
Not Cougar specific, but could be useful for a lot of members;
I'm not going to give a detailed overview of how to use the it (it's dead easy) and essentially it's various grades of 3M abrasives that are attached to a normal power-drill, working down (up?!) the grades and eventually finishing with a foam-pad with a polishing compound.
I'll let the pictures speak for themselves;
1) Start with one set of tatty polycarbonate headlamps, both of the lamps on this car are hazed badly with large areas of "rough" plastic spoiling the whole appearance of the car

OSF
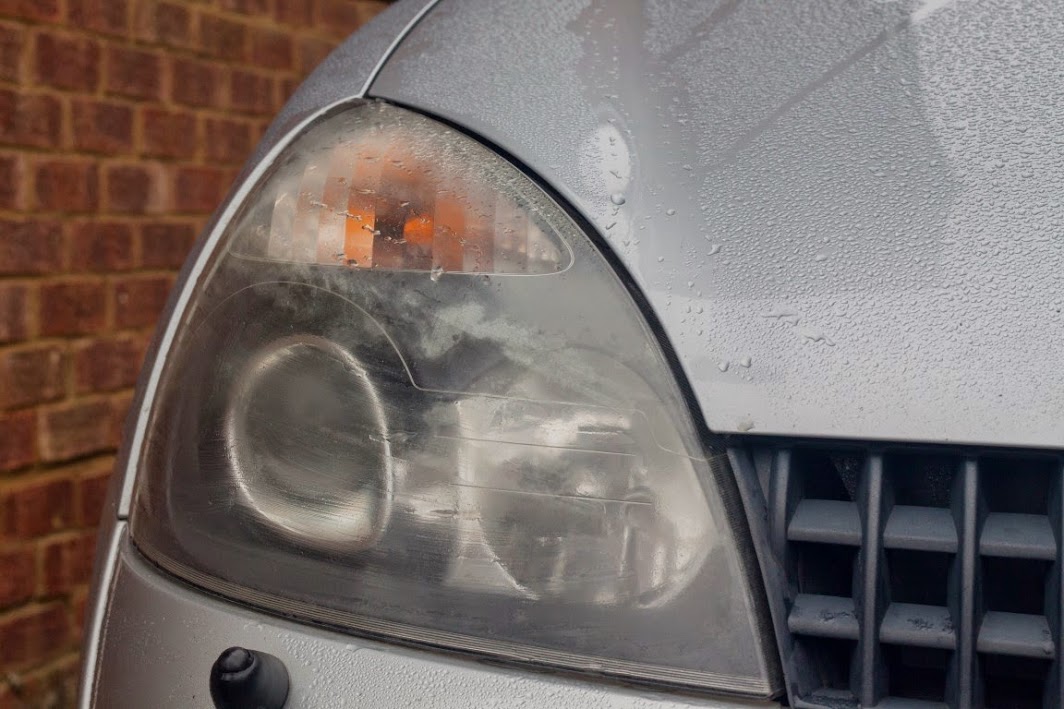
OSF

NSF
2) 3M supply a small roll of nice quality trim masking tape, this is thick but low-tack, as you'll be wafting a fast spinning abrasive disc perilously close paintwork you'll want to spend a bit of time getting this right!

3) I used my professional cordless drill but any drill would do, you need a load speed of around 1400rpm which is in the range of any drill I'm sure.

4) The scary bit, the instructions say to start sanding down (dry) the lamps, a suprising about of dust is created and this cuts FAST! Keep the drill moving, it took me about 20 minutes to get the lamp to the instructions requirement of "dull, with no high or glossy spots".
5)

Sort of thing you're aiming for.
6) Work down a grade.

7) Wet finishing is carried out with a small foam pad, you work the slurry for several minutes as it continues to lightly cut the lens, this is an aggressive technique and not the feint of heart!
8) The supplied compound is used in conjunction with the waffle cutting pad supplied, this is continuously worked to buff the lamp, I cleaned it again and applied a coat of HD Wax.
Well.....
Brace yourselves...
65 minutes later....
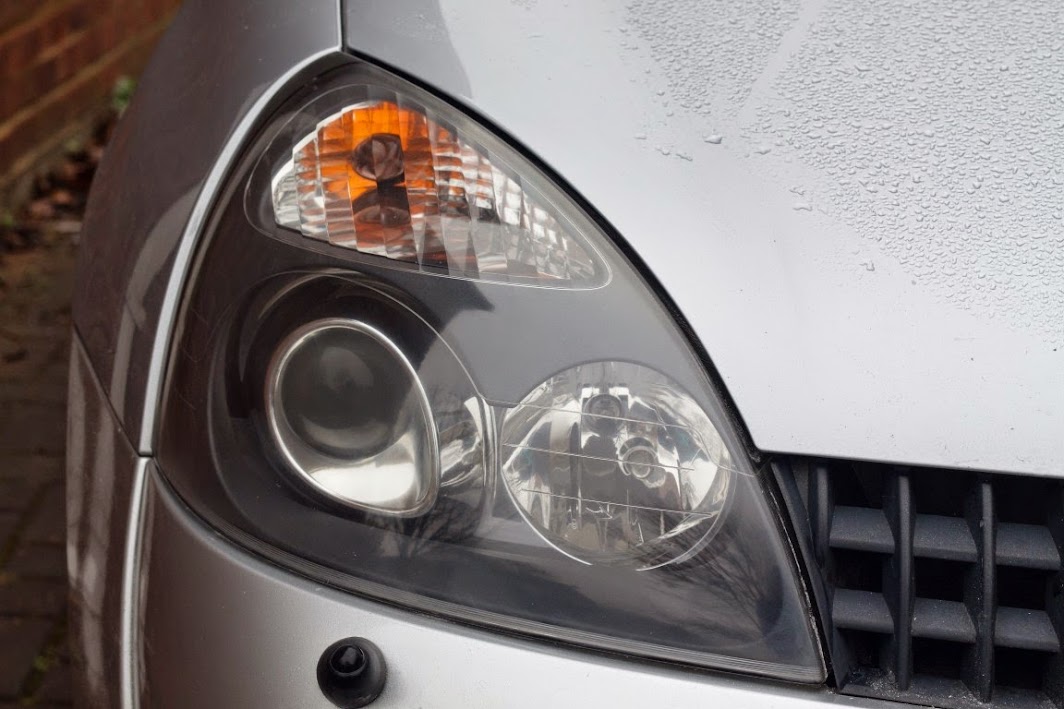
I think the pictures speak for themselves.
£17, this truly is a no brainer. The only things you'll need to supply are a power drill (standard chuck, don't try your Kango) and something to mist some tap water over the lens for a final cut.
I liked
- Spectacular results, the lamp looks brand new.
- No extra stuff required, the kit contains enough of everything to do at least two large lamps.
- Feels like quality stuff, mind you it is 3M.
- PRICE!
I didn't like:
- Takes a fair bit of time, but this is reflected in the results
- A larger roll of masking tape would have been nice.
Overall though, a huge THUMBS UP!
- - - Updated - - -
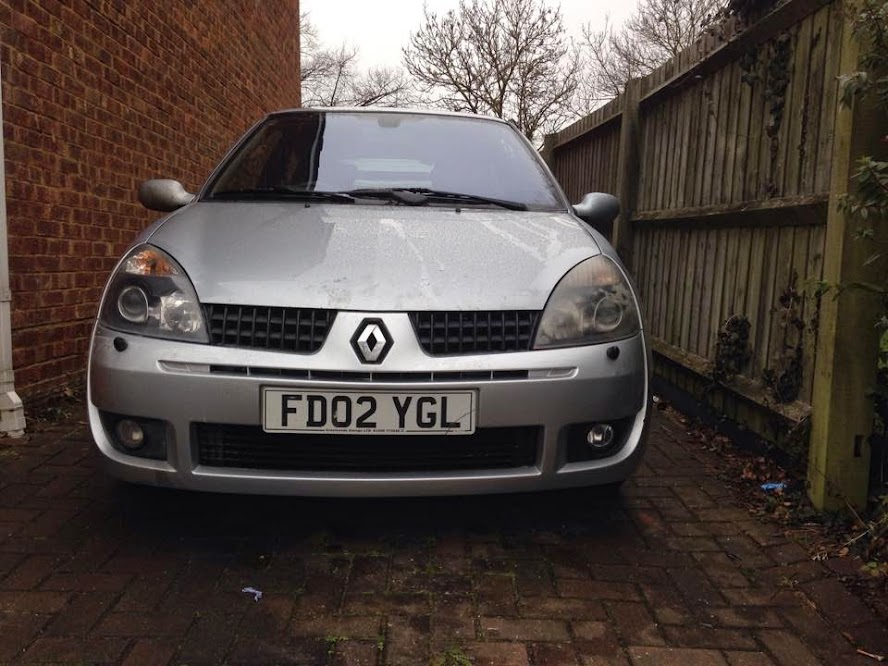

Spot the difference!
I'm not going to give a detailed overview of how to use the it (it's dead easy) and essentially it's various grades of 3M abrasives that are attached to a normal power-drill, working down (up?!) the grades and eventually finishing with a foam-pad with a polishing compound.
I'll let the pictures speak for themselves;
1) Start with one set of tatty polycarbonate headlamps, both of the lamps on this car are hazed badly with large areas of "rough" plastic spoiling the whole appearance of the car
OSF
OSF
NSF
2) 3M supply a small roll of nice quality trim masking tape, this is thick but low-tack, as you'll be wafting a fast spinning abrasive disc perilously close paintwork you'll want to spend a bit of time getting this right!
3) I used my professional cordless drill but any drill would do, you need a load speed of around 1400rpm which is in the range of any drill I'm sure.
4) The scary bit, the instructions say to start sanding down (dry) the lamps, a suprising about of dust is created and this cuts FAST! Keep the drill moving, it took me about 20 minutes to get the lamp to the instructions requirement of "dull, with no high or glossy spots".
5)
Sort of thing you're aiming for.
6) Work down a grade.
7) Wet finishing is carried out with a small foam pad, you work the slurry for several minutes as it continues to lightly cut the lens, this is an aggressive technique and not the feint of heart!
8) The supplied compound is used in conjunction with the waffle cutting pad supplied, this is continuously worked to buff the lamp, I cleaned it again and applied a coat of HD Wax.
Well.....
Brace yourselves...
65 minutes later....
I think the pictures speak for themselves.
£17, this truly is a no brainer. The only things you'll need to supply are a power drill (standard chuck, don't try your Kango) and something to mist some tap water over the lens for a final cut.
I liked
- Spectacular results, the lamp looks brand new.
- No extra stuff required, the kit contains enough of everything to do at least two large lamps.
- Feels like quality stuff, mind you it is 3M.
- PRICE!
I didn't like:
- Takes a fair bit of time, but this is reflected in the results
- A larger roll of masking tape would have been nice.
Overall though, a huge THUMBS UP!
- - - Updated - - -
Spot the difference!
")