Fog Light Refurb - Updated with Running Light Photos
Seeing as a few members are interested in Lewys Fog Light / Daytime Running lights mod (Myself included if my other idea doesn't work out), I thought I would do a quick "How To" on refurbing the lights.
Before I go any further, I just want to say that the reason I have never seen a Cougar with a broken fog light became very apparant to me whilst doing this.
I have NEVER come across a plastic so bloody hard in all my life !
When I did the headlights, due to some deep scratches I had to go down to 600 grit paper.
For these puppies (and my car has only done 50k miles so God knows what some of your lights are like with average or above average mileage), I had to drop down to 240 grit !!! Even then I had to rub and rub and rub.
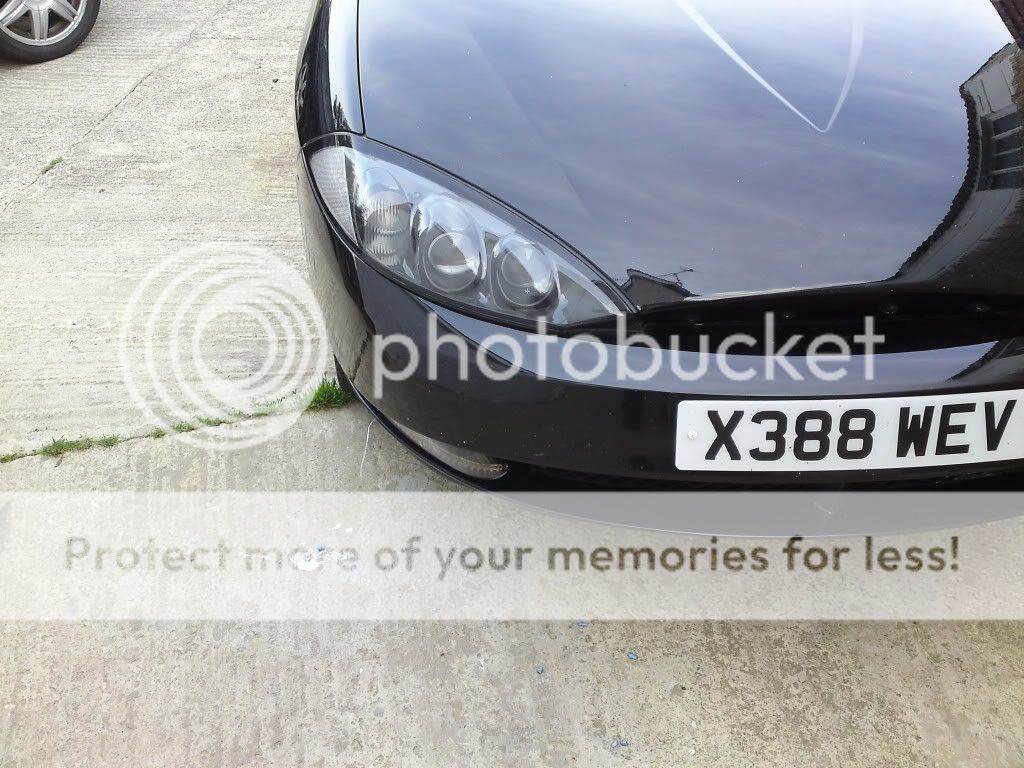
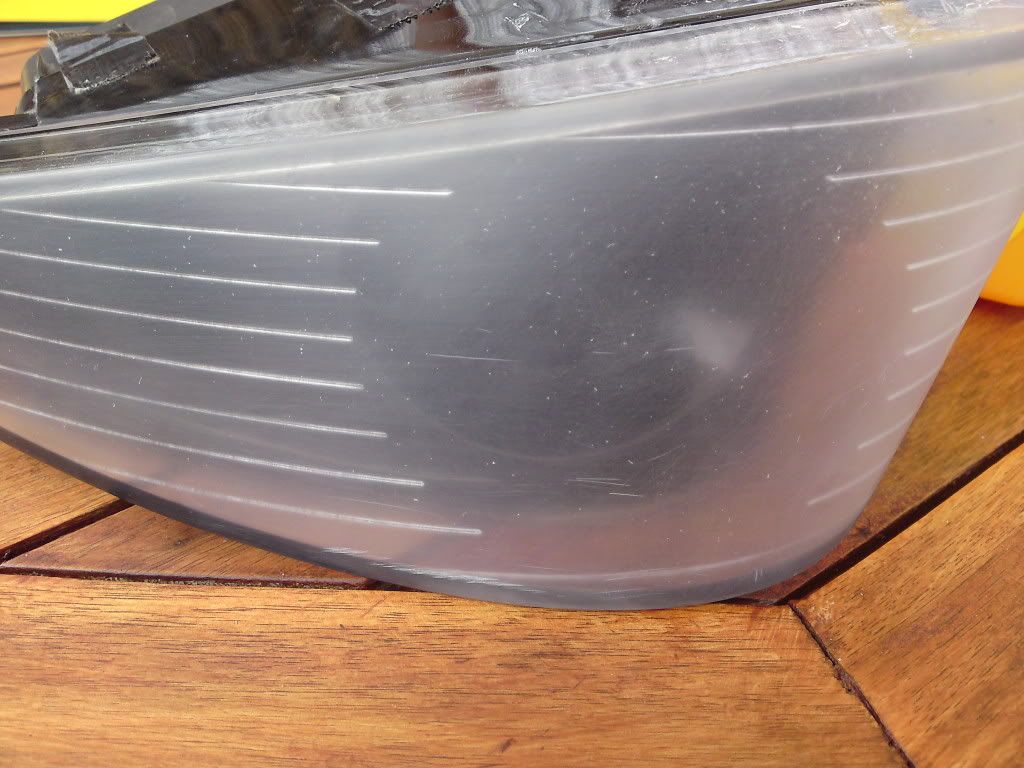
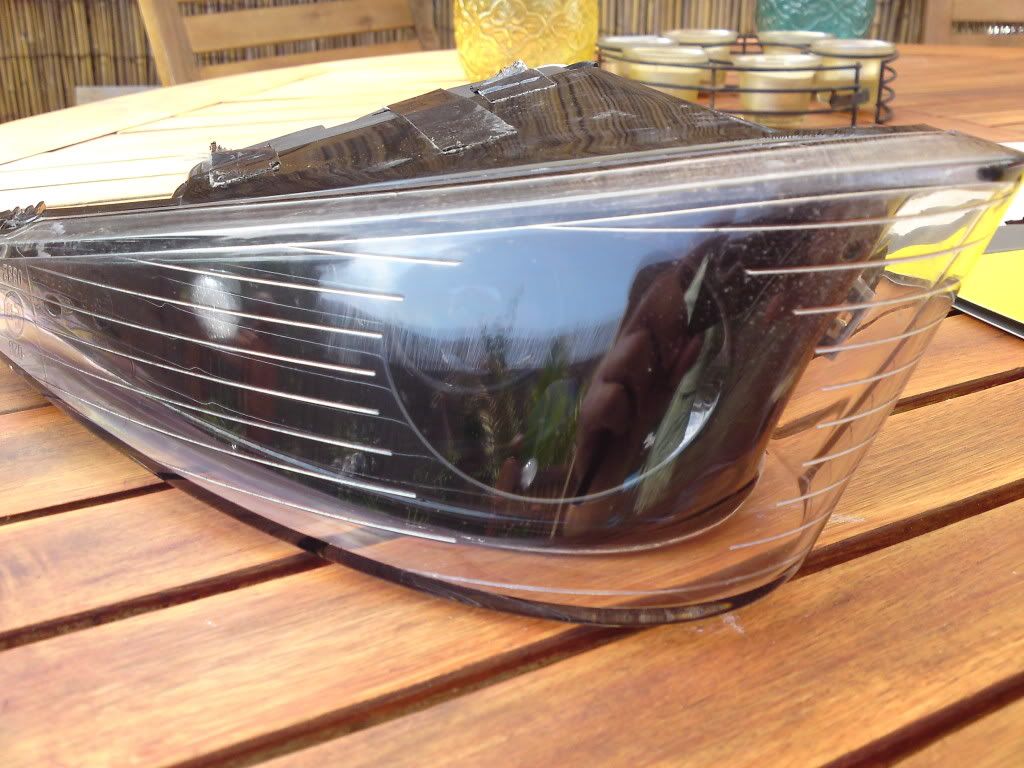
Right. So this was what they were like to start with. I only took a photo of 1 side for some reason....doh!
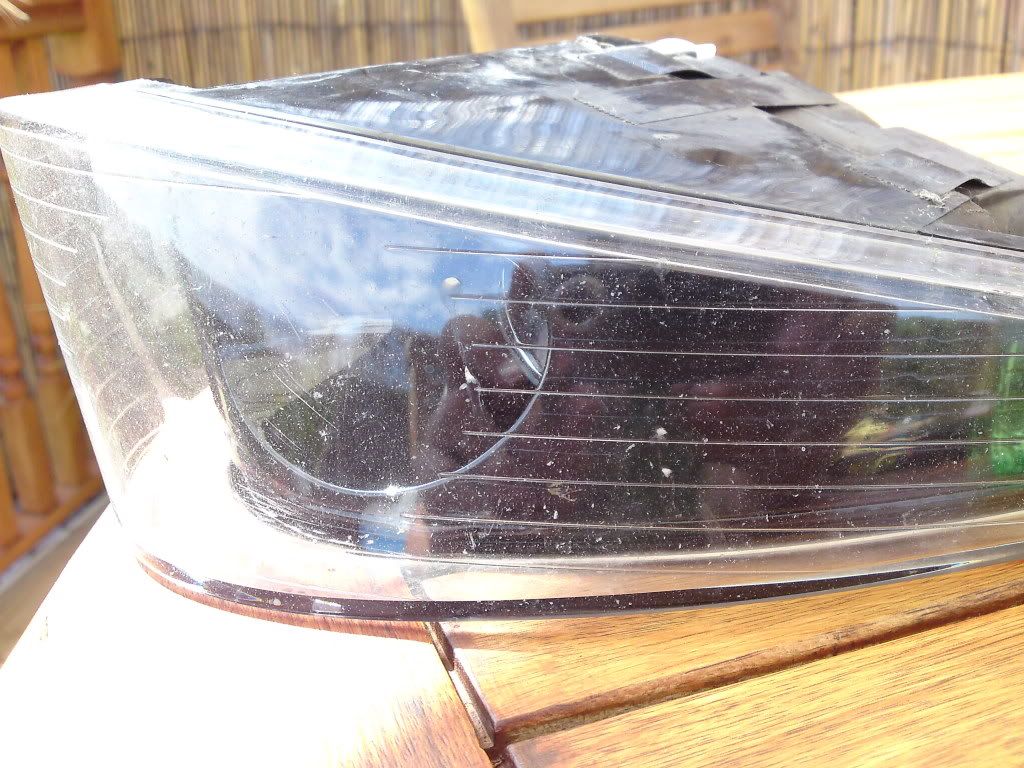
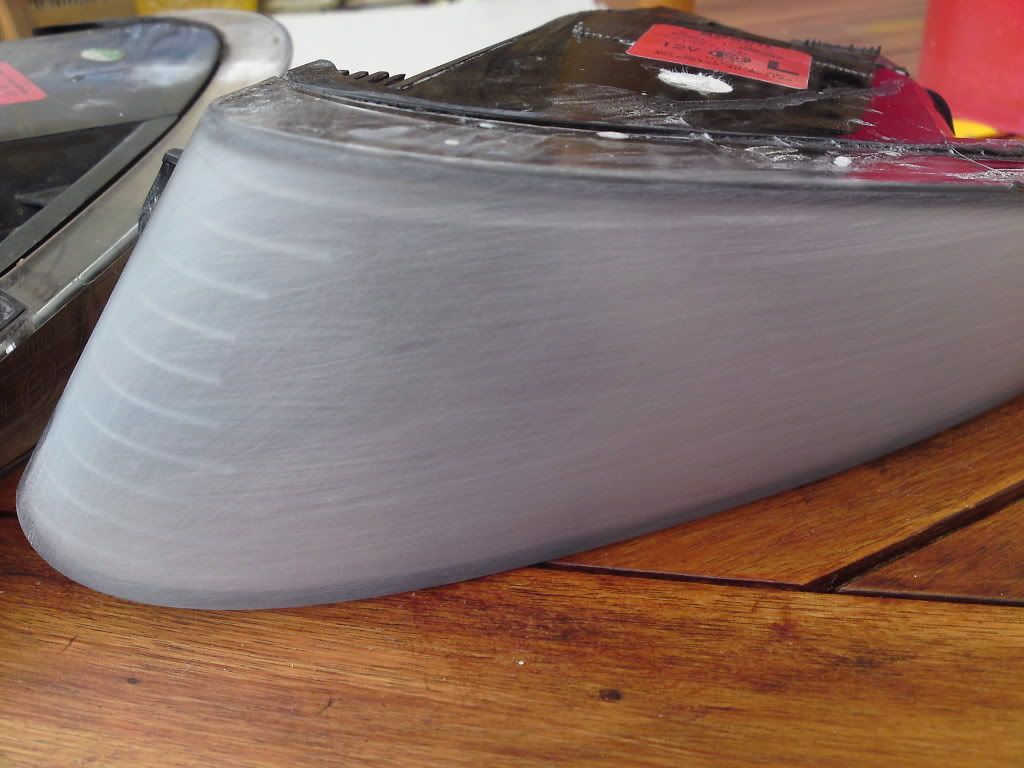
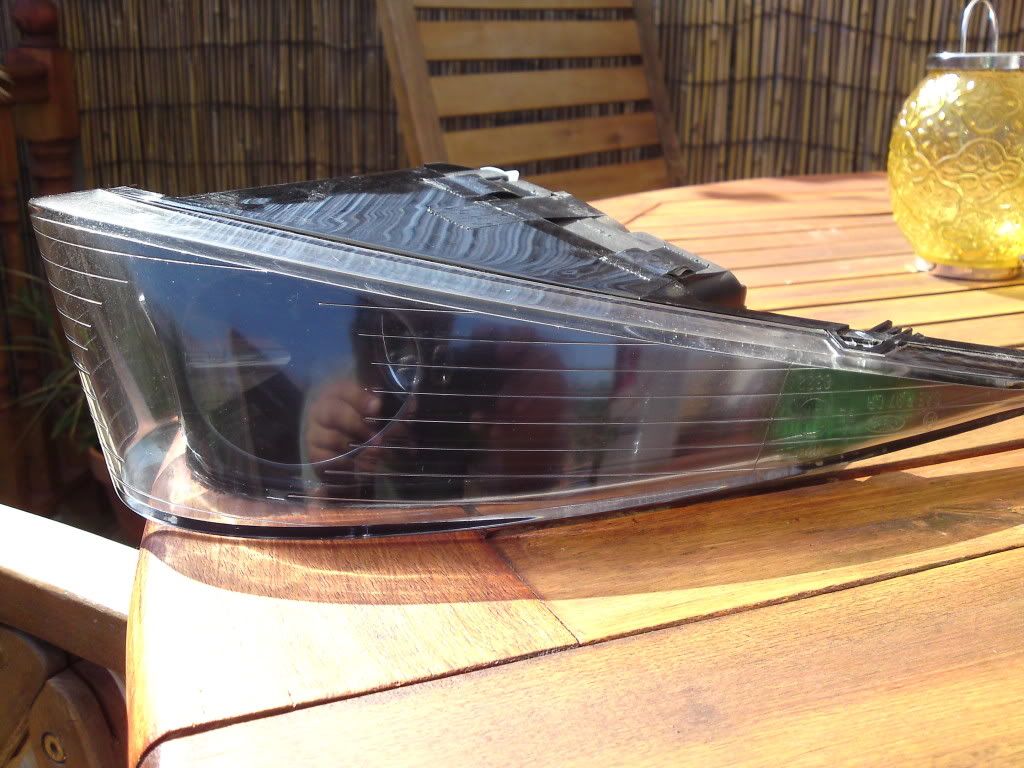
After attempting 800 grit for about 30 mins, the best I could get was this:
As you can see, still some very visible scratches and chips.
Now at this point I was stuck between two thoughts. Do I spend more time and effort getting it perfect, or do I leave as is because hey, it's a fog light. It's gonna get chipped and scratched again anyway!
Those that know me, will of course understand why i went with perfection!
OK. Tried 600 grit and still some marks left. Time for the big boys - 240 grit !!!
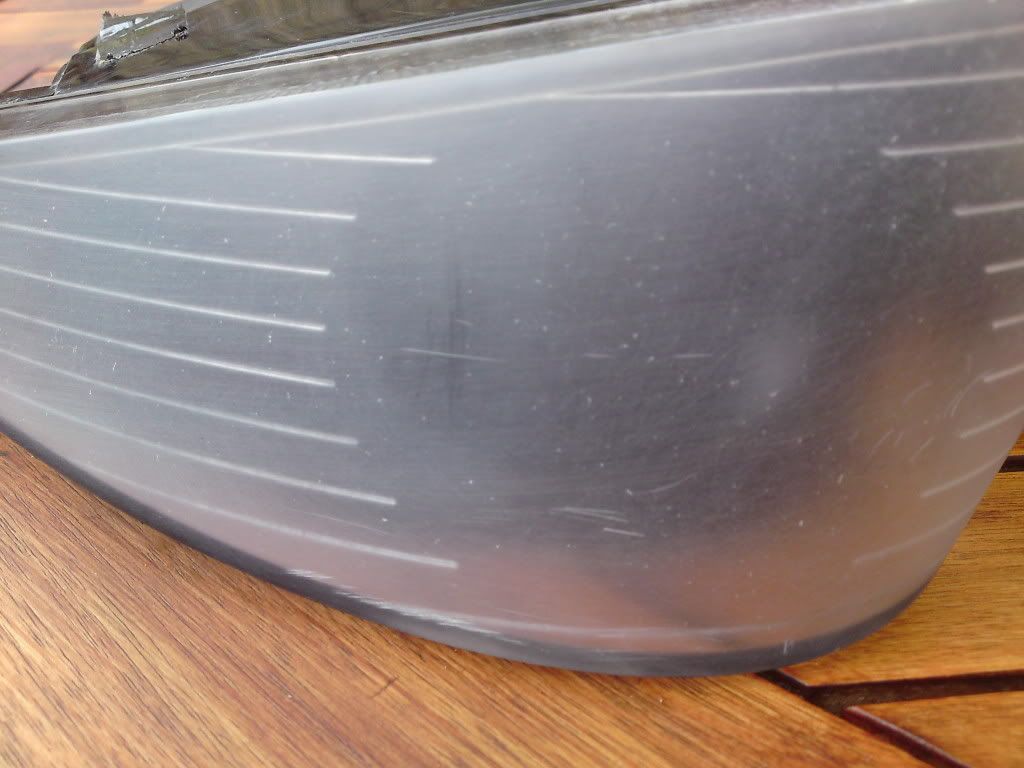
Even this was hard work but after about 30mins I achieved this:
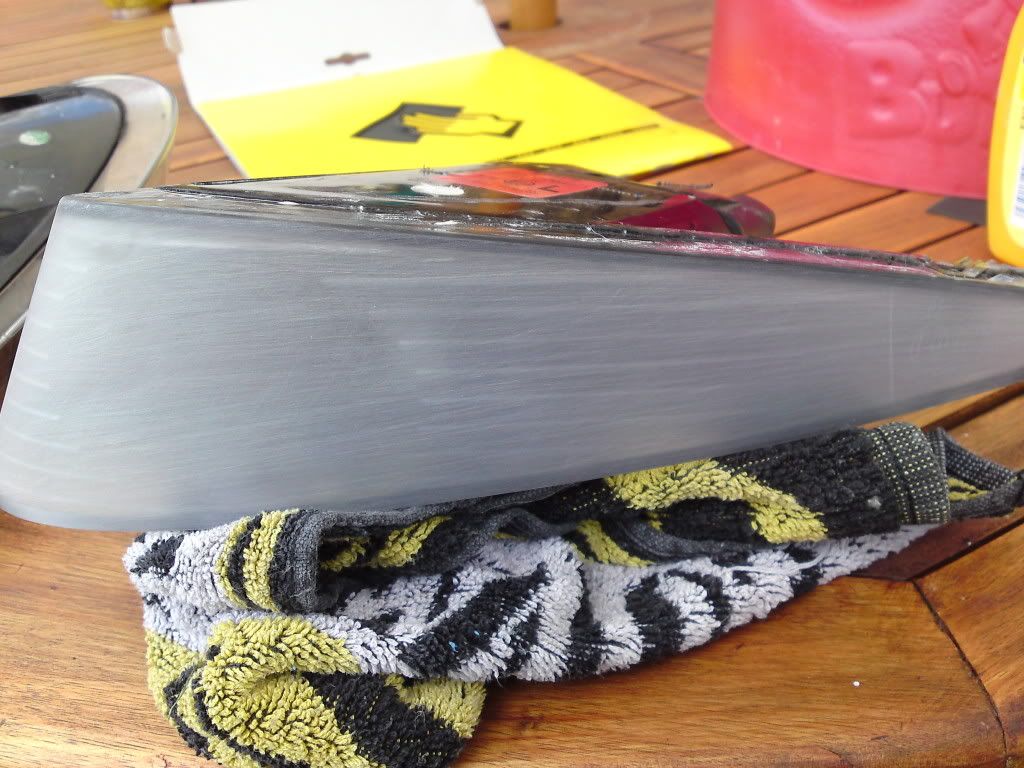
At last ! 99% of all visible marks removed.
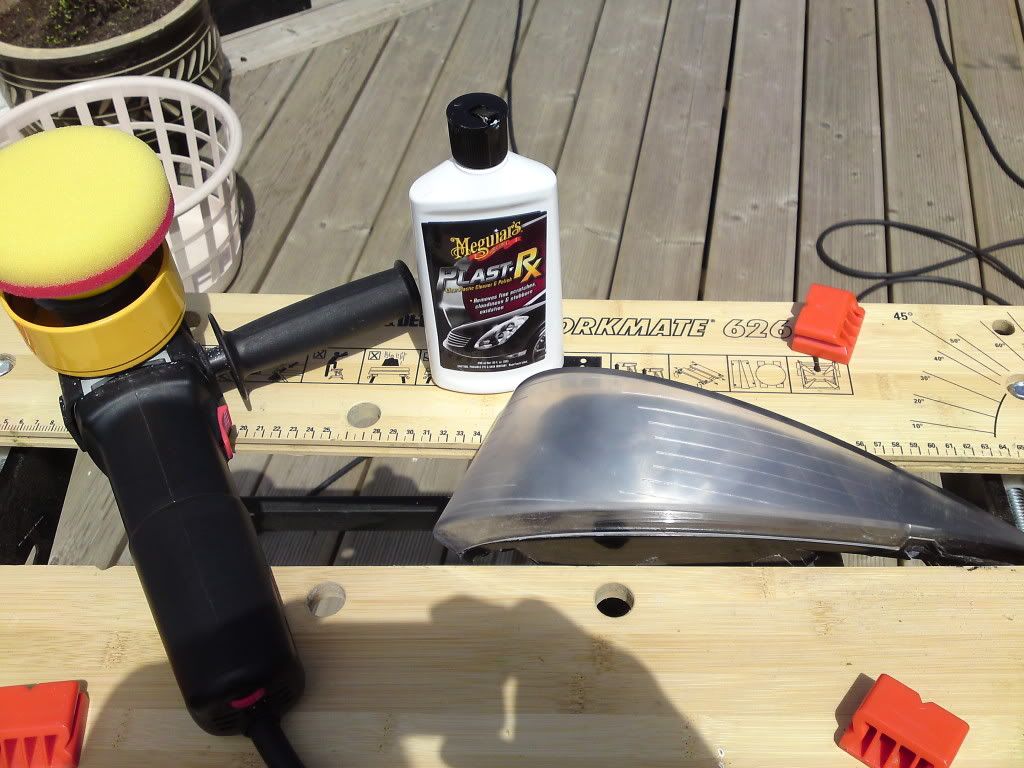
Time to work up from 240 to 400 to 600 to 800 to 1200 to 1500 to 2000 to 2500 and then onto the machine polishing stage.
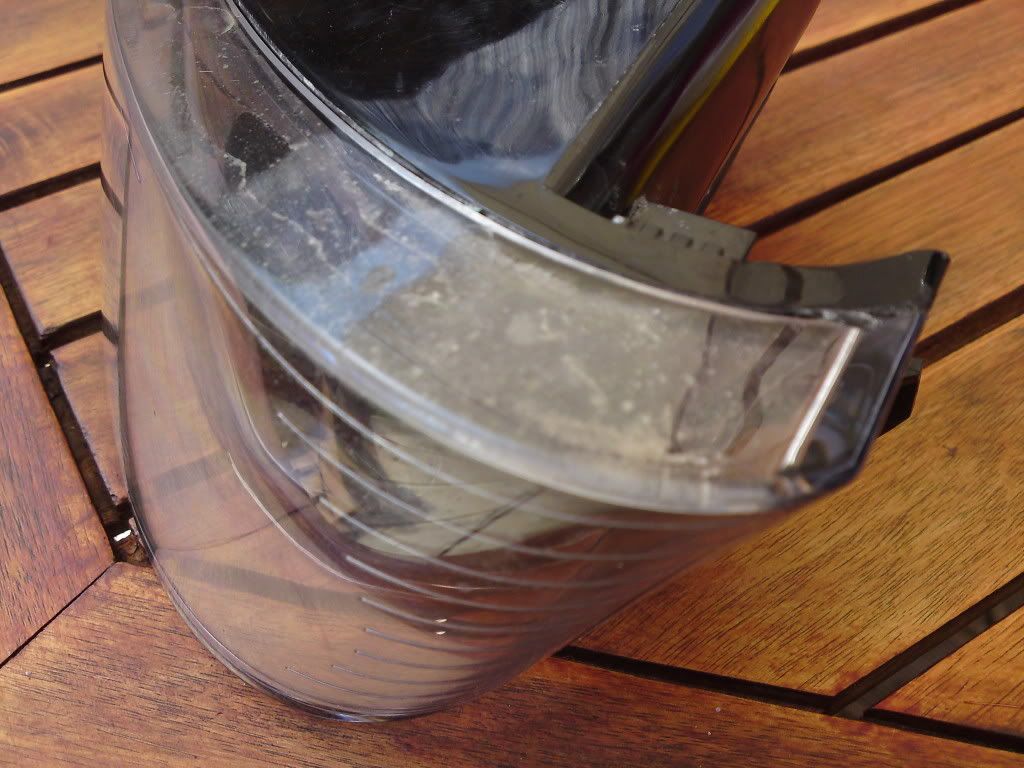
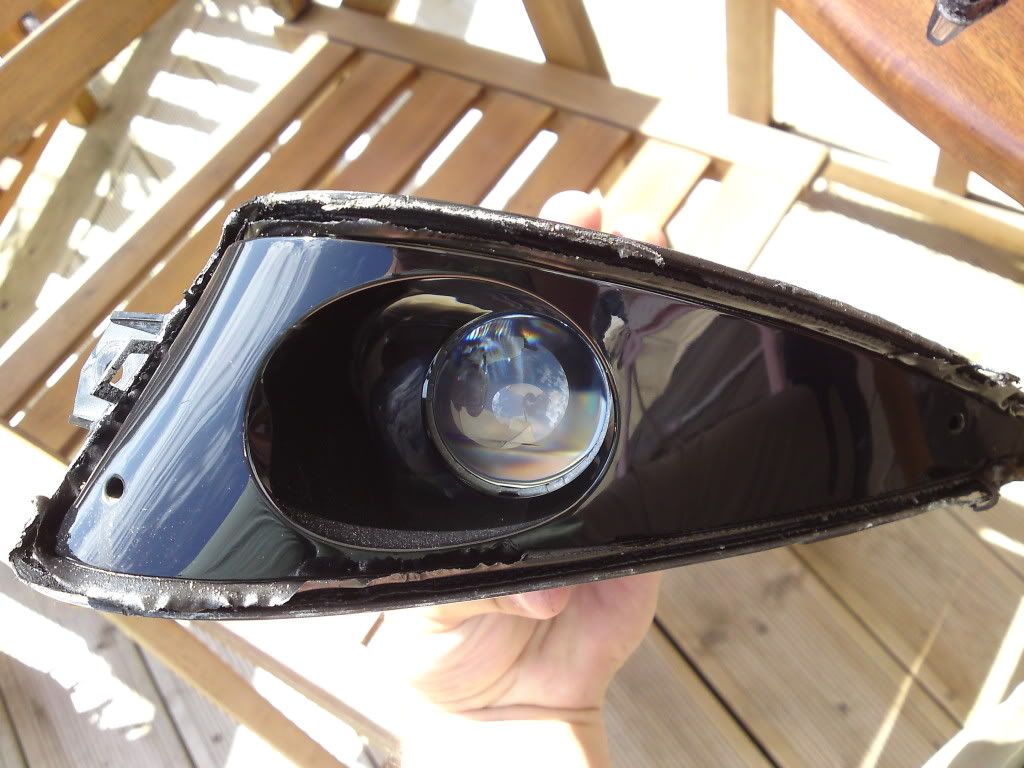
Finished result was ruined somewhat by the filth and muck that was now very visible inside the lense!
 Don't believe me? Look here!
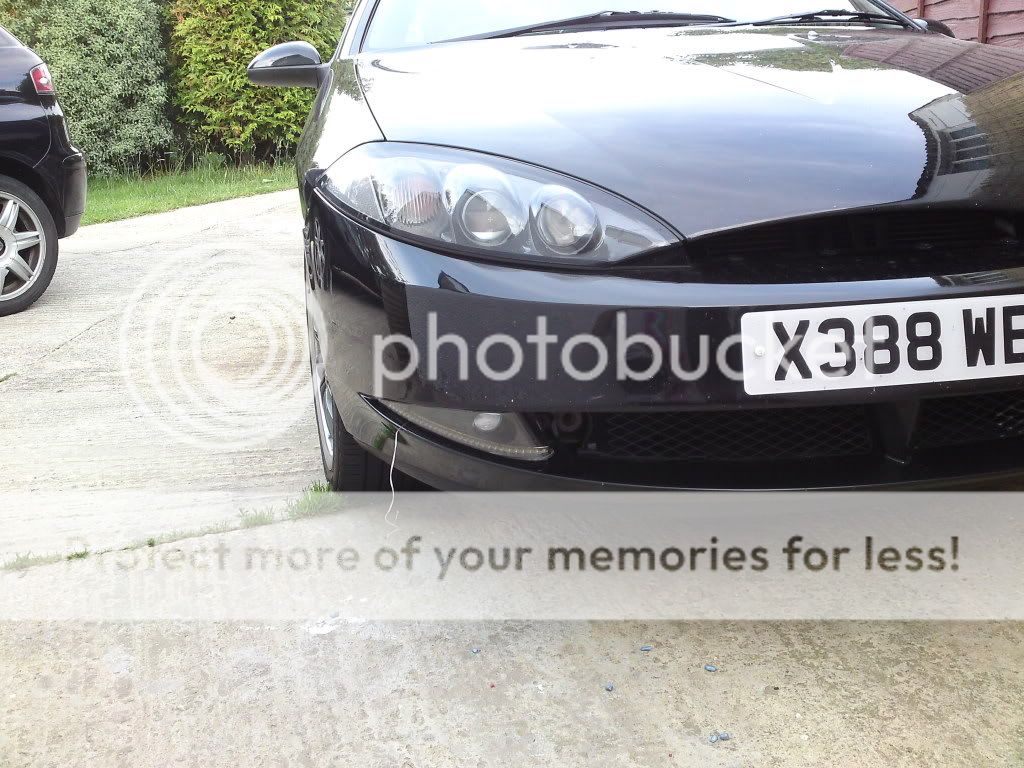
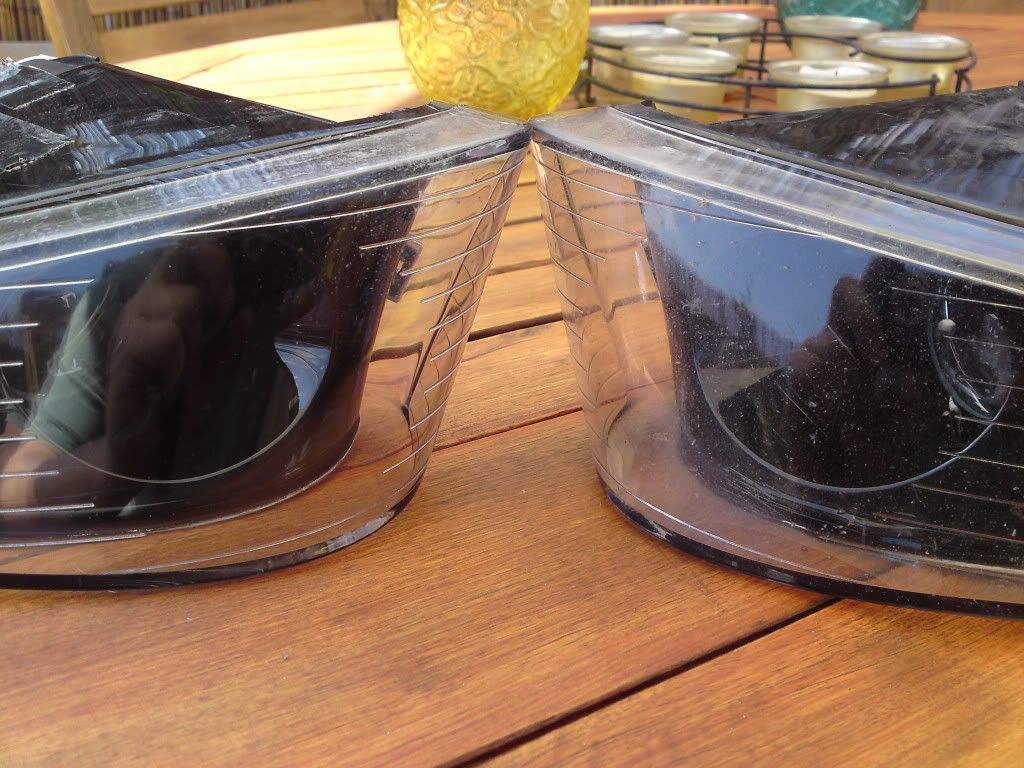
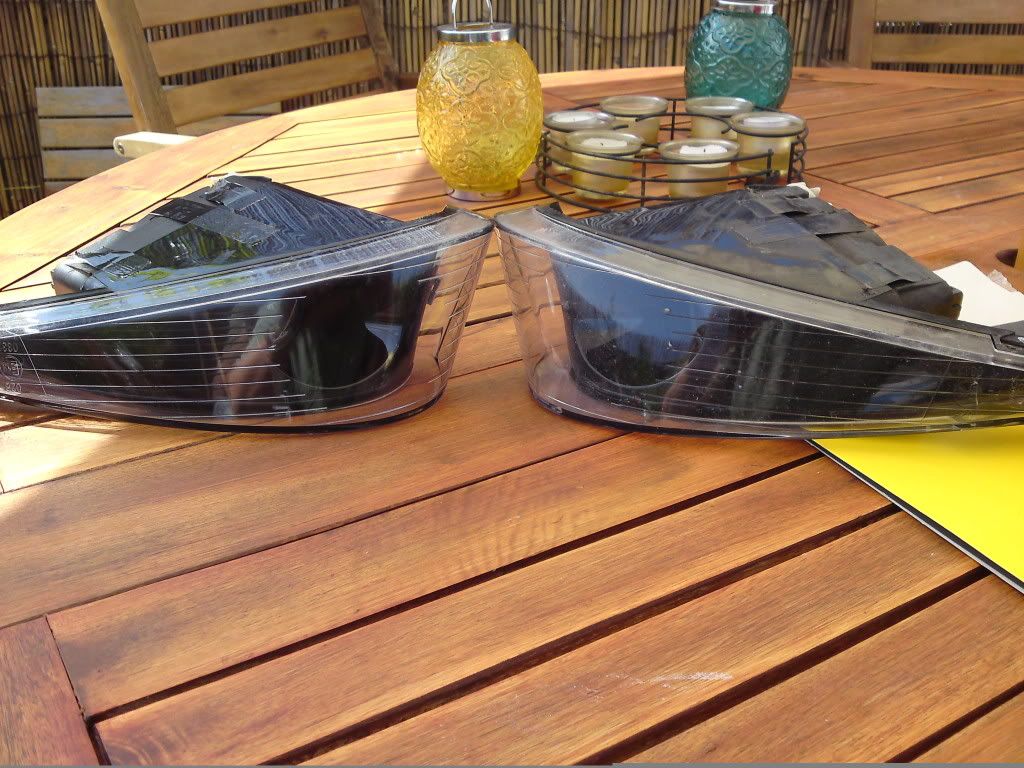
Anyhow, before I cracked them both open to clean the inside, I did a side by side comparison shot. Must admit, feeling very pleased with the outcome.
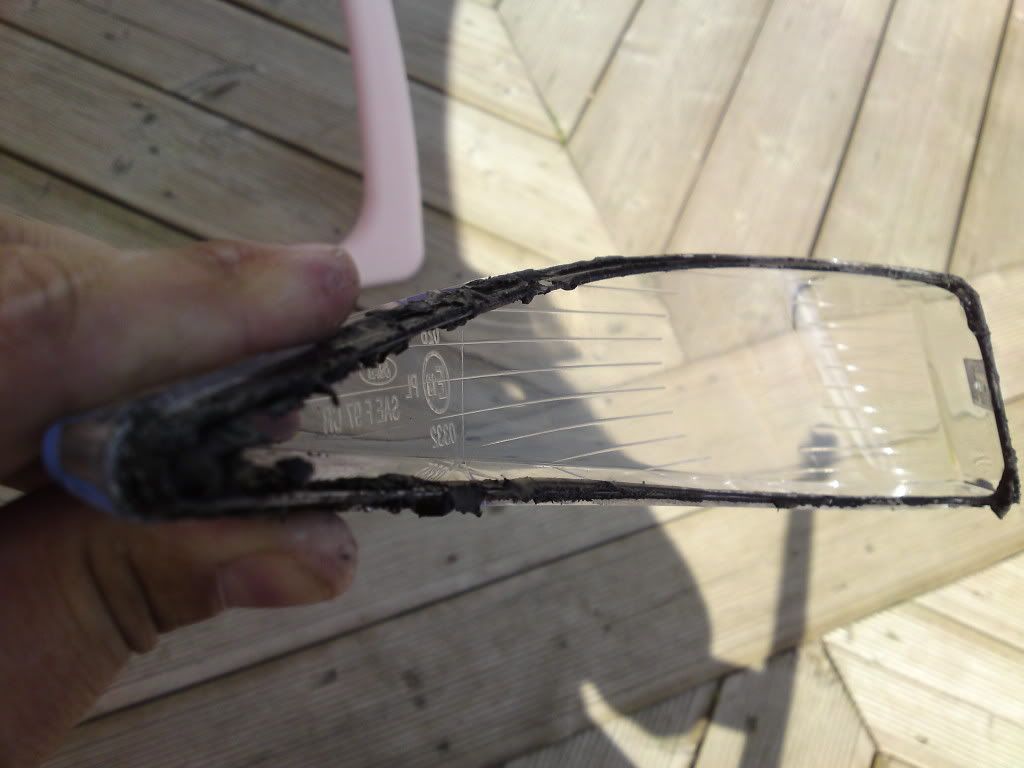
The lights were then cracked apart
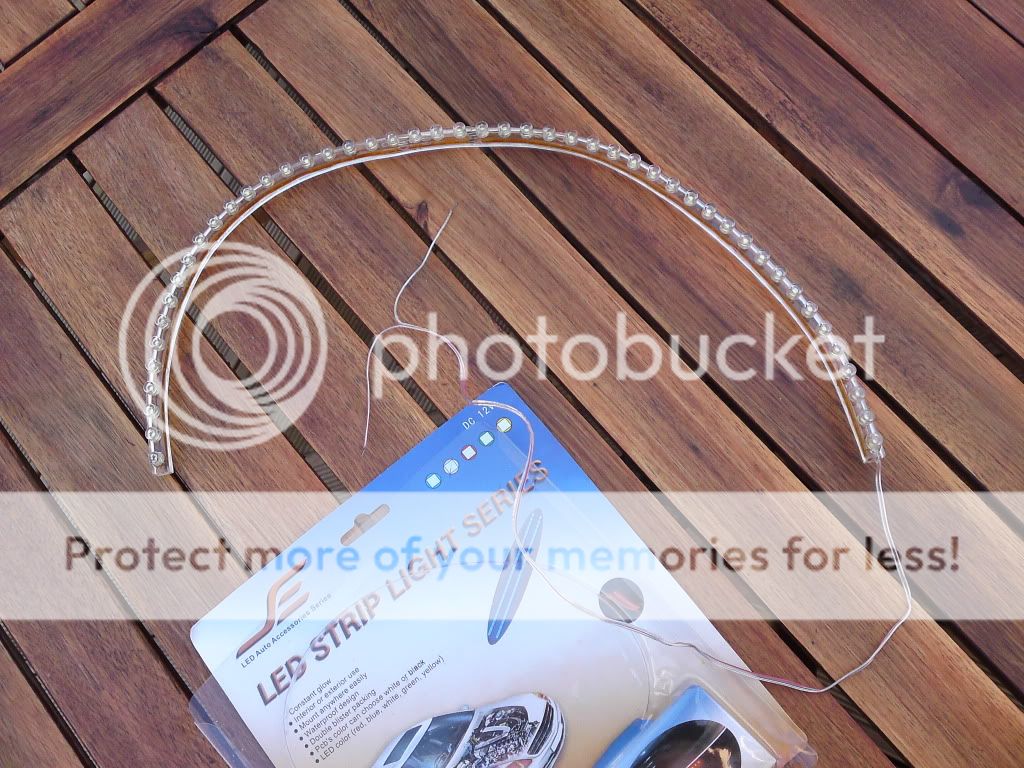
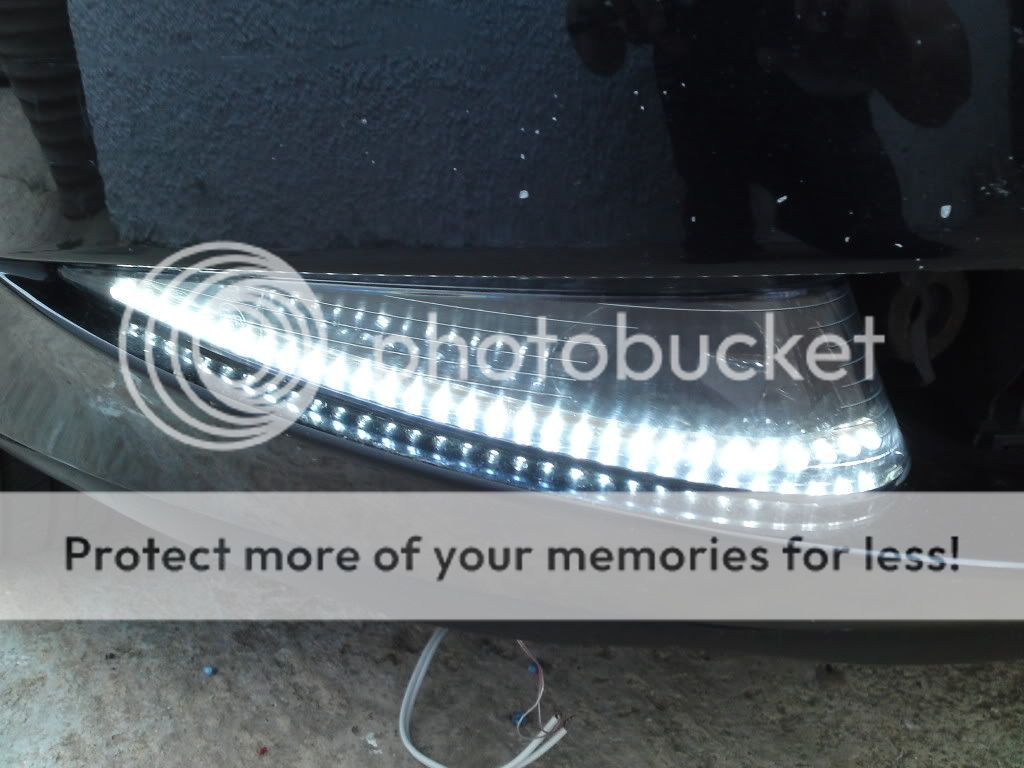
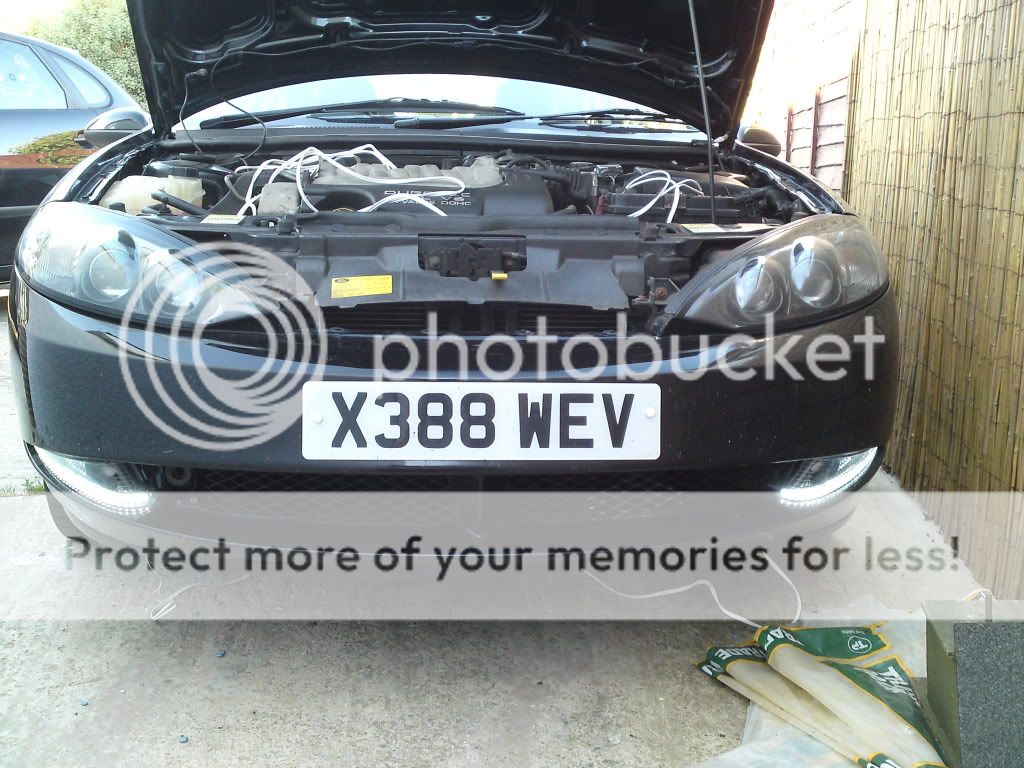
It was at this point that I thought to myself, no point in me pursuing my other idea for some running lights, I might as well copy Lewys idea.
Thus the lights are currently sitting in my shed waiting some running lights to be fitted before being put back on the car.
The running lights is Lewys idea so while I admit I have stolen his idea, I will NOT be posting up any photos until AFTER Lewy has done his and posted up pictures and details. I in no way want to step on his toes as this idea is his little project.
All in all the 2nd fog was much quicker to do than the 1st one as I knew to jump straight in with the 240 grit.
In total I would say it took me about 5 hours from removing them from the car, to sitting outside in the sun with a bucket of warm soapy water and sheets of sandpaper to getting them finished.
Knowing that I need to start with 240 grit, I reckon I could remove, do both sides and refit in about 4 hours or less.
If you do attempt to copy this, it is VERY important that when going up a grade with the sandpaper, you rub the whole surface 100%
If you miss a few 240grit sandpaper marks, the more and more visible they will become, the higher and higher the grade of paper you use. Take your time and when you are sure you have rubbed the whole surface down, get a fresh piece of the same sandpaper and rub it all down again for another 5 mins.
Result is well worth it IMHO.
Cheers
Paul
Seeing as a few members are interested in Lewys Fog Light / Daytime Running lights mod (Myself included if my other idea doesn't work out), I thought I would do a quick "How To" on refurbing the lights.
Before I go any further, I just want to say that the reason I have never seen a Cougar with a broken fog light became very apparant to me whilst doing this.
I have NEVER come across a plastic so bloody hard in all my life !
When I did the headlights, due to some deep scratches I had to go down to 600 grit paper.
For these puppies (and my car has only done 50k miles so God knows what some of your lights are like with average or above average mileage), I had to drop down to 240 grit !!!
Even then I had to rub and rub and rub.Right. So this was what they were like to start with. I only took a photo of 1 side for some reason....doh!
After attempting 800 grit for about 30 mins, the best I could get was this:
As you can see, still some very visible scratches and chips.
Now at this point I was stuck between two thoughts. Do I spend more time and effort getting it perfect, or do I leave as is because hey, it's a fog light. It's gonna get chipped and scratched again anyway!
Those that know me, will of course understand why i went with perfection!
OK. Tried 600 grit and still some marks left. Time for the big boys - 240 grit !!!
Even this was hard work but after about 30mins I achieved this:
At last ! 99% of all visible marks removed.
Time to work up from 240 to 400 to 600 to 800 to 1200 to 1500 to 2000 to 2500 and then onto the machine polishing stage.
Finished result was ruined somewhat by the filth and muck that was now very visible inside the lense!
Anyhow, before I cracked them both open to clean the inside, I did a side by side comparison shot. Must admit, feeling very pleased with the outcome.
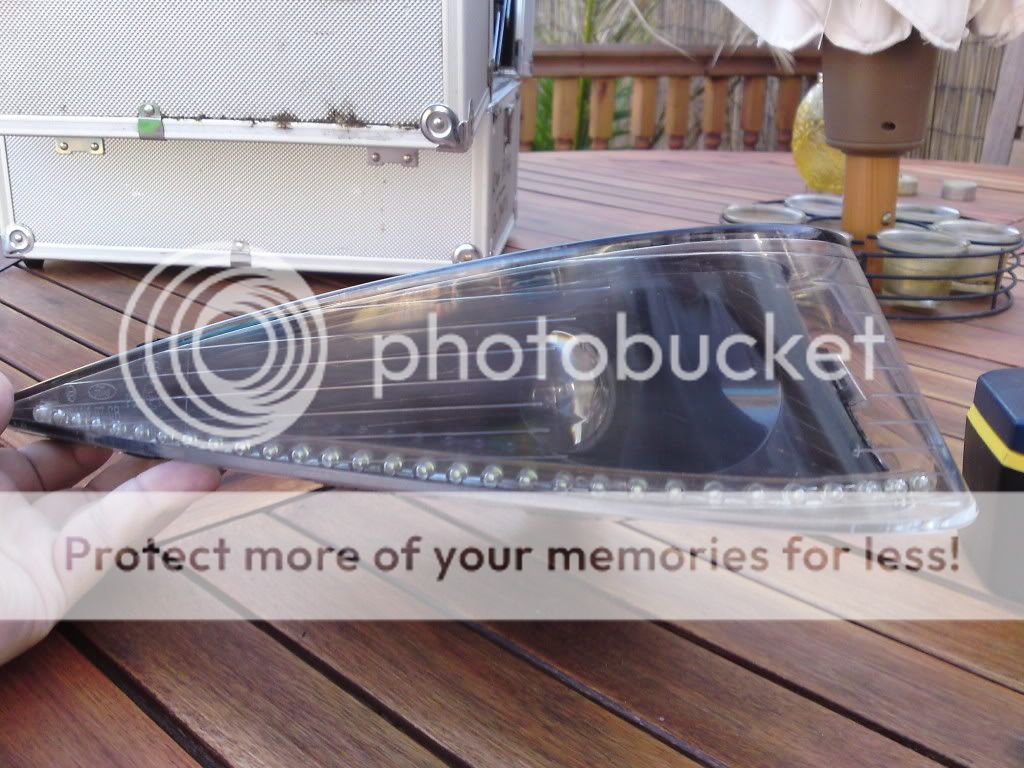
The lights were then cracked apart
It was at this point that I thought to myself, no point in me pursuing my other idea for some running lights, I might as well copy Lewys idea.
Thus the lights are currently sitting in my shed waiting some running lights to be fitted before being put back on the car.
The running lights is Lewys idea so while I admit I have stolen his idea, I will NOT be posting up any photos until AFTER Lewy has done his and posted up pictures and details. I in no way want to step on his toes as this idea is his little project.
All in all the 2nd fog was much quicker to do than the 1st one as I knew to jump straight in with the 240 grit.
In total I would say it took me about 5 hours from removing them from the car, to sitting outside in the sun with a bucket of warm soapy water and sheets of sandpaper to getting them finished.
Knowing that I need to start with 240 grit, I reckon I could remove, do both sides and refit in about 4 hours or less.
If you do attempt to copy this, it is VERY important that when going up a grade with the sandpaper, you rub the whole surface 100%
If you miss a few 240grit sandpaper marks, the more and more visible they will become, the higher and higher the grade of paper you use. Take your time and when you are sure you have rubbed the whole surface down, get a fresh piece of the same sandpaper and rub it all down again for another 5 mins.
Result is well worth it IMHO.
Cheers
Paul