Noel, those 1" holes in the rear covers were to route the HID wiring in. I don't know whether Steve removed them or not, but the car had HIDs for both full and dipped beams, the wiring to the ballasts went through those holes and was sealed by correspondingly sized rubber grommets.
W685 KRM - ( the ) Dominatrix
- Thread starter Foobar
- Start date
You are using an out of date browser. It may not display this or other websites correctly.
You should upgrade or use an alternative browser.
You should upgrade or use an alternative browser.
Aha, thanks Rich, that explains what I see. I am a bu993r with the pressure hose, so sorting that out is a priority. Even a drop of water seems capable of removing that silver. Even though much of that is cosmetic, it would soon look horrible. I'll let you know what I find in there, but I only see one HID power supply on each side of the vehicle. Not sure that they are visible in the photos. Maybe Steve upgraded to LEDs. Its hard to say whats there zooming in on the picture...
Foobar, nothing whatsoever wrong with a few years on me. I genuinely wouldn’t swap my years of experience for youth. I’m jealous of you being closer to retirement. Strangely I never used to feel any work related stress but I do these last few years. I have aspirations to retire early, whether that’s possible is very much in the power of others.
looking at the headlights, what is the extra lamp wired in blue?
looking at the headlights, what is the extra lamp wired in blue?
It wasn't that roundabout on the corner of the airfield was it? Where there's only one real turning. That gets hit several times a week, and there's been loads of complaints, it can't just be the road layout, there has to be something else going wrong there. And while we're talking of the NDR don't get me started on the three lane roundabouts that are quite obviously marked out wrong but the council will do nothing about it.
Aside from Norwich problems, the car looks great by the way. Hope to see it in the flesh soon. I spot US spec rear lights? Are they alright for the MOT? Might have to go looking on US eBay...
Aside from Norwich problems, the car looks great by the way. Hope to see it in the flesh soon. I spot US spec rear lights? Are they alright for the MOT? Might have to go looking on US eBay...
mabo; C2 headlamps have an extra bulb socket at their outer end to accommodate US running lamps, they use the same type of socket as the wing repeaters. Noel's have been wired as extra indicators though.
David'; I've never had a problem with my US rear lamps and the MOT but found it better to relocate the indicators to the reverse lamp position and use chromed amber bulbs. I relocated my reversing lamps to a remote position in the number plate recess.
I believe Noel's were modified with offset-pin sockets in the reverse lamp position to accommodate twin filament bulbs for the indicators and reverse lamps.
https://forums.ukcougar.club/threads/32814-Pic-Request-USA-Rear-Lights
There's no shortage of them on US ebay but please stress to any seller you might deal with that the corners must be especially well protected for shipping, numerous ones have arrived over here with damage in that area.
Last edited:
mabo; C2 headlamps have an extra bulb socket at their outer end to accommodate US running lamps...

Well, the Vectra passed its MOT, despite the dodgy bit on the tyre. There was one advisory which I had ( luckily ) forgotten about. A crack in the windscreen but away from driver's view.
So I cracked on with the headlights. I probably started a bit gently with 800 grit and it was still a job to get thru the tougher parts of the coating. The yellowing is of course, in the lens material itself. So I found that by watching the colour of the sludge coming off the paper and the reflections in the reflector for hints of yellow, I could concentrate my efforts in the right place. When 800 was done it looked pretty scrathcy and for convenience I had been rubbing along the long axis of the lens.
Then I decided to go 'wet' rather than dry and changed to circular motion. That started to cut again and took a lot more yellow off. Then to 1500 which left a few localised scratches I hadn't seen before, so back to 800 wet and then 1500 again. Now looking very 'opaque' and I'm wondering if this will ever look good again. So on to 3000 and suddenley its looking clear again ! I mean a very dramatic change from that one step. Just done 5000 now and I may yet do 8000 tomorrow before finally deciding how to treat the surface. Looking good.
I didn't exactly do a before and after, which I should have done, so I will try and remember to contrast the finished one with the one yet to do so you can see the difference.
Ordered loads of plastic panel fastenings yesterday. Enough for several lifetimes I think. I should however have what I need when its time to reassemble...
Noel, there is a NSF arch liner in the forum spares.
Andy, please forgive my rudeness in not acknowledging your kind offer. Yes, if this is still available that would be fantastic. Not sure how it will get to me, but we can figure that later. Dan is still holding onto springs and injectors for me, plus wings may be back on the menu depending what I find, so there may be a case for a road trip some time before Christmas ! Thanks - Noel
_________________________________________________________________________________
Finishing off the first C2 Headlamp today. I found a temporary way to prevent moisture and dirt ingress thru that hole in the back cover. I now keep a comprehensive set of 'bungs' and 'caps' for just this sort of occaision :-

Here's what it looks like after a final, wet 8000 grit. Then a wash with soapy water, and then a gentle clean with cleaning alcohol. Note the contrast to the other side as yet untouched. I think the lighting is probably quite blue, so this is not so apparent as it is to the naked eye :-

Now I've given this some thought and I know others may disagree, but I've decided to use a solvent to effectively 'melt' the scratches out of the surface. This strikes me as a very gentle way to proceed and the chosen solvent is very volatile and will be gone in seconds. Also, the other alternative, a ceramic coat, will preclude doing this later. However, using the solvent first, does not preclude later using a ceramic coat.
The lens is polycarbonate and acetone is the obvious thing to use. N.B. NOT my wife or daughter's nail varnish remover ( and certainly not mine
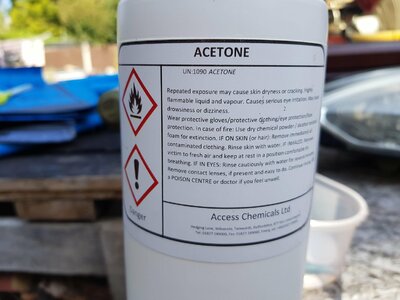
However, cosmetic items did appear in my selection of ways to apply it. This is going to be a lightning fast process: apply to pad, whip it liberally all over the lens as quickly as possible and stand back. I'm looking for low lint, high capacity and 'not gonna melt' pads. Who also hasn't got a stock of old, unused, computer cleaning kits, that were sold to our bosses ( well, I'm not admitting to that ) as 'utterly essential' and yet nobody ever used ? :-
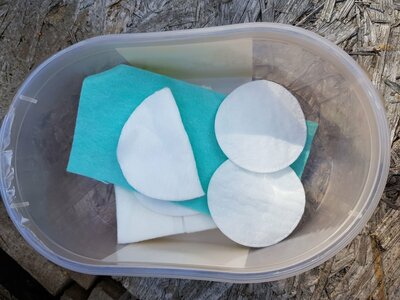
Well, after a sort of 'dry run' with nothing on the pad to find a good position and see if I am going to trip over myself - I go for it :-

Ye Gods ! wow, Wow, WOW, that's amazing ! Not entirely blemish free, but heck this is my first try.

Its hard to see, but on the right there is a cloudy area, a bit like at the rim further on. I gave it a minute and tried again on the blemish. I should have waited, it streaked ever so slightly, but this is a learning curve after all. The solution is to come and enter my findings here and give it time to fully harden again.
However, I also notice there is something on the pad. It looks like it is picking up fine dust, still trapped on the surface.
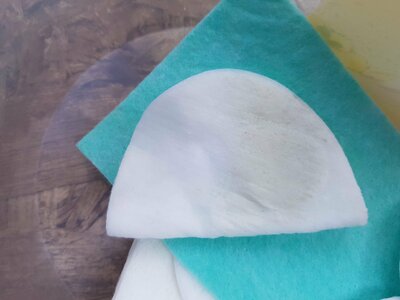
This could be prevented by wiping unidirectionally, which I will try and do in future. Perhaps using multiple pads, or maybe a 'round' pad that I can rotate to keep applying a fresh surface with each stroke. Tbh, this is good enough to go, but who ( apart from a friend of mine ), bails out at £8,000 in 'Who wants to be a Millionaire ?' Striving for perfection imho, is learning the practical limit of your craft. After that you know where to compromise and do an efficient job. Just my opinion.
So now I have to decide, take the £8,000, use a lifeline or head into oblivion and eternal shame...
Last edited:
Looking really good Foobar and providing inspiration to improve mine. I doubt I’ll get involved in solvent flashing and make up wipes though.
Be very, VERY careful using acetone. It's very effective but that means it's very easy to screw up.
The usual method is to heat it to the point of fuming then letting it blow over the lens. And that's bad enough, but actually wiping it on...? Very brave of you - I'm impressed.
You got great results there, but I'd suggest sanding back with 2500-grit and then using this.
The usual method is to heat it to the point of fuming then letting it blow over the lens. And that's bad enough, but actually wiping it on...? Very brave of you - I'm impressed.
You got great results there, but I'd suggest sanding back with 2500-grit and then using this.
Thanks for the info Chris, I have not yet tried the vapour method. I think that might be a more controlled delivery, so will probably try it later. Acetone's boiling point is 56°C so wouldn't need a lot of fancy equipment, but it is too hot to hold without insulation and I hate to think what it does to the skin at that temperature  . I took a look at the method on YouTube and then eBay, I see they use a metal, 12 Volt, heated, thermal insulated car mug and a plastic 'funnel' thing as a spout - good plan.
Here below is the best demonstration / explanation of what I am doing. Although all my extra rubbing down is to ensure absolute removal of the yellowed, degraded, UV film and damaged polycarbonate underneath it. I'm getting as near as perfect a mechanical surface as I can, as my starting point. That's because this doesn't seem to have been done before, based upon the strength of the remaining, unaffected coating that I'm having to remove to get to a uniform surface. That's because the coating may not react the same as the polycarbonate of the headlamp. Also I'm removing many of the abrasions and scratches that result from 20 years of normal wear and tear. Next time will be much easier. I am also not happy to do this with the headlamp(s) in the vehicle.
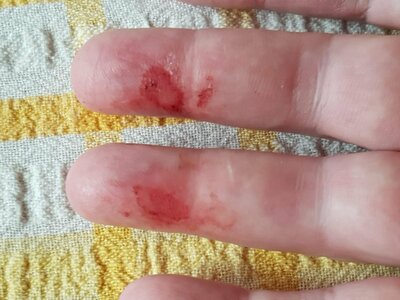
Anyway, I have some more results from yesterday's session. Some good some bad, all part of the learning curve ! First of all I have a confession to make, I don't know how I could be this stupid. Towards the end of all my sanding I started to see yellow coming off again. It is a telltale sign that I'm sanding an area that needs more work. I was on a high grit and thought this had all been removed already. Well it had, what I was seeing was blood ! It never occurred to me that if you fold abrasive paper over, that you are in fact also likely to sand your fingers ! Well, I had already removed a couple of cm2 of skin ! Simply unfolding the paper made things easier, I will remember to put fingers to backing paper at the start in future. Later on when using the acetone, I cannot quite describe the pain ( yes, I know, PPE, what a plonker... )
Due to the difficulty in getting a clean 'pass' with the application of the acetone, I considered spraying it on. I wasn't sure what sort of bottle this would need so as not to dissolve. I do have a 'Touch-Up' gun, but the nearby compressor is not oil-less and the portable one would be a pain to extract. I settled for a holiday / airport cosmetic spray bottle, this didn't like the acetone on the polished outer surface, but otherwise was ok. However, it didn't work as expected, it simple cleaned the surface and left it looking cloudy. This was going to require waiting before I could rub it down again ( which might need some skin to regrow too... ). So I decided, 'in for a penny...' - I might as well try tipping it on ! Epic Fail... This went a brilliant, perfect surface for a whole 2 seconds, before going completely opaque. You can see a sort of 'High Tide' mark.
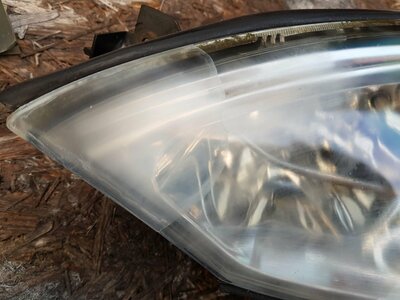
This puzzled me for a bit, but then I remembered that in the early days of courting my wife, I helped paint her boat ( she is an accomplished sailor and I, a mere midshipman, but I have my uses with ropes and sails when instructed ). Now her family is about as non DIY as is possible, she thought bizarre things like - once a wood screw was removed it wouldn't go back in again? Her dad ( primary cause of said confusion ) once put up a bookshelf and she was later scolded for putting a book on it, as it immediately fell off the wall. Anyway, the point here is that we did the job 'properly' as I am so inclined, and all was perfect until it came to the final coat. Now you don't paint a boat indoors, and this sort of thing takes all day, so it was getting late by the time we finished, but job done, clean brushes, down the pub ( Adnams btw ). Next day, instead of a fantastic gloss, we had a perfect MATT finish !
What had happened, was that it was a damp night and as it was drying, condensation had formed on the still soft paint. This had created microscopic pits where each spherical droplet formed and thus it was not flat or shiny - bu993r ! So I think this is what happened to me with pouring the acetone. The surface melted, but didn't get washed over by a cloth, using it cold, it gets even colder as it evaporates, almost like a freezer spray, so condensation moved in briefly and created the same effect. Nothing lost except some time, so re-sand today and try again.

In the meantime I thought I might as well experiment as I had already ruined the finish. So I tried 'wiping' over the rest of the lens AND the cloudy bits. Conclusion, the rest worked fine, but the cloudy bit only improved marginally.

Also, these turned up today, must have been UK stock, literally only 2 days: £8 off eBay and the first of several orders I am now expecting for under bonnet and wheel arches, trim etc...
Here below is the best demonstration / explanation of what I am doing. Although all my extra rubbing down is to ensure absolute removal of the yellowed, degraded, UV film and damaged polycarbonate underneath it. I'm getting as near as perfect a mechanical surface as I can, as my starting point. That's because this doesn't seem to have been done before, based upon the strength of the remaining, unaffected coating that I'm having to remove to get to a uniform surface. That's because the coating may not react the same as the polycarbonate of the headlamp. Also I'm removing many of the abrasions and scratches that result from 20 years of normal wear and tear. Next time will be much easier. I am also not happy to do this with the headlamp(s) in the vehicle.
Anyway, I have some more results from yesterday's session. Some good some bad, all part of the learning curve ! First of all I have a confession to make, I don't know how I could be this stupid. Towards the end of all my sanding I started to see yellow coming off again. It is a telltale sign that I'm sanding an area that needs more work. I was on a high grit and thought this had all been removed already. Well it had, what I was seeing was blood ! It never occurred to me that if you fold abrasive paper over, that you are in fact also likely to sand your fingers ! Well, I had already removed a couple of cm2 of skin ! Simply unfolding the paper made things easier, I will remember to put fingers to backing paper at the start in future. Later on when using the acetone, I cannot quite describe the pain ( yes, I know, PPE, what a plonker... )

Due to the difficulty in getting a clean 'pass' with the application of the acetone, I considered spraying it on. I wasn't sure what sort of bottle this would need so as not to dissolve. I do have a 'Touch-Up' gun, but the nearby compressor is not oil-less and the portable one would be a pain to extract. I settled for a holiday / airport cosmetic spray bottle, this didn't like the acetone on the polished outer surface, but otherwise was ok. However, it didn't work as expected, it simple cleaned the surface and left it looking cloudy. This was going to require waiting before I could rub it down again ( which might need some skin to regrow too... ). So I decided, 'in for a penny...' - I might as well try tipping it on ! Epic Fail... This went a brilliant, perfect surface for a whole 2 seconds, before going completely opaque. You can see a sort of 'High Tide' mark.

This puzzled me for a bit, but then I remembered that in the early days of courting my wife, I helped paint her boat ( she is an accomplished sailor and I, a mere midshipman, but I have my uses with ropes and sails when instructed ). Now her family is about as non DIY as is possible, she thought bizarre things like - once a wood screw was removed it wouldn't go back in again? Her dad ( primary cause of said confusion ) once put up a bookshelf and she was later scolded for putting a book on it, as it immediately fell off the wall. Anyway, the point here is that we did the job 'properly' as I am so inclined, and all was perfect until it came to the final coat. Now you don't paint a boat indoors, and this sort of thing takes all day, so it was getting late by the time we finished, but job done, clean brushes, down the pub ( Adnams btw ). Next day, instead of a fantastic gloss, we had a perfect MATT finish !
What had happened, was that it was a damp night and as it was drying, condensation had formed on the still soft paint. This had created microscopic pits where each spherical droplet formed and thus it was not flat or shiny - bu993r ! So I think this is what happened to me with pouring the acetone. The surface melted, but didn't get washed over by a cloth, using it cold, it gets even colder as it evaporates, almost like a freezer spray, so condensation moved in briefly and created the same effect. Nothing lost except some time, so re-sand today and try again.

In the meantime I thought I might as well experiment as I had already ruined the finish. So I tried 'wiping' over the rest of the lens AND the cloudy bits. Conclusion, the rest worked fine, but the cloudy bit only improved marginally.

Also, these turned up today, must have been UK stock, literally only 2 days: £8 off eBay and the first of several orders I am now expecting for under bonnet and wheel arches, trim etc...
Oh, I nearly forgot - the polish. I have a bottle of something very similar, I know where it is. I may try this once the surface is up to scratch ( no pun intended ).
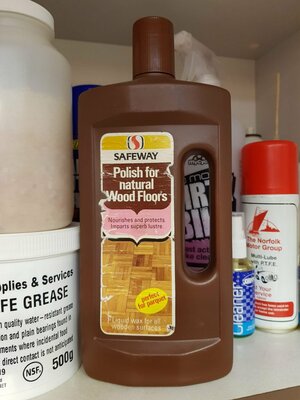
However, this reminds me of something else I could try.
A long time ago I had borrowed a piece of equipment for my company and it became a workhorse for a while. So much so that when 'muggins' had to send it back, it was embarrassing the state it was in. I tried foam cleaner, pledge, Mr Sheen etc. and it really still looked sad. So I looked in the cleaner's cupboard for something stronger - which I found - 'Heavy Duty Metallised Floor Polish'. It was for use on plastic floor coverings aka 'Marley' or similar, as in hospitals etc. Now this stuff was so strong, you had to use a corresponding 'stripper' ( which I also found ) and massive, abrasive, 1" thick Scotchbrite wheel 15" in diameter on a polishing machine to get the remains of it off before polishing. Needless to say, this process worked and made it look 'new' again. No other cleaning product could actually remove it.
Now when that office closed and we were required to vacate the building completely, you can guess where the remainder of that material got thrown away ? I still have some and it also kind of glows like tonic water does. So I wonder if it might have a UV screening element in it ? I'll dig it out and experiment with that too. Previously, it has mostly been used on my kids shoes - thorough clean and then this stuff which makes them look new again...
There are headlamp-specific products (rather than repurposed floor coatings) - this one isn't too expensive.
This part of the instructions suggest it's not as long-lasting as some other treatments might be:
"To maintain the lens clarity, use regularly to keep headlights looking clear for years!"
This part of the instructions suggest it's not as long-lasting as some other treatments might be:
"To maintain the lens clarity, use regularly to keep headlights looking clear for years!"
Last edited:
Something is nagging me that to be effective there must be a residual coating of a finite thickness. I don't see how rub on, rub off products can achieve that. UV protection is by way of a filter, like sunscreen or a camera lens. What we need is a lacquer that is effectively 'black' at UV frequencies and lets visible light thru. Bizzarely, Philips do a kit for this and they list the components, which includes a restorative / protective coat. A UV protective ceramic coat would be ideal...
These look promising ( search for 'UV ceramic coat' ) :-
https://www.ebay.co.uk/itm/2-Bottle...274753?hash=item1cf3514881:g:KGEAAOSwl-FdtKZ8

https://www.ebay.co.uk/itm/2x-Clear...878005?hash=item33fc56c8b5:g:EegAAOSwLN5ev8kO
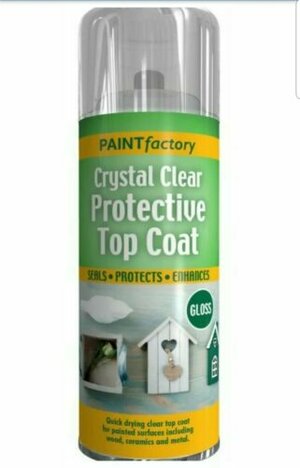
https://www.ebay.co.uk/itm/Car-Nano...208521?hash=item54895392c9:g:mj4AAOSw7dtfPQnQ

Someting fluorescent, as I suggested my floor polish might be, would work in a similar way by turning the UV into visible light instead. Who wants glowing headlamps ?
These look promising ( search for 'UV ceramic coat' ) :-
https://www.ebay.co.uk/itm/2-Bottle...274753?hash=item1cf3514881:g:KGEAAOSwl-FdtKZ8

https://www.ebay.co.uk/itm/2x-Clear...878005?hash=item33fc56c8b5:g:EegAAOSwLN5ev8kO

https://www.ebay.co.uk/itm/Car-Nano...208521?hash=item54895392c9:g:mj4AAOSw7dtfPQnQ

Someting fluorescent, as I suggested my floor polish might be, would work in a similar way by turning the UV into visible light instead. Who wants glowing headlamps ?
There are headlamp-specific products (rather than repurposed floor coatings)
Forgive me - I was trying to be helpful. That's a product that we model-makers use to preserve the clarity of styrene and polycarbonate. Nevermind - I didn't realise I was giving poor advice so I'll STFU now.
Yes clear coat!!!!! A UV protective automotive grade clear coat is your best friend.
All the coatings and such like ceramics and floor wax and all that work great for a couple weeks/months. But then you gotta do it again. And if it goes too long when needing redone you're back at square one.
Clear coat if you get a good one can last years. Dont go to the local buy it all store and get something thats super cheap. Get a 2K clear and do it right. Something with a seperate hardner that has to be added.