I'd hereby like to make a formal complaint about Kully. His overly enthusiastic telephone manner and carefree abandon with which he talks about bodywork tends to give the impression to the impressionable (that's me) that bodywork is the kind of thing that any genius can master. This is not strictly incorrect but it has been a damned inconvenience discovering this.
Thanks to Kully, I am now about ?ú200 worse off and have consumed not only my entire week off work, but my wife's aswell.
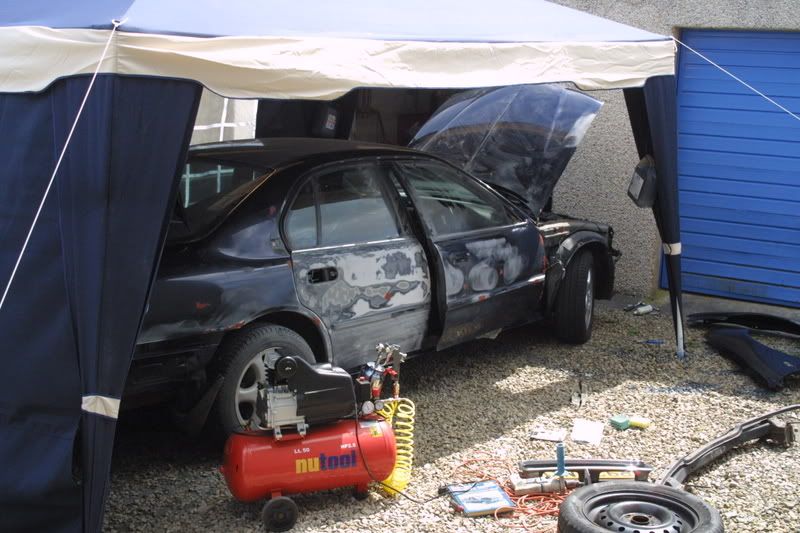
In addition, I now own a 4m by 3m gay zebra I have no further use for and my neighbour has had to park on the street whilst I occupied his driveway with my zebra of alternative sexual persuasion.
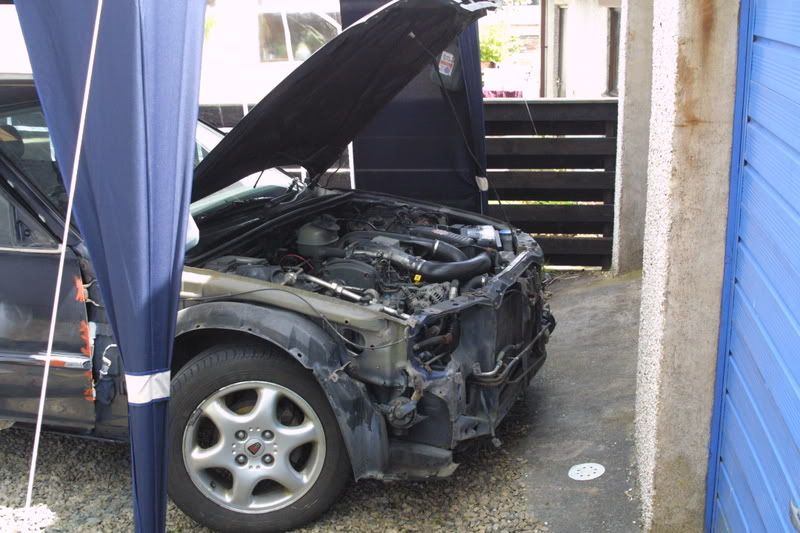
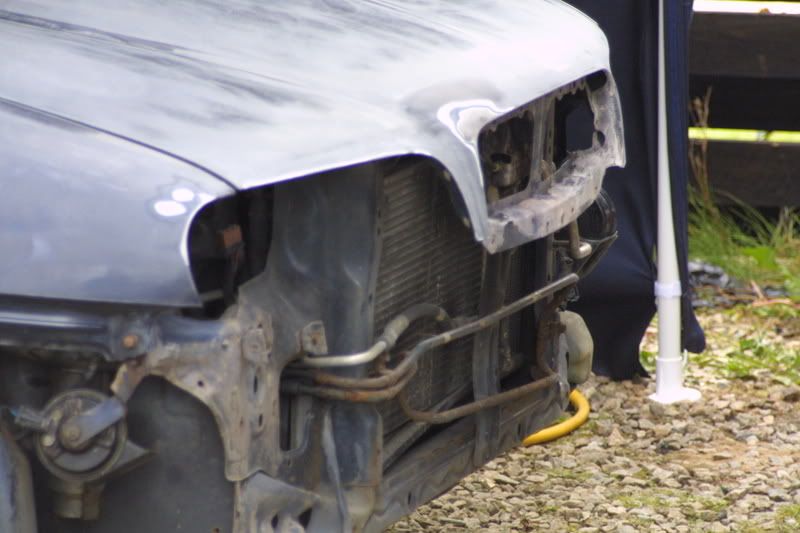
2 weeks ago, on my drive to work, I was unfortunate to lose a headlight to some flying debris from a lorry. I got hold of a headlight for ?ú20 but to change a headlight unit on my car the front bumper must first be removed. The front bumper had some very minor damage of it's own, but had never been addressed. Due to various bodywork problems the whole car, although totally reliable over it's 161,000 miles, looked a complete mess frankly.
Thanks to Kully, what should have been a simple headlight switch over turned into a bit of an epic.
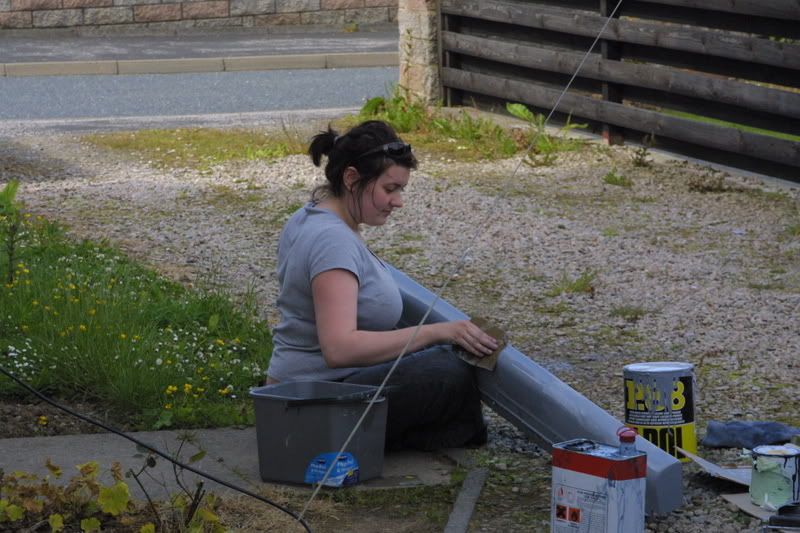
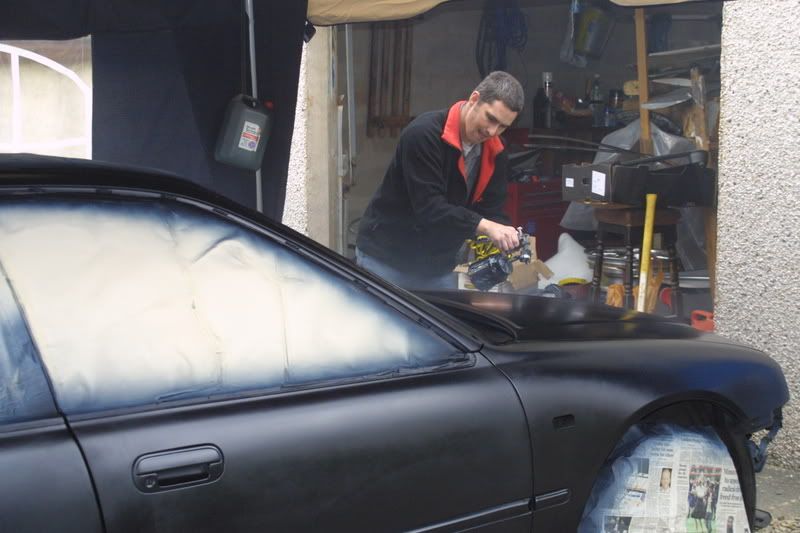
First of all, the sideskirts and bumpers somehow became detached. The lights all came out and the chrome window trims fell off. The door cards removed themselves and found their way indoors for some attention. The wiper arms detached and made their way into my modelling parlour to be stripped of flaky paint and, erm, repainted.
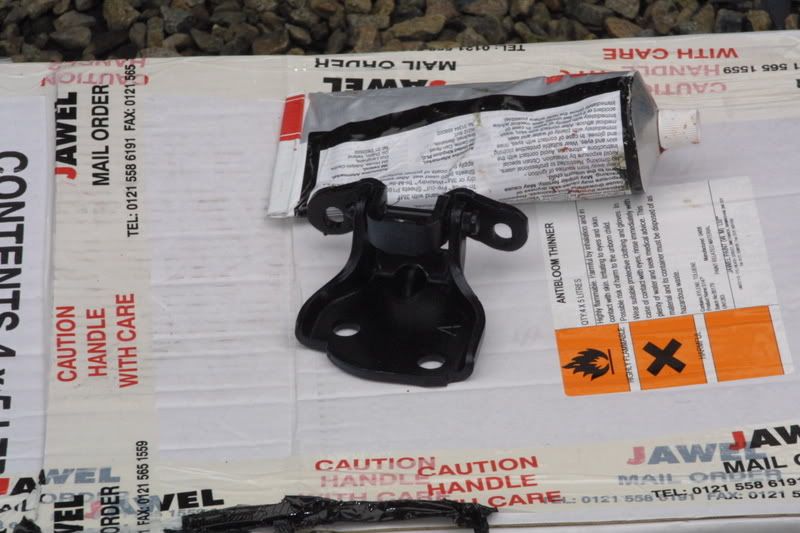
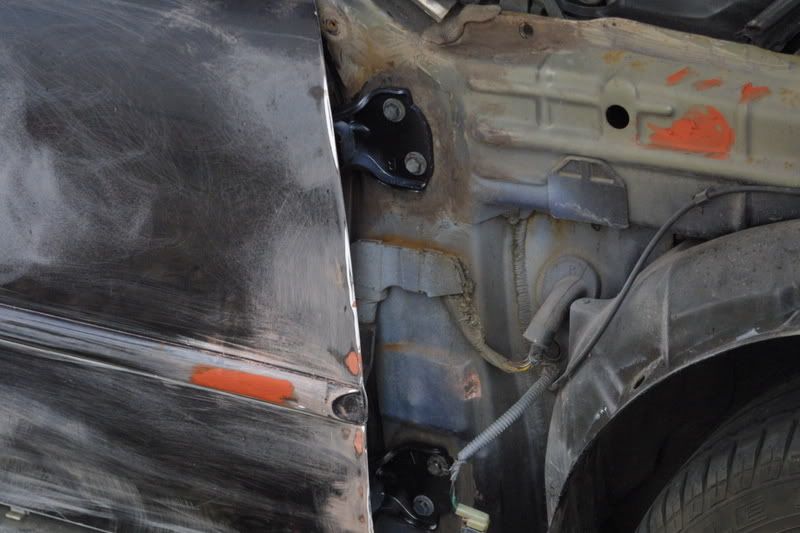
The driver's door had sagged so I replaced the old hinges for new hinges.
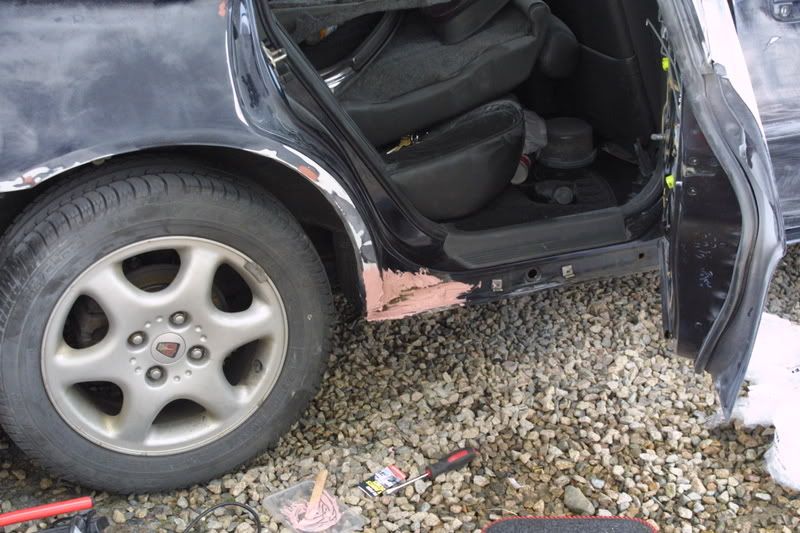
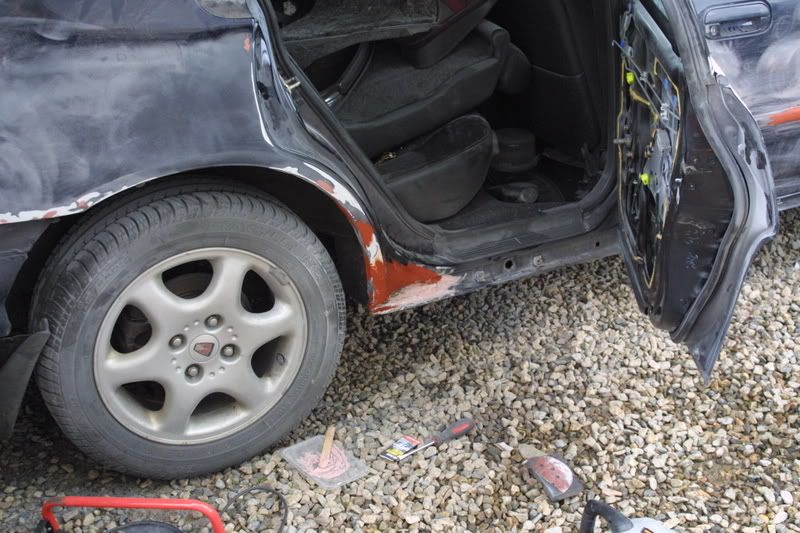
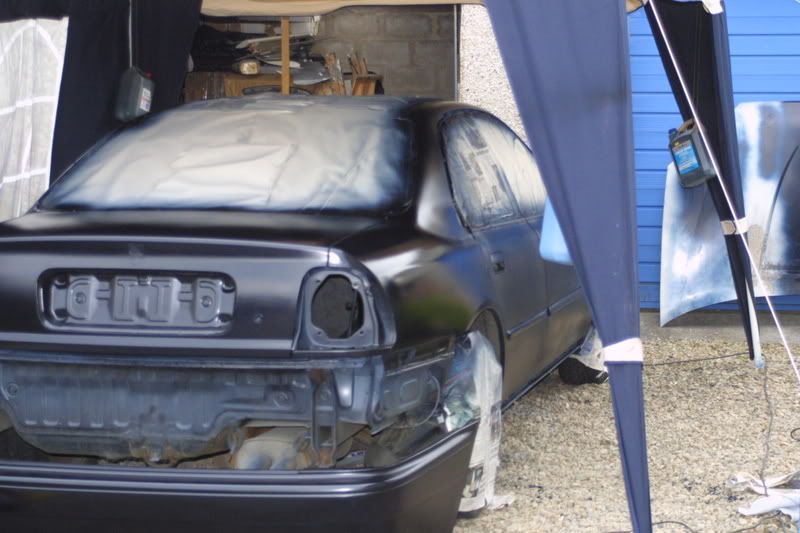
I had to do another quick little weld at the bottom of the o/s rear wheel arch and blend it in with filler as it's seen with the back door open....
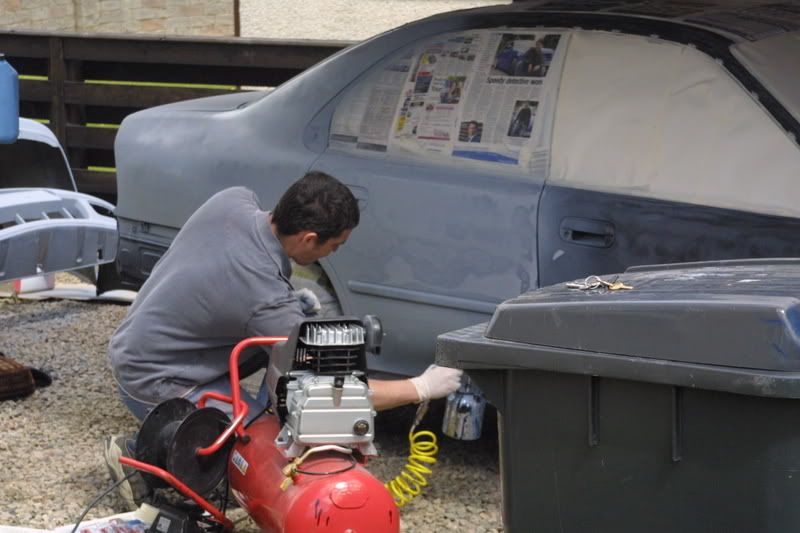
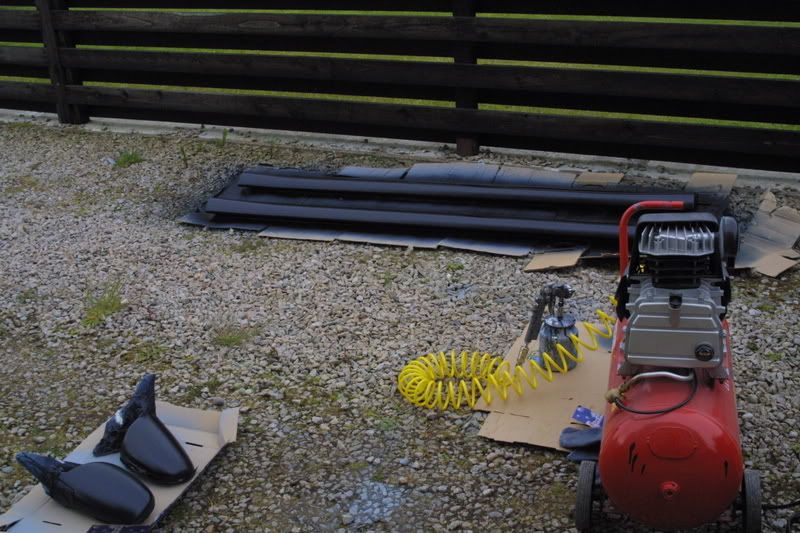
Bodywork essential tip 1: If you get any sort of paintwork issue, and your mind turns towards aerosols - shoot yourself in the head 10 times. Aerosols are a whole world of pain which cost us at least 20 manhours in otherwise unneccessary work. The o/s rear door came from a scrappy after a scrape years ago. It was quickly scooshed with aerosols and then resprayed professionally with 2-pack later after a proper crash. The car was written-off in this crash due to parts costs, but actually had next to nothing wrong with it. The professional respray was done by a good bloke as a cut-price favour using the insurance pay-out money. The 2-pack paint lifted off the aerosol base. This meant lots and lots of sanding down. A dual action sander is my new favourite toy...
Bodywork essential tip 2: See number 1. After a minor weld I did I put some aerosol over it. After a good rub down, the new primer reacted. More sanding..... :mad5: Seriously - do yourself a big favour and give aerosols a miss. Neither cellulose nor 2-pack paint will go on over aerosol paint. Trust me - just don't do it.
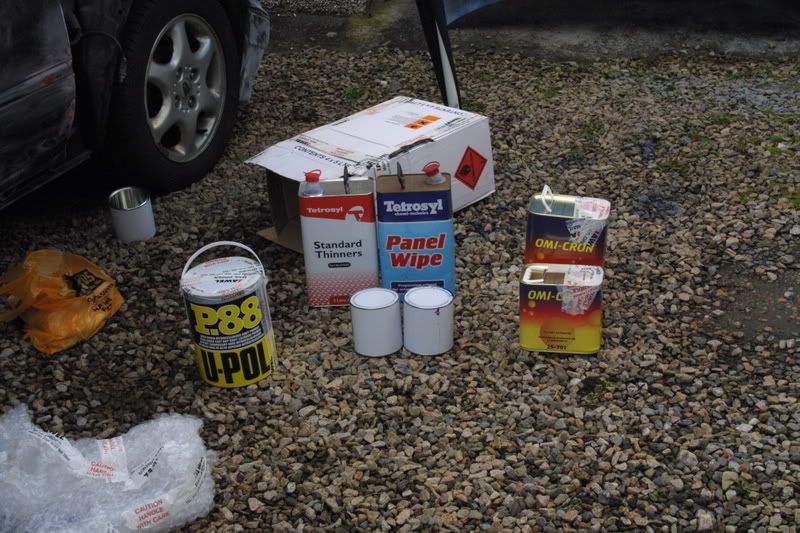
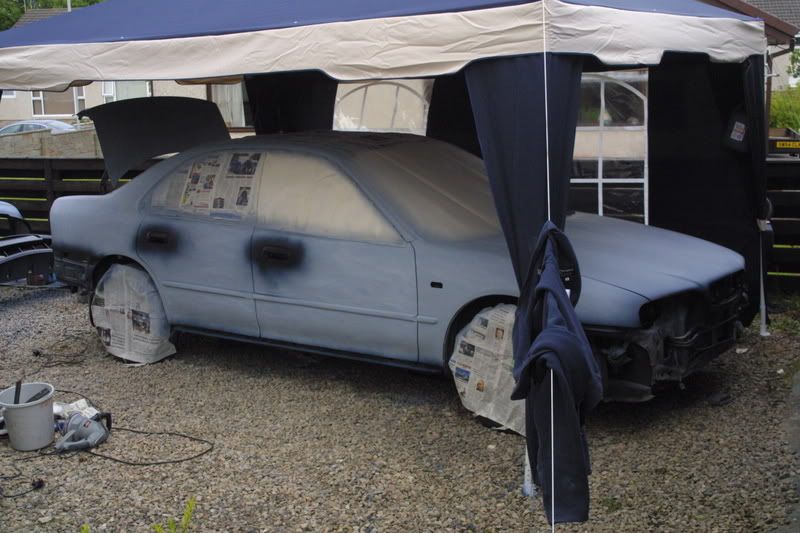
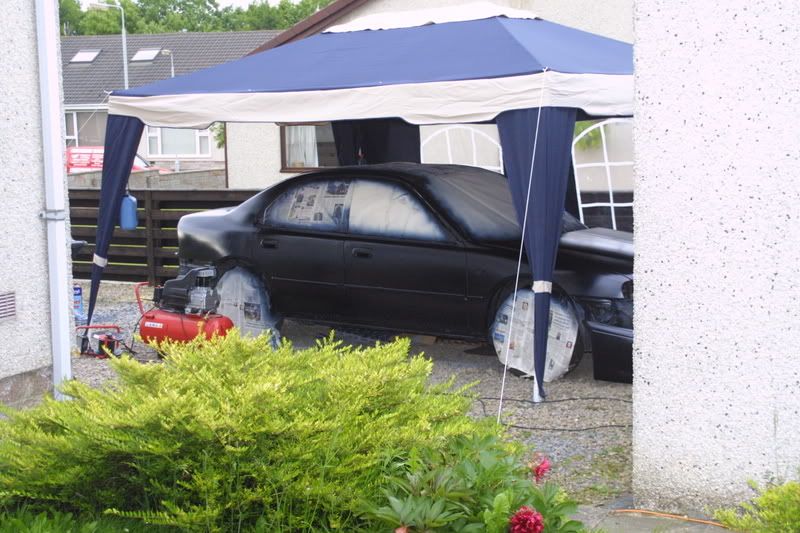
Obviously when the d/a sander came out there really was no turning back. Halfords mixed up 2 litres of cellulose base-coat and a van turned up with 5 litres of cellulose hi-build primer and 7.5 litres of 2-pack lacquer. I bought 10 litres of cellulose thinners from a local Autosave or whatever it's called.
On went the primer... and off it came again from the Bodywork essential tip 2 panels. :frown2: On it went again and a few people (including that sod Kully) got a picture message showing them that my car was now grey. Funnily enough, that's the best it's looked in a long time. Being all the one colour is a big help though... I was half tempted just to call it done, but I thought I'd better paint it blue again since I'd bought the paint.... :yesnod:
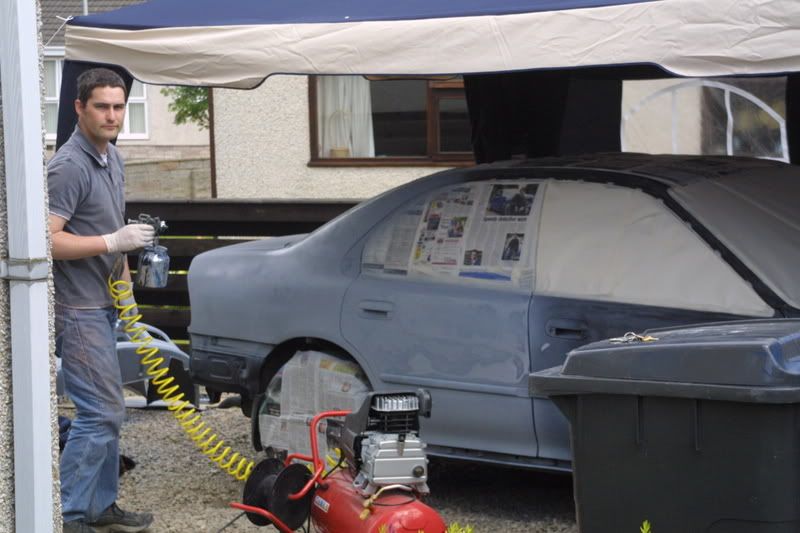
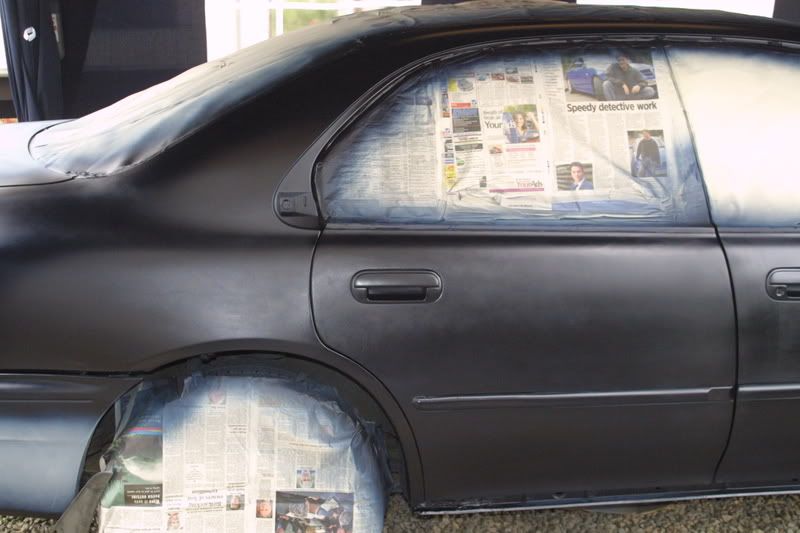
So I did. First though, the primer got a quick flat with 600 grit wet & dry used wet. Then I painted it. I used the Cougar S bonnet I never finished to practice with the colour a smidge first, and Gill wanted a go too :ihih: She decided I should paint the car (mainly so I couldn't criticise her for getting it wrong) and off I went. I started with the easy bits off the car first, and after a few schoolboy errors (e.g. check your gun & bottle don't drip when tipped up before trying to spray vertically downwards over a body panel) it went alright. The car was done next obviously...
To avoid any nasty surprises with the Halfords paint colours, I mixed up 250ml from each of the 1litre tins before thinning with 500ml of thinner. At least then it would all be the same colour!
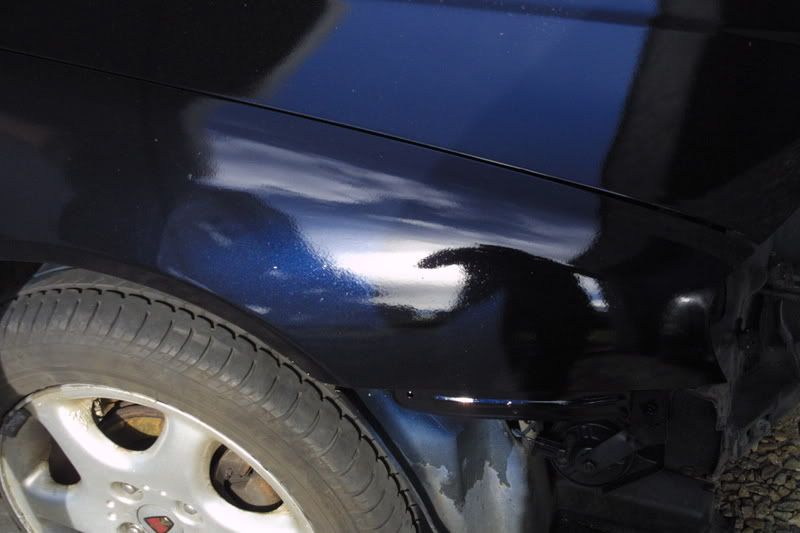
It looked nice as it was going on, but when dried it looked like a dull blue-grey colour. Still, I thought, it's better being all the one dull blue-grey colour than the mish-mash it was before.
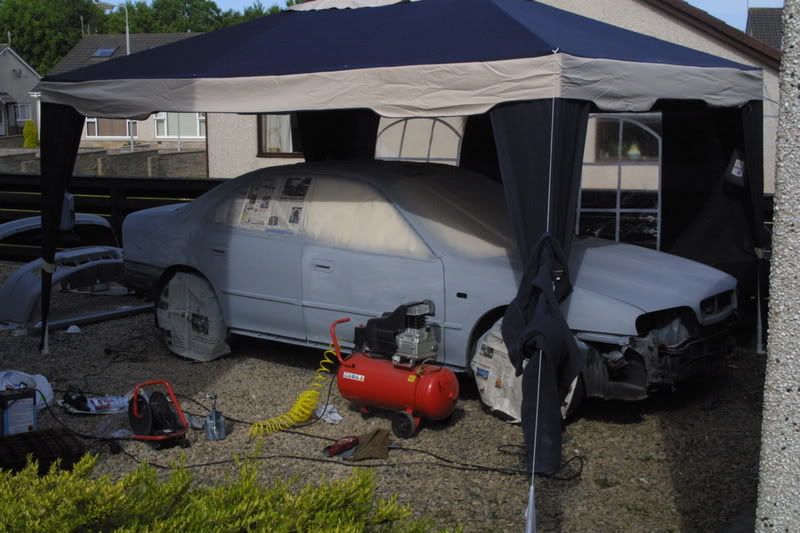
I gave the cellulose plenty time to dry out (it dries really fast anyway) and mixed up some lacquer. This stuff mixes 2 to 1 and needs no thinning (again, thanks to Kully's painting consultancy). It goes on MUCH easier than aerosol lacquer ever did, the latter being more suited to generating patchy runs than anything else... The 2 pack lacquer takes quite a while to dry at ambient temperatures, so it's had some dust and the odd insect land in it, but Kully tells me these will flat out with fine wet & dry and polish up no problem, so I'm not too fussed. There are so many things wrong with the finished paint job I wouldn't know where to start, and I'm certainly not about to offer to paint anyone elses' car, but for a first attempt it's not too bad I don't think. I've made all the usual school-boy mistakes Kully warned me about, and my metallic basecoat is patchy and inconsistent now it's all lacquered. This is purely down to slack technique on my part and the last parts of the car I painted are definately better than the first.
I just have to put the damn thing back together again to go to work on Monday now :eek6::eek6:
At this stage, it's safe to say I am totally knackered and my hands are blue. I always thought that bodywork and car painting was a total pig of a job but I didn't know the half of it.
I'd be VERY suspicious of any quotes for a respray coming in less than ?ú2000 because there's just a ridiculous amount of work involved in it which I doubt anyone could really appreciate until they've done it. :eek6:
Feel free to laugh at the pictures. I'll stab anyone who criticises though!!!!! :ihih::ihih::ihih:
Thanks to Kully, I am now about ?ú200 worse off and have consumed not only my entire week off work, but my wife's aswell.
In addition, I now own a 4m by 3m gay zebra I have no further use for and my neighbour has had to park on the street whilst I occupied his driveway with my zebra of alternative sexual persuasion.
2 weeks ago, on my drive to work, I was unfortunate to lose a headlight to some flying debris from a lorry. I got hold of a headlight for ?ú20 but to change a headlight unit on my car the front bumper must first be removed. The front bumper had some very minor damage of it's own, but had never been addressed. Due to various bodywork problems the whole car, although totally reliable over it's 161,000 miles, looked a complete mess frankly.
Thanks to Kully, what should have been a simple headlight switch over turned into a bit of an epic.
First of all, the sideskirts and bumpers somehow became detached. The lights all came out and the chrome window trims fell off. The door cards removed themselves and found their way indoors for some attention. The wiper arms detached and made their way into my modelling parlour to be stripped of flaky paint and, erm, repainted.
The driver's door had sagged so I replaced the old hinges for new hinges.
I had to do another quick little weld at the bottom of the o/s rear wheel arch and blend it in with filler as it's seen with the back door open....
Bodywork essential tip 1: If you get any sort of paintwork issue, and your mind turns towards aerosols - shoot yourself in the head 10 times. Aerosols are a whole world of pain which cost us at least 20 manhours in otherwise unneccessary work. The o/s rear door came from a scrappy after a scrape years ago. It was quickly scooshed with aerosols and then resprayed professionally with 2-pack later after a proper crash. The car was written-off in this crash due to parts costs, but actually had next to nothing wrong with it. The professional respray was done by a good bloke as a cut-price favour using the insurance pay-out money. The 2-pack paint lifted off the aerosol base. This meant lots and lots of sanding down. A dual action sander is my new favourite toy...
Bodywork essential tip 2: See number 1. After a minor weld I did I put some aerosol over it. After a good rub down, the new primer reacted. More sanding..... :mad5: Seriously - do yourself a big favour and give aerosols a miss. Neither cellulose nor 2-pack paint will go on over aerosol paint. Trust me - just don't do it.
Obviously when the d/a sander came out there really was no turning back. Halfords mixed up 2 litres of cellulose base-coat and a van turned up with 5 litres of cellulose hi-build primer and 7.5 litres of 2-pack lacquer. I bought 10 litres of cellulose thinners from a local Autosave or whatever it's called.
On went the primer... and off it came again from the Bodywork essential tip 2 panels. :frown2: On it went again and a few people (including that sod Kully) got a picture message showing them that my car was now grey. Funnily enough, that's the best it's looked in a long time. Being all the one colour is a big help though... I was half tempted just to call it done, but I thought I'd better paint it blue again since I'd bought the paint.... :yesnod:
So I did. First though, the primer got a quick flat with 600 grit wet & dry used wet. Then I painted it. I used the Cougar S bonnet I never finished to practice with the colour a smidge first, and Gill wanted a go too :ihih: She decided I should paint the car (mainly so I couldn't criticise her for getting it wrong) and off I went. I started with the easy bits off the car first, and after a few schoolboy errors (e.g. check your gun & bottle don't drip when tipped up before trying to spray vertically downwards over a body panel) it went alright. The car was done next obviously...
To avoid any nasty surprises with the Halfords paint colours, I mixed up 250ml from each of the 1litre tins before thinning with 500ml of thinner. At least then it would all be the same colour!
It looked nice as it was going on, but when dried it looked like a dull blue-grey colour. Still, I thought, it's better being all the one dull blue-grey colour than the mish-mash it was before.
I gave the cellulose plenty time to dry out (it dries really fast anyway) and mixed up some lacquer. This stuff mixes 2 to 1 and needs no thinning (again, thanks to Kully's painting consultancy). It goes on MUCH easier than aerosol lacquer ever did, the latter being more suited to generating patchy runs than anything else... The 2 pack lacquer takes quite a while to dry at ambient temperatures, so it's had some dust and the odd insect land in it, but Kully tells me these will flat out with fine wet & dry and polish up no problem, so I'm not too fussed. There are so many things wrong with the finished paint job I wouldn't know where to start, and I'm certainly not about to offer to paint anyone elses' car, but for a first attempt it's not too bad I don't think. I've made all the usual school-boy mistakes Kully warned me about, and my metallic basecoat is patchy and inconsistent now it's all lacquered. This is purely down to slack technique on my part and the last parts of the car I painted are definately better than the first.
I just have to put the damn thing back together again to go to work on Monday now :eek6::eek6:
At this stage, it's safe to say I am totally knackered and my hands are blue. I always thought that bodywork and car painting was a total pig of a job but I didn't know the half of it.
I'd be VERY suspicious of any quotes for a respray coming in less than ?ú2000 because there's just a ridiculous amount of work involved in it which I doubt anyone could really appreciate until they've done it. :eek6:
Feel free to laugh at the pictures. I'll stab anyone who criticises though!!!!! :ihih::ihih::ihih:


")