R
rhume
Hi,
Just thought I would post a few pics of where I am at with our Frosty. Not very radical I know but my wife still needs to use it to take the kids to school!!
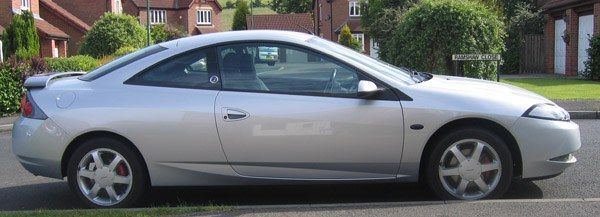
Side View
Shows smoked repeaters, red callipers and side profile of spoiler. Also metal cougar badges that I got from JEZPORT on the rear quarters (similar idea to Fiat Coupe :wink: I hope).
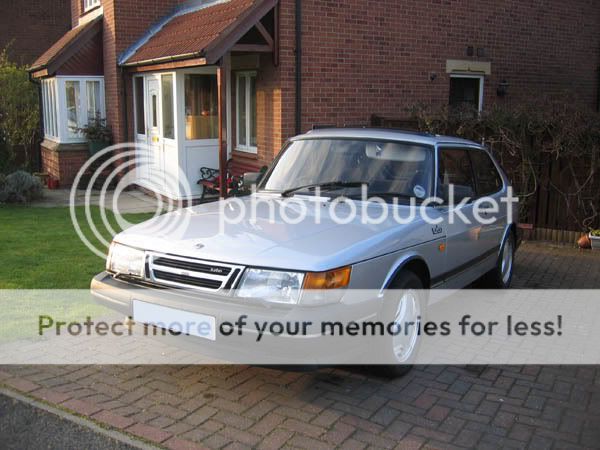
Front View
Replaced front badge.

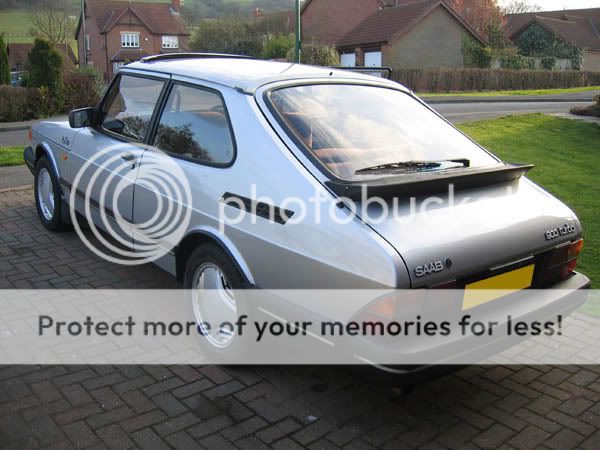
Back View
Spoiler, light covers, centre light cover, repositioning of letters and stainless exhaust.
I am sure you are all thinking that the match to Frost silver is pants but this is intentional. I wanted the spoiler in a graphite grey as I always like the contrast of the spoiler on my classic Saab 900 Turbo. I decided to do the lights the same as I liked the effect that you got on the Megane convertibles that had dark surrounds to the lights.
The exhaust was on the car when I got it and seems very good. Sounds absolutely standard till 3000 revs then really opens up.
So there you have it either as I hope a good start or heaven forbid a Frankenstein selection of styling features.
Next its time to get some 17" wheels. 215/45/17 would fit the bill as the existing ones are a bit kerbed and the tyres have only got a couple of K left on them.
In the next installment I will post a pic of the comedy gear knob it came with and how it nearly caused me to write the car off.
Cheers R
Just thought I would post a few pics of where I am at with our Frosty. Not very radical I know but my wife still needs to use it to take the kids to school!!
Side View
Shows smoked repeaters, red callipers and side profile of spoiler. Also metal cougar badges that I got from JEZPORT on the rear quarters (similar idea to Fiat Coupe :wink: I hope).
Front View
Replaced front badge.
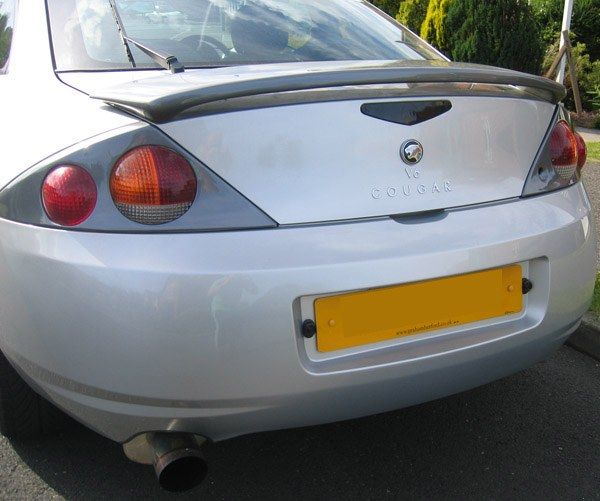
Back View
Spoiler, light covers, centre light cover, repositioning of letters and stainless exhaust.
I am sure you are all thinking that the match to Frost silver is pants
but this is intentional. I wanted the spoiler in a graphite grey as I always like the contrast of the spoiler on my classic Saab 900 Turbo. I decided to do the lights the same as I liked the effect that you got on the Megane convertibles that had dark surrounds to the lights.The exhaust was on the car when I got it and seems very good. Sounds absolutely standard till 3000 revs then really opens up.
So there you have it either as I hope a good start or heaven forbid a Frankenstein selection of styling features.
Next its time to get some 17" wheels. 215/45/17 would fit the bill as the existing ones are a bit kerbed and the tyres have only got a couple of K left on them.
In the next installment I will post a pic of the comedy gear knob it came with and how it nearly caused me to write the car off.
Cheers R
")

")