What Have You Done to Your Cougar Today?

Well did a bit of work on Hellcat today, drained the oil from the engine, 12.5 litres, changed oil filter and put new oil in, new battery fitted and bled the ABS pump (finally) changed front discs and bled all 4 corners, fired her up and she runs like a dream :) made a list of parts I need and then had a play with my ECU, as you can see from the picture front and rear banks running almost perfectly in unison not to rich and not to lean so well happy (y)View attachment 11400

About bleedin' time :)

Nice one mate ;)

- - - Updated - - -

Glad you had a successful trip Jon.
On the way down to Marts my brake warning light was flashing. Checked the fluid level and it had got too low, probably just natural wastage but I'll keep an eye out for leaks now I've topped it up.
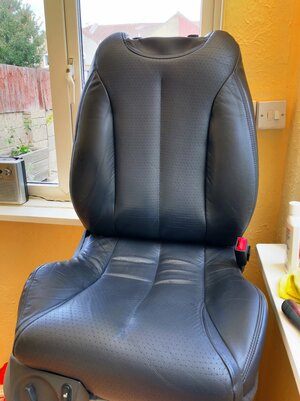
 
Today while the viakal is doing it's magic I decided to replace my knackered drivers for the much better one I paid £20 for.
Seat.jpg

One of those jobs I thought would take 1/2 hour, but nearly 2 hours later I still haven't got the old seat out. :cautious:

2 of the bolts at the back of the seat are really tight and I only managed to get them a couple of mm out. Soaked with WD and revisited, now 1 of the nuts has sheared under the floor so the bolt will need cutting out, the other has rounded and I'm gonna have to attack it with the mole grips, might just forget it for the day and go to the pub!

Oh the joys of owning a 19 year old car :)
 
Sorry to hear of your problems Jon but it's always worth asking first.
The two rear-most bolts protrude through the floor and are exposed to the elements.
It's always worth spraying them first from underneath with Plusgas, or similar, as WD40 is not a penetrant and then, when you try to undo them if they go tight, back them off a bit and then try again repeating as necessary.

Now go to the pub. :beer:

Thanks for the advice, especially the part about going to the pub (y)
 
The two rear-most bolts protrude through the floor and are exposed to the elements.

Oh yes, so much this. I have never understood why Ford decided that these bolts should penetrate the floorpan that far. They must have had (safety) reasons, but why weren't they at least a coarse M10?

A rattle gun won't save you. Plus-Gas...might.

I've done an interior swap where I had to use a 2.5' breaker bar and 1/2" extensions (to get enough throw) to wind out one of those b'stard bolts, all the while praying to every deity I could think of that the captive nut wouldn't let go.
 
Sorry to hear of your problems Jon but it's always worth asking first.
The two rear-most bolts protrude through the floor and are exposed to the elements.
It's always worth spraying them first from underneath with Plusgas, or similar, as WD40 is not a penetrant and then, when you try to undo them if they go tight, back them off a bit and then try again repeating as necessary.

Now go to the pub. :beer:

Jon, I should have added that I've got a couple of spare bolts here if you'd like me to send them to you?
 
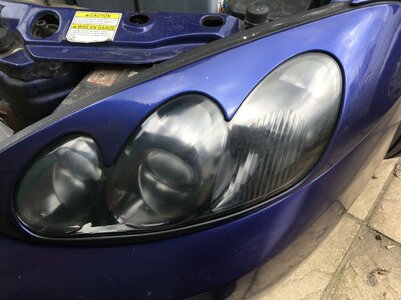
Headlamp Restoration on a Shoestring

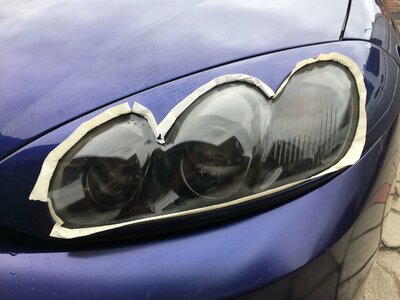
I finally got fed up with my grotty headlights. These caused me an advisory in May for something akin to 'Product on lens & poor focus / pattern'. Previously, I had removed something yellow, like a lacquer, which had quickly come off with mild kerosene based solvent, similar to a petroleum tar remover for paintwork.

IMG_2585.jpg

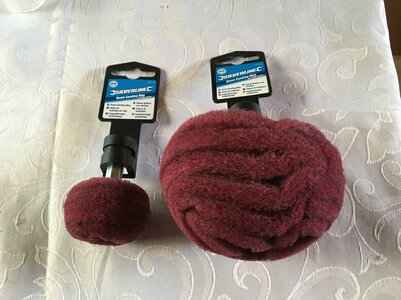
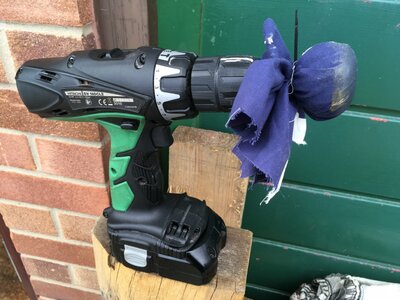
However, although its hard to see, I was still left with a transparent but flaky coating that was hard to shift. ( see right of above pic ). So I tried Brasso on a cloth over what I can only describe as several layers of 'ScotchBrite' ( scouring pad ) on a drill arbor.

IMG_2531.jpg

IMG_2582.jpg

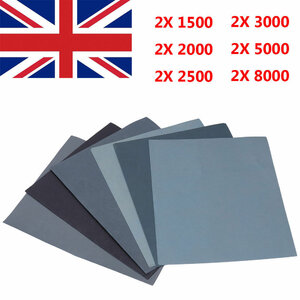
This was very gentle and improved things a lot but I could not get too close to the edges and it did not break thru some of the glaze. So I reached for the fine grade wet & dry paper which I had paid £5 for off eBay, but had to mask my lens covers first.

Wet & Dry Fine.jpg

This shifted everything in sight but even used wet and moving to finer grades left them looking 'hazy' although by now a nice, faint, smoky colour.

9H Ceramic Car Coating.jpg

After a thorough clean, I kept the masking in place and applied a coat of 9H Ceramic Auto Glaze costing a princely £1.95 from eBay. I used a good quality lint free swab that came out of an old 'Computer Cleaning Kit' that I just didn't like to throw away and am glad I didn't. Then it rained :cautious: ...

IMG_2963.jpg

But Wow ! What a difference, they look like new and at night are much nicer to look at and drive with...
 
Nice work on the headlights, I had mine out today (to chnage the lever back over from the jaunt; only just realised I hadn't done them) and mine are awful. I simply must do something about them.

In other news I collected her yesterday to find the battery was flat. Needed a jump which was a bit of a shock as although it's not moved much of late it wasn't that long ago, so I need to keep a check on that. Anyway ahead of the MOT and to keep my sanity I spent a few hours over the weekend finally removing the vinyl;

Before.jpg
After.jpg

It took a good few hours mainly in removing the residue. Some of the glue, espeically the bonnet, took an age to clean off. It still needs a good wash and a bit of attention but it's not too shabby really. Also removed the compressor and wiring for the air horns :).

A good mooch about and the list of things to do continues to grow.....
 
Nice work on the headlights, I had mine out today (to chnage the lever back over from the jaunt; only just realised I hadn't done them) and mine are awful. I simply must do something about them.

In other news I collected her yesterday to find the battery was flat. Needed a jump which was a bit of a shock as although it's not moved much of late it wasn't that long ago, so I need to keep a check on that. Anyway ahead of the MOT and to keep my sanity I spent a few hours over the weekend finally removing the vinyl;

View attachment 11511

It took a good few hours mainly in removing the residue. Some of the glue, espeically the bonnet, took an age to clean off. It still needs a good wash and a bit of attention but it's not too shabby really. Also removed the compressor and wiring for the air horns :).

A good mooch about and the list of things to do continues to grow.....

Looking good Sam ! Btw, have you considered entering one of your photos of the 'vinyled' version in the calendar competition ? I can't say I've seen it but that doesn't mean much. I think you should.

The battery issue is something I am also fighting with my Vito van. I will come to it and find the battery is flat if I leave it for 10 days or so. Since I have had the cat I tend to forget about the van so it gets less use. But it has these clever interior lights and headlights that stay on as a courtesy and I don't quite trust them to stay off. Often, well once a month maybe, I look outside when locking up at night and see a glow.

So I had already decided on another little project. A battery monitor that lets me know before the battery gets too low, maybe at around 11.5 Volts, so before it starts to get damaged / reduced capacity and still with enough left to start up one more time without slogging. An ultra bright, intermittently flashing LED in the window would alert me to the problem without adding to it, and I could choose to drive it or fit the charger to bring up the charge. It would be pretty small and could probably be hidden in the head lining and powered off the interior light wiring. Oddly enough, the vito has a way of telling me the voltage is low on the dash, but only when starting / driving which is pretty pointless really...
 
You know I hadn't even considered it but I probably should have a look through my pics of the trip for a good 'un (y).

I did rememeber I'd left my OBD reader in and despite it being switchable on / off I popped it out anyway. Can't think whatever else could cause it, but I do like the low level warning idea.
 
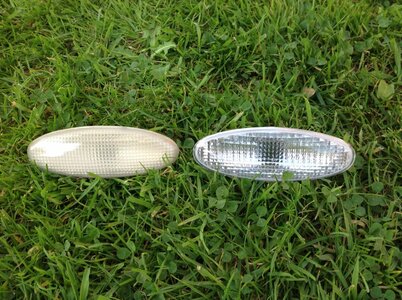
I fitted my new side repeaters today. Much better :)
Can I ask, what you think of the quality of the ones you fitted ? And where did you get them from ?
Turns out the same repeaters fit my jag but I can't get them from the same source as I put in my cougar a few years ago - shame as they were quite good quality.
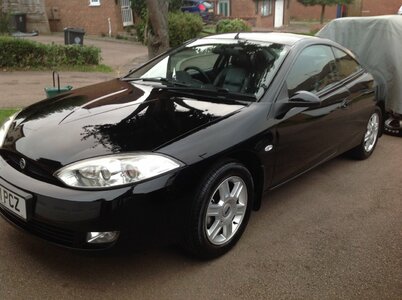
Cougar looks great by the way (y)