That is an absolutely awesome job. I can't even be bothered going out to hoover mine..... and i've got a garage!
My Cat ...... Work In Progress.....
- Thread starter Shagmonkey
- Start date
You are using an out of date browser. It may not display this or other websites correctly.
You should upgrade or use an alternative browser.
You should upgrade or use an alternative browser.

This thread, along with Cullers' detailing thread, has prompted me to spend a good few hours today giving mine it's first proper wash & wax of the year! It does get washed once a week, but I have to admit to being lazy and using the £5 hand car wash that's about 100m from my front door. Obviously the job I've done isn't a patch on Shagmonkey's or Cullers' high standards but I have neither the technical skill nor the equipment to go to the levels they do. What I did do was hoover it all out (left the leather treatment at home, drat!) wash it, clay it, wash it again, then wax it. I use Turtlewax Extreme (comes in a dayglo green tub from Halfords) which I find gives a nice shine. It does look very nice, but every time I clean it I'm reminded that the paint really needs some TLC from A Man With A Polishing Machine to try and cut through all the swirls and get it looking it's best.
Last edited:
Only bit which would give you a deeper shine is after the claying give it a good polish, i use Autoglm Super Resin then wax after the polish to lock the shine in.
K
KingRoderick
Paul, You can sell that as concours condition, surely!!
I had an offer for £100 to cut and polish the whole car.. I was going to say yes then thought sod it, I'll let whoever buys it do that, doubt I'll make the £100 back on the resale value!
Great job shaggers, keep up the good work.
Rod
I had an offer for £100 to cut and polish the whole car.. I was going to say yes then thought sod it, I'll let whoever buys it do that, doubt I'll make the £100 back on the resale value!
Great job shaggers, keep up the good work.
Rod
That's not a bad quote at all. Because of the state of my paintwork I was told I would be looking at just shy of £400 :eek6:
Hence why I decided to teach myself and buy all the stuff myself so I can also do other peoples cars for them. After the last time I trusted a bodyshop to do any work for me, I don't think I can trust anyone else.
Anyhow.....moving on.....good weather today so managed to do the passenger side door, passenger side quarter panel and the top of the boot lid. I also did another 2hrs on the wheels.
Here was the door before I started. As you can see, the kind owner had fitted some door protectors at some point which had marked the paint. Through to the primer in places so not much I could do with the heavy marks:


This is after a number of passes, but before glaze and wax:

I then applied sealer and then the wax:

I then forgot to take a final piccie :mad2:
So.....onto the quarter panel. Again, just look how $£&* the paintwork is:


I have a few big scratches by the side of the bootlid. The worst one I will have to touch up and cut back:


This is after many, many passes and various different cutting compounds and pads:


As you can see below, the deep scratch needs more work:

I'll do that when I do the stone chips.
Door jam and sill were done but I forgot to take an "after" piccie. Will do that tomorrow and stick them up.
Bootlid next which was also **** paint. Notice the deep scratch in the middle:


Like the quarter panel, I tried various compounds and pads to get the best finish. I was very happy with my end result:


Only the top was done. I will do the "face" of the bootlid tomorrow:

Light was going down so packed up and moved back onto the wheels. The inner lip of the rim needed sanding back as you can see:


After a couple of hours, ears ringing and fingers full of pins and needles, I got this result:


And that is everything I managed today.
Saga continues tomorrow....
Hence why I decided to teach myself and buy all the stuff myself so I can also do other peoples cars for them. After the last time I trusted a bodyshop to do any work for me, I don't think I can trust anyone else.
Anyhow.....moving on.....good weather today so managed to do the passenger side door, passenger side quarter panel and the top of the boot lid. I also did another 2hrs on the wheels.
Here was the door before I started. As you can see, the kind owner had fitted some door protectors at some point which had marked the paint. Through to the primer in places so not much I could do with the heavy marks:
This is after a number of passes, but before glaze and wax:
I then applied sealer and then the wax:
I then forgot to take a final piccie :mad2:
So.....onto the quarter panel. Again, just look how $£&* the paintwork is:
I have a few big scratches by the side of the bootlid. The worst one I will have to touch up and cut back:
This is after many, many passes and various different cutting compounds and pads:
As you can see below, the deep scratch needs more work:
I'll do that when I do the stone chips.
Door jam and sill were done but I forgot to take an "after" piccie. Will do that tomorrow and stick them up.
Bootlid next which was also **** paint. Notice the deep scratch in the middle:
Like the quarter panel, I tried various compounds and pads to get the best finish. I was very happy with my end result:
Only the top was done. I will do the "face" of the bootlid tomorrow:
Light was going down so packed up and moved back onto the wheels. The inner lip of the rim needed sanding back as you can see:
After a couple of hours, ears ringing and fingers full of pins and needles, I got this result:
And that is everything I managed today.
Saga continues tomorrow....
B
Buxton
Paul, that is looking awesome mate, fantastic job with the paintwork - what exactly have you used, as I have a number of polishes and also have an auto polisher too. I can't get the swirl marks out of mine - so what have you used?
I have been using Menzerna power Gloss on a heavy cutting pad, followed by a single pass of Menzerna Final finish on a finishing pad.
Then Poor Boys Black Hole Sealer Glaze.
Finally I then applied DoDo Juice Purple Haze by massaging it onto the paintwork with my fingers:
Apart from the wax, they are all applied using my DA (Dual Action) polisher.
Nice job, looks like the previous owner used a Green scourer to clean their car with ") ..who's cat was it by chance?
..who's cat was it by chance?
Buxton: Frosty is a real pig to polish up to the same shine as Ebony, Its just the way it is, you can polish it for ages and look at the car afterwards and it still looks the same, well until, the light hits it, then you get a sence of how well you have done (i've never managed that mirror shine like Paul has on this car)
..who's cat was it by chance?Buxton: Frosty is a real pig to polish up to the same shine as Ebony, Its just the way it is, you can polish it for ages and look at the car afterwards and it still looks the same, well until, the light hits it, then you get a sence of how well you have done (i've never managed that mirror shine like Paul has on this car)
Ok......finished a bit earlier today as to put it mildly, my back is killing me !
So this was the passenger side door sill after, as promised:

I then started with the rear bumper and so many more scratches....sigh:


This after all the cutting, but before the glaze and wax:


While i was back there, I decided to spruce up the rear lights also. No before pics as there wasn't much to pick up on a camera. However afterwards they just seem so much more ....shiny


I didn't take any before shots of the drivers side as it wasn't in the sun and thus the scratches etc couldn't be clearly seen on a camera. Anyhow, needless to say it was just as bad on the drivers side as it was on the passenger side:
This was after cutting, but before sealer and wax again:


Sealer then applied, then wax:


Finally all buffed up:


Door jam IMHO could do with some more work:

This is just a close up piccie of the drivers side door:

That's it for today.
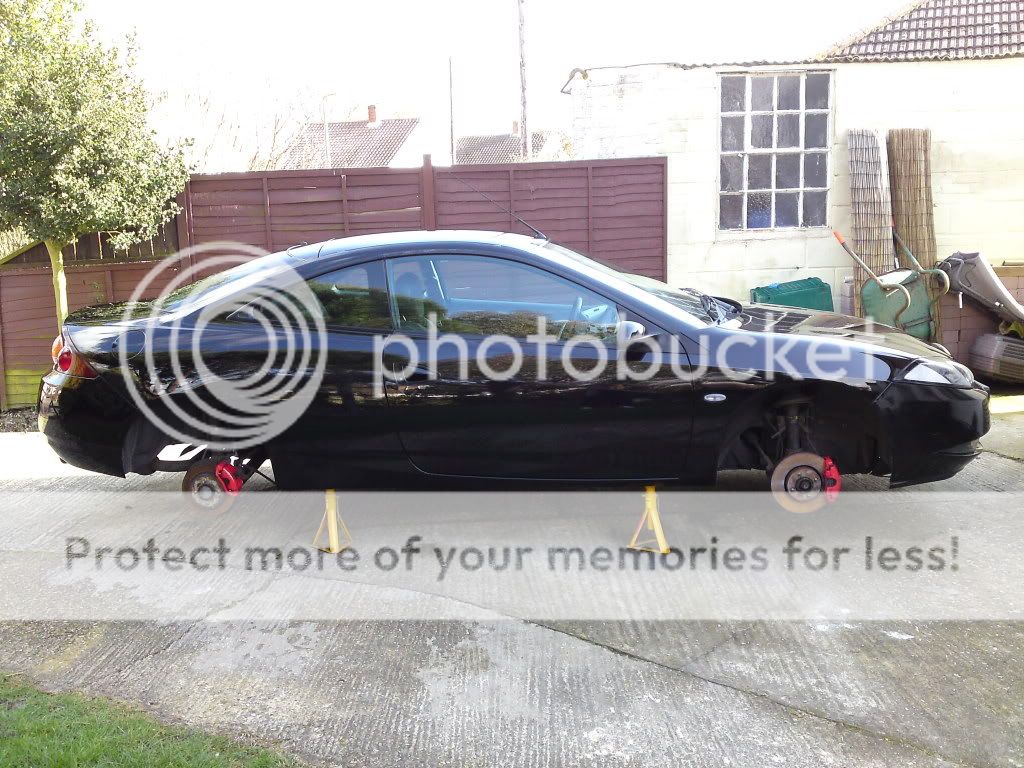
Plan of attack for tomorrow (weather permitting) is to get all 4 wheels ready and laquered so they can dry overnight.
Thursday will be the front bumper (might need some spray work thanks to morons that use my bumper to help them park, I'll find out when I start). Will also paint the worst of the stone chips and scratches.
Friday will be sanding down headlights and the stone chip and scratches where I have touched up, and cleaning all the rain gulleys and door jams etc
Saturday will be spent on the engine bay. Just giving it a good steam clean and wipe down. Will also put the passenger seat back it.
That should then be that I hope......
So this was the passenger side door sill after, as promised:
I then started with the rear bumper and so many more scratches....sigh:
This after all the cutting, but before the glaze and wax:
While i was back there, I decided to spruce up the rear lights also. No before pics as there wasn't much to pick up on a camera. However afterwards they just seem so much more ....shiny
I didn't take any before shots of the drivers side as it wasn't in the sun and thus the scratches etc couldn't be clearly seen on a camera. Anyhow, needless to say it was just as bad on the drivers side as it was on the passenger side:
This was after cutting, but before sealer and wax again:
Sealer then applied, then wax:
Finally all buffed up:
Door jam IMHO could do with some more work:
This is just a close up piccie of the drivers side door:
That's it for today.
Plan of attack for tomorrow (weather permitting) is to get all 4 wheels ready and laquered so they can dry overnight.
Thursday will be the front bumper (might need some spray work thanks to morons that use my bumper to help them park, I'll find out when I start). Will also paint the worst of the stone chips and scratches.
Friday will be sanding down headlights and the stone chip and scratches where I have touched up, and cleaning all the rain gulleys and door jams etc
Saturday will be spent on the engine bay. Just giving it a good steam clean and wipe down. Will also put the passenger seat back it.
That should then be that I hope......
")
You are getting amazing finishes to the car Paul! Whoever the previous owner was who owned a dog they clearly let the animal jump up all over the damn car!! :mad5::mad5: There are scratches just everywhere!!
How else would there have been so many scratches around the boot lid?
How else would there have been so many scratches around the boot lid?
how much you charging paul and what is putting the colour back into the paint work is it the dodo wax as its got dark bees wax in it
K