That was the first thing I thought of when I saw him polishing it mate.:yesnod:I'm well impressed Paul!!")
Shame you're gonna sell it after all that work though! Those that saw me do Neil's car at fest a couple of years back said they'd never go to that extreme lol so I share your pain.
My Cat ...... Work In Progress.....
- Thread starter Shagmonkey
- Start date
You are using an out of date browser. It may not display this or other websites correctly.
You should upgrade or use an alternative browser.
You should upgrade or use an alternative browser.
I've just ordered some stuff that Cullers uses on his, have ordered the following:
Britemax #4 BLACK MAX Ultra Polishing Glaze
Britemax #5 Extreme Elements Polymer Sealant
So, will see how mine comes up once I've received this and got time (and weather permitting ofcourse) to get it done. Will try and get it done for the Castle Coombe meet.
Britemax #4 BLACK MAX Ultra Polishing Glaze
Britemax #5 Extreme Elements Polymer Sealant
So, will see how mine comes up once I've received this and got time (and weather permitting ofcourse) to get it done. Will try and get it done for the Castle Coombe meet.
If i was to offer this service to members, it wouldn't be cheap.....well cheap compared to taking it to a dedicated auto detailer, but not cheap compared to a drive through car wash 
I would look at doing the first car for £200 all in. After that I would prob have to increase it to £250
I have worked out that if the car was black, I would be spending at least £50 on materials, which leaves £150 for me.
I would be spending at the very least 25 hours on the car (plus I would have to take time off work), so I would be paying myself £6 an hour !!!!
If the car is not black, I would be looking at £100 in parts, which would leave £100 for me which works out at £4 an hour !
For that I would remove all the seats and clean the interior. Steam the seats if they are cloth, or wash and treat with leather cleaner / food if it's an X-pack.
Clean the boot (Remove the spare wheel and clean under there etc) and if needed, steam the boot carpet clean.
All car mats steam cleaned and washed / vac'd
Remove all 4 wheels, clean, polish and treat with wheel wax.
Clean arches
If brakes were to be painted, I would charge an extra £50 to include whatever caliper colour paint you want. Please note I use proper caliper paint and not just Hammerite.
The whole car would then be cleaned with a heavy duty car wash to strip any existing waxes etc. A stiff detail brush would be used to clean all the nooks and crannies. Get rid of any mould around the window moulds etc etc
Then the car would be cut and polished and glazed and waxed as per my car in this thread.
All windows treated with glass sealer.
All plastics treated
Front and rear lights polished up with plastic polisher (If the headlights need sanding but are NOT as bad as mine, I would sand them back like mine etc for no extra charge).
Engine bay would be steam cleaned and wiped over with plastic cleaners / sealers.
I would need the car for 5 days minimum. Longer if the paintwork is as bad as mine.
So there we go.....right.....off to attack my wheels and headlights
OK. Todays work. Seems like a lot of effort for not much return, but that's the nature of the beast.
I tackled all 4 rims with 1200 wet and dry. The ones in the back weren't done at the time of the photo.
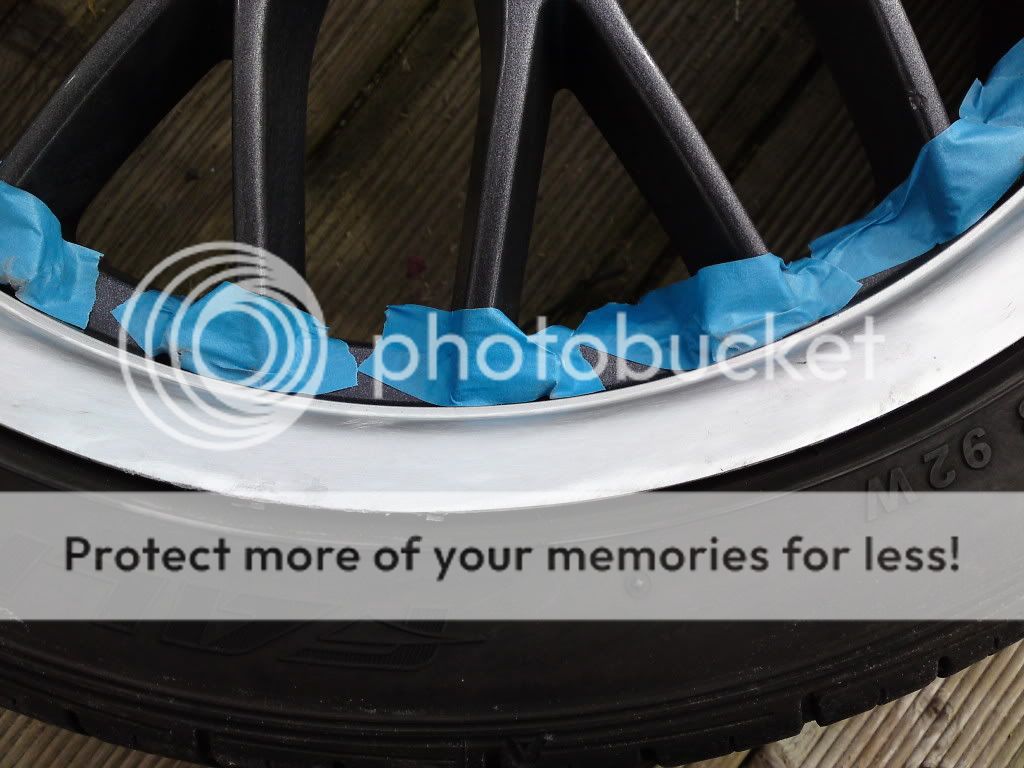

Next I tackled them with 1500 grit wet and dry.
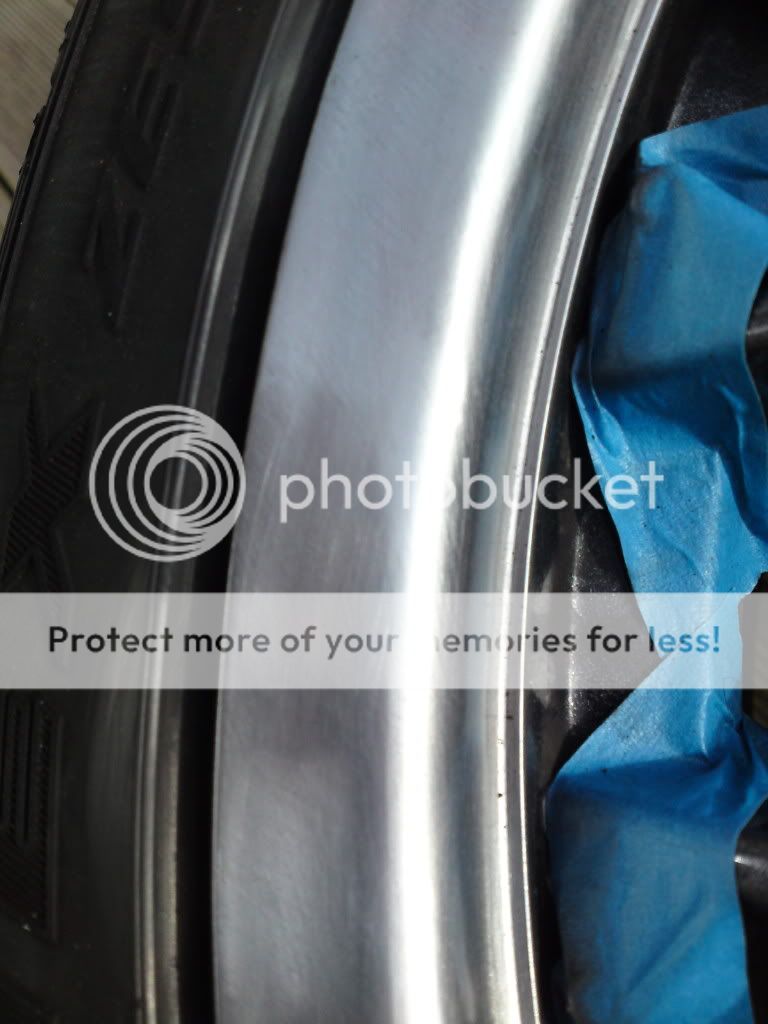
I couldn't do any more as my order of 2000, 2500 and 3000 grit wet and dry paper didn't arrive today like I had hoped.
When it does arrive, I shall polish the lip right up to 3000 grit.
I then moved onto the passenger side headlight. God knows what the previous owner had done to it. My guess is some sort of euro light sticker (for driving in France or something - clearly he didn't know about the lever behind the lights :mad2: ), which he then removed with a knife......leaving a load of sticky residue to bake into the plastic lense over the years. Remind me to kick him in the nuts if I ever see him !
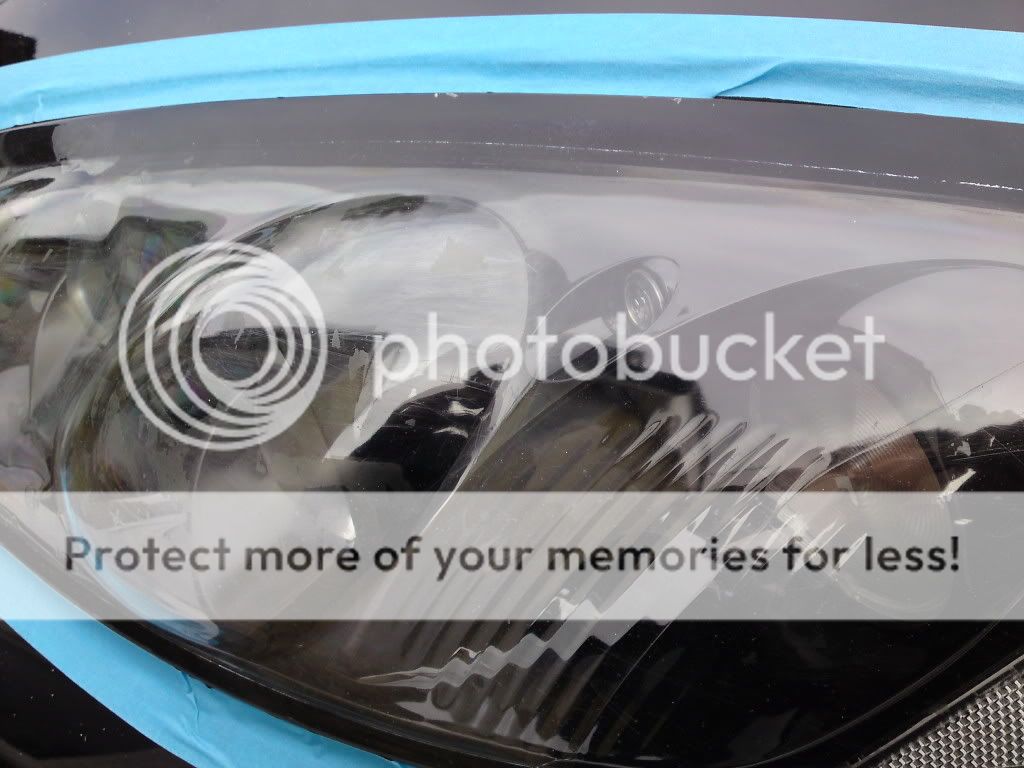
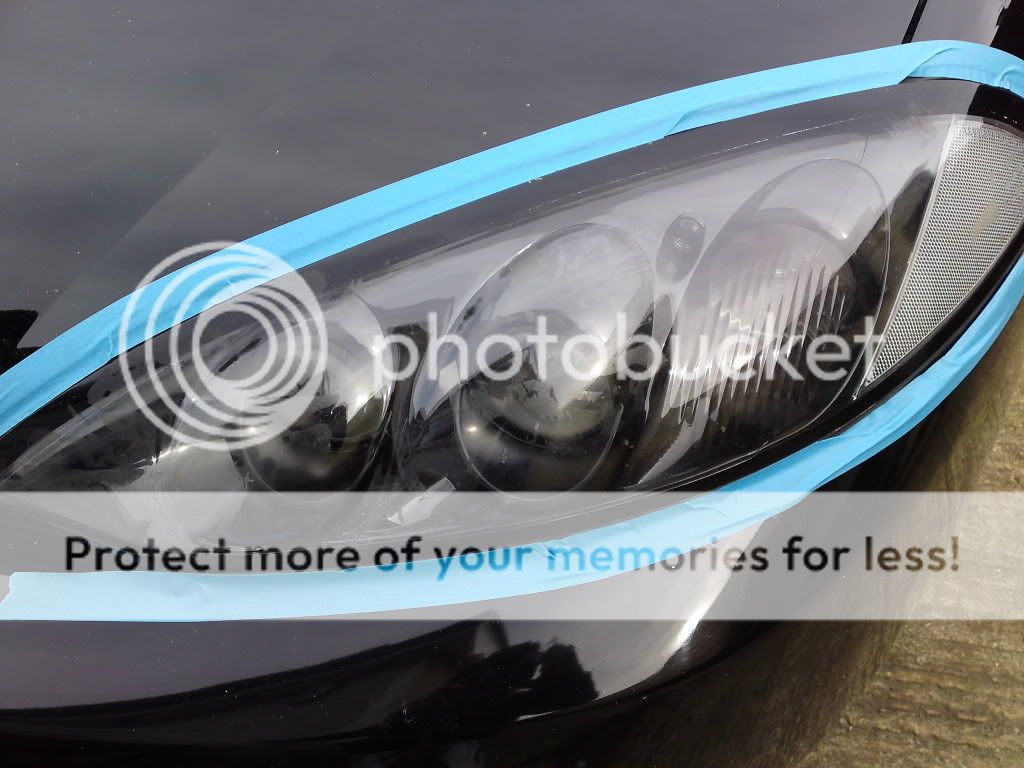
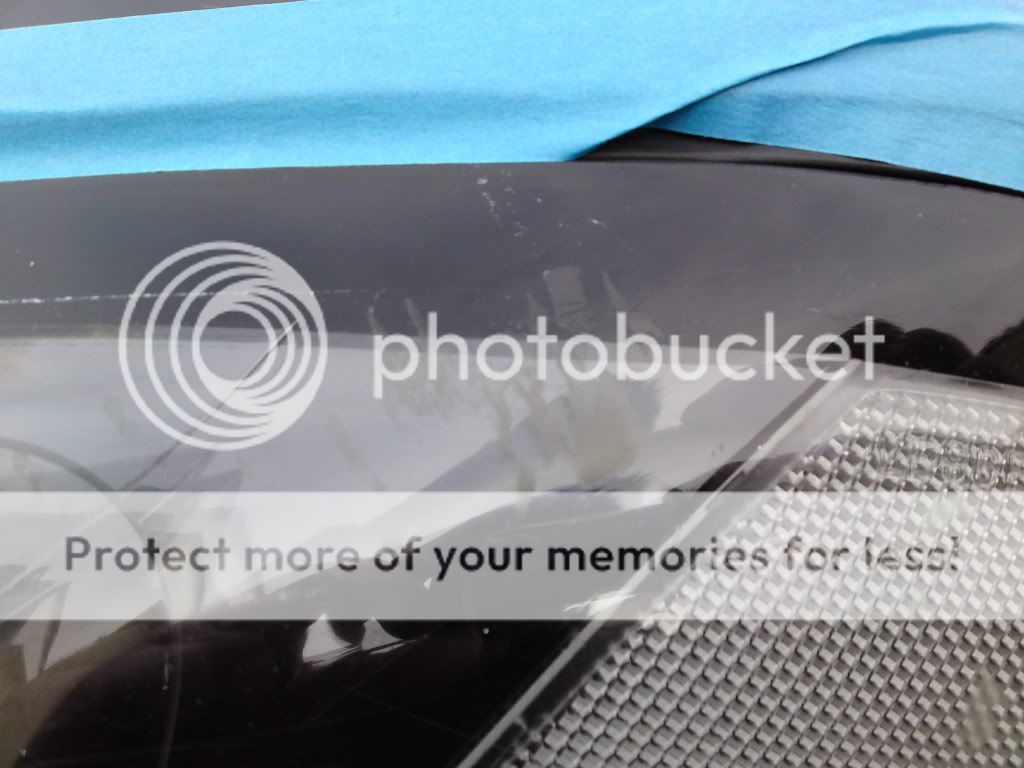
I started with 1200 wet and dry to see if that would suffice in removing everything......plus it was the lowest number grit I had left.
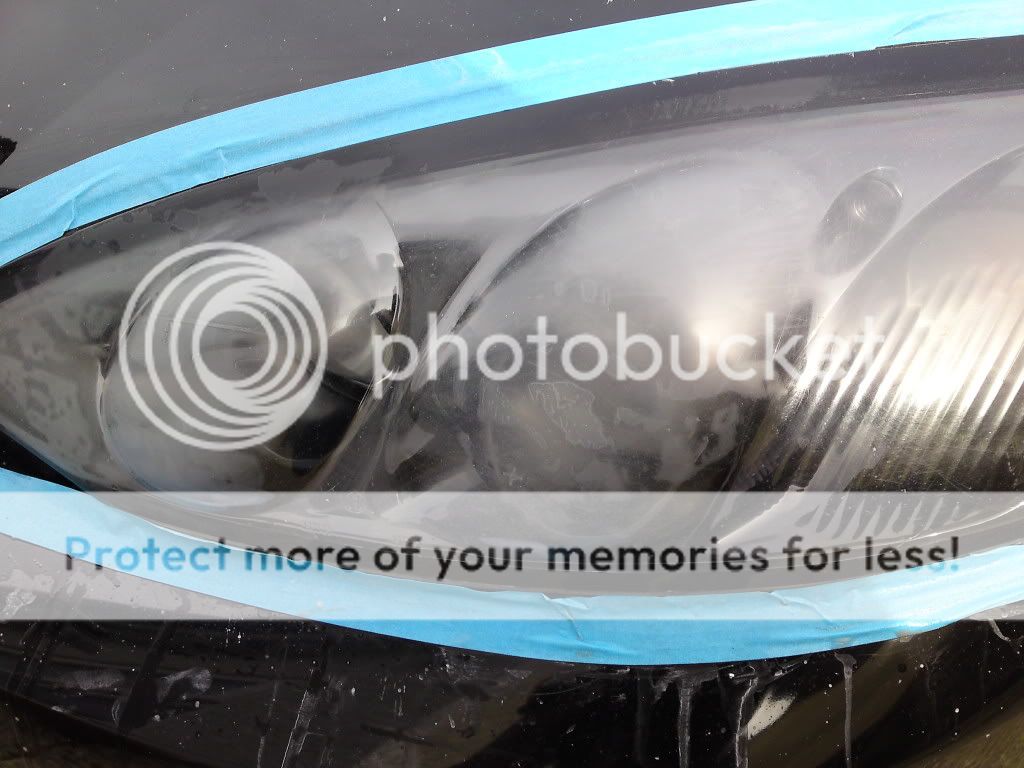

Not good enough, so a second going over. Again, with 1200 grit wet and dry.
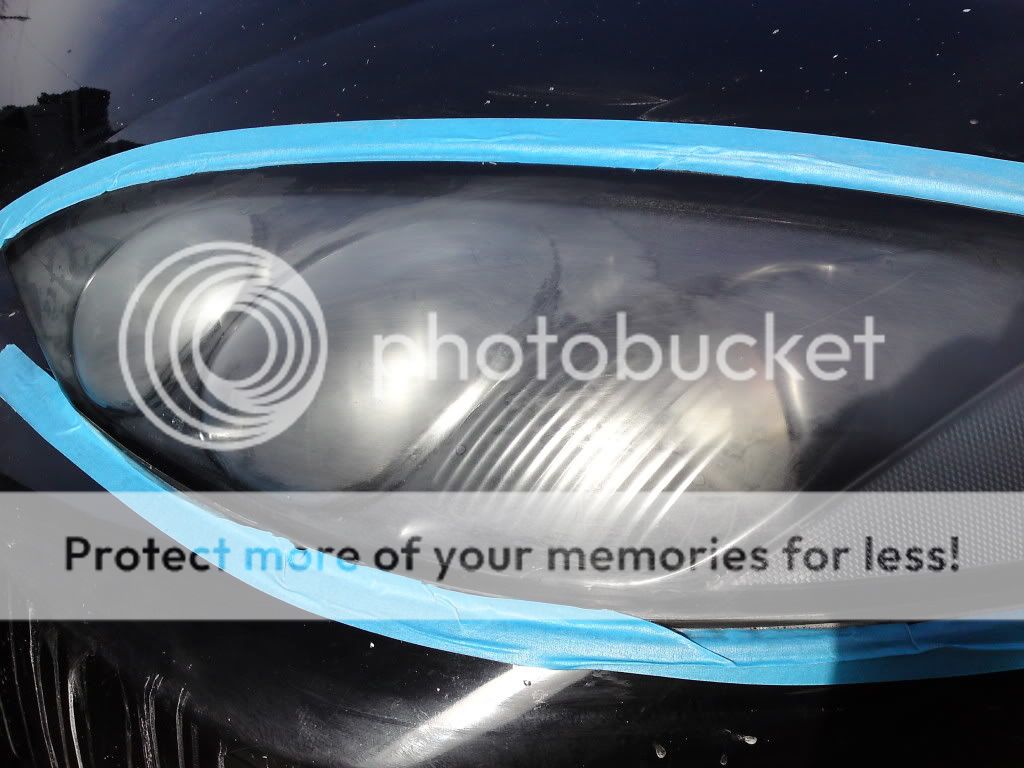
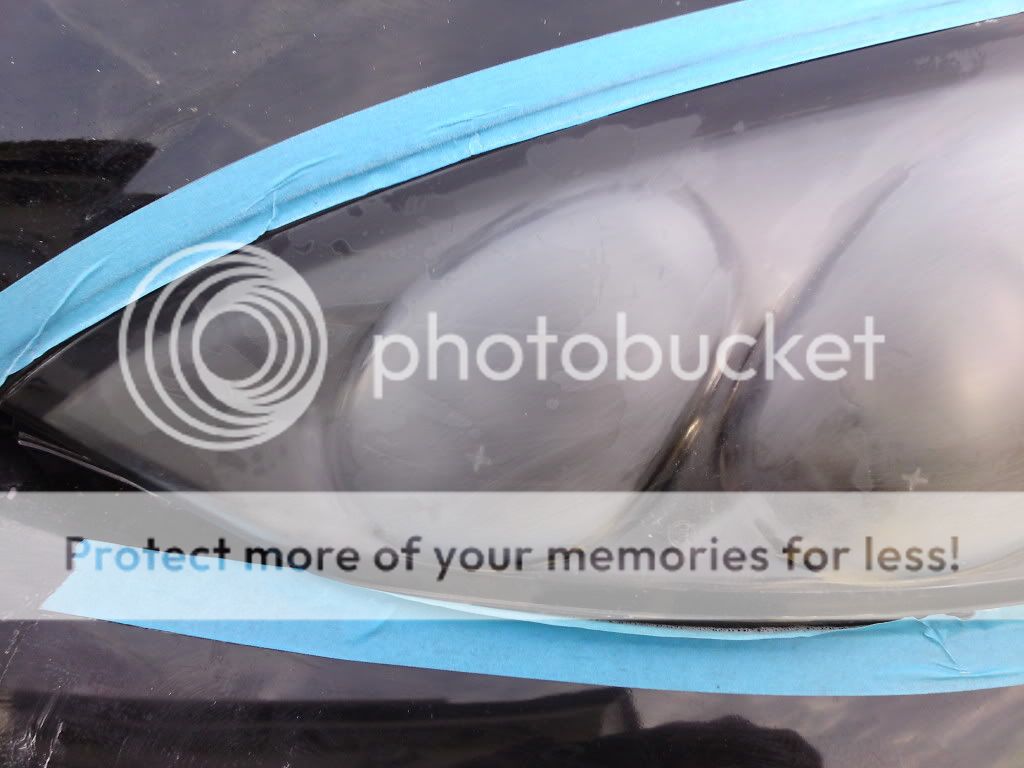
Again, not good enough, so off to Halfords for some 600 and 800 grit wet and dry. This is the light after a good going over with 600 grit
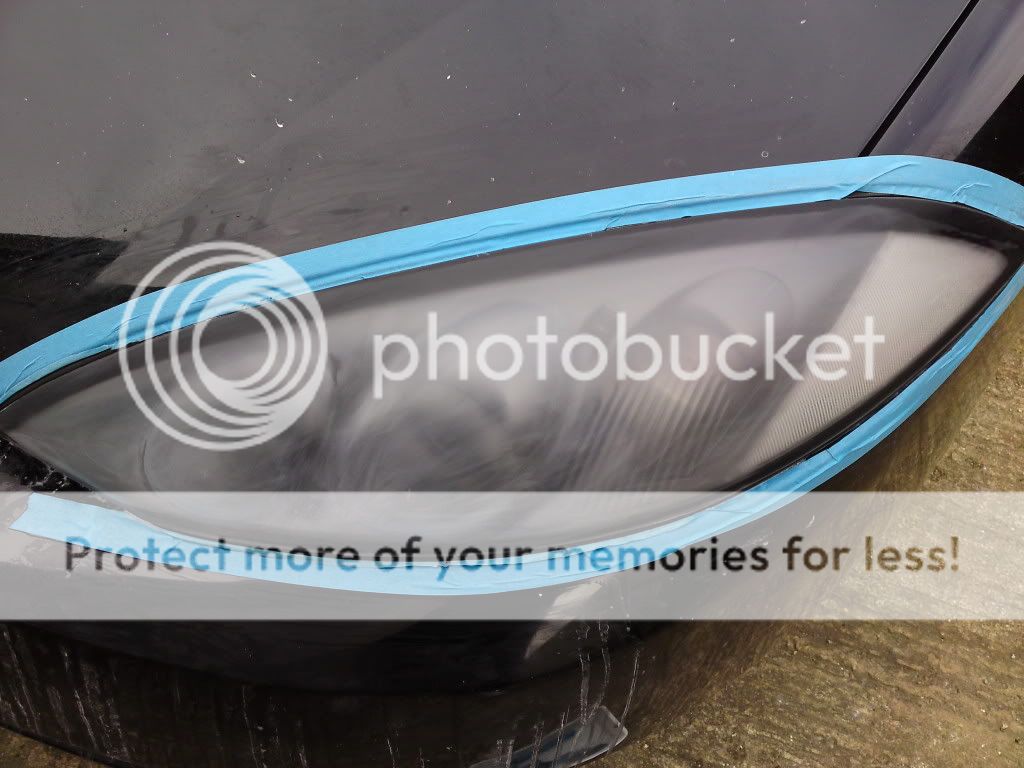
This is it after 800 grit.
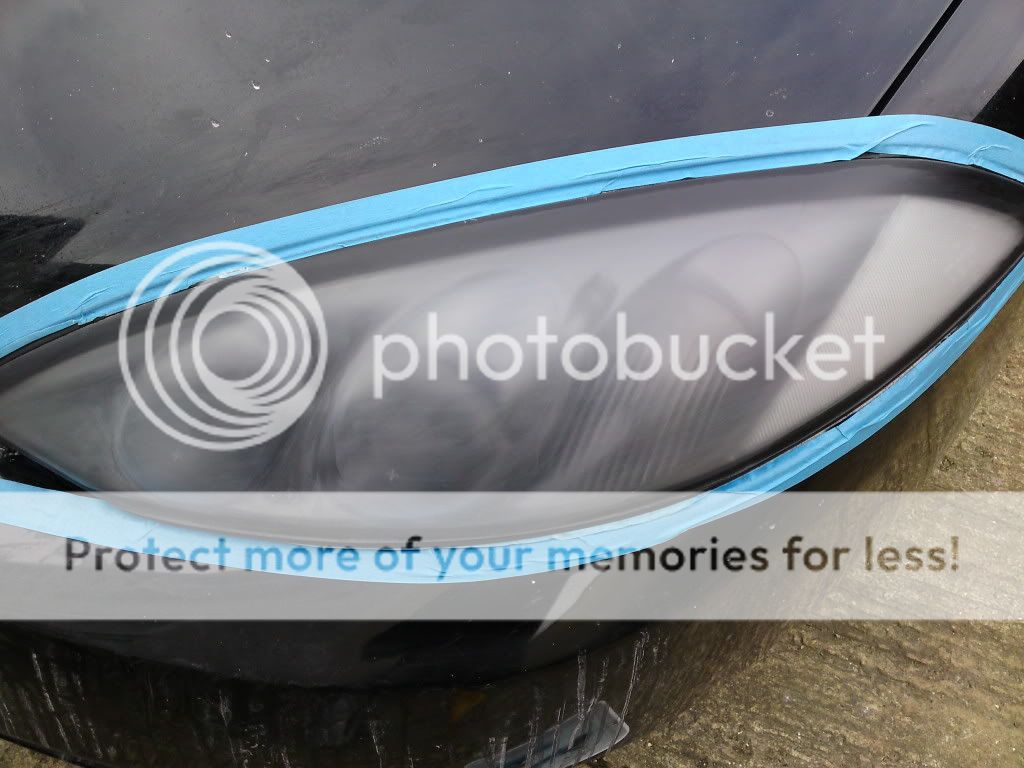
This is it after 1200 grit.
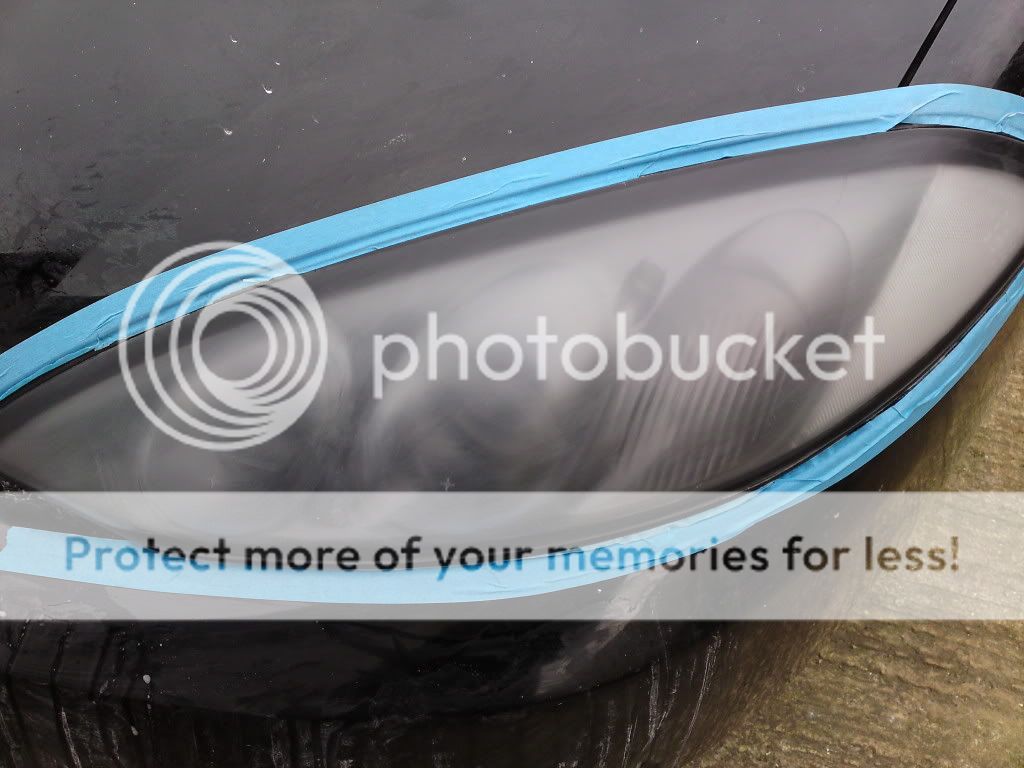
TBH, in the photos it doesn't look very different through the stages, but in real life you can see a subtle difference. Like the wheels above, I then had to stop as I need my higher grit wet and dry before I continue.
Like I said, doesn't seem a lot, but I spent over 2 hours on the headlight so far (would be so much quicker and easier if the headlights were flat), and another 3 hours on the wheels.
Hope to get the sandpaper tomorrow.......no movement on the touch up paint as the weather looked like it was going to rain at any moment all day today so didn't want to risk it.
I tackled all 4 rims with 1200 wet and dry. The ones in the back weren't done at the time of the photo.
Next I tackled them with 1500 grit wet and dry.
I couldn't do any more as my order of 2000, 2500 and 3000 grit wet and dry paper didn't arrive today like I had hoped.
When it does arrive, I shall polish the lip right up to 3000 grit.
I then moved onto the passenger side headlight. God knows what the previous owner had done to it. My guess is some sort of euro light sticker (for driving in France or something - clearly he didn't know about the lever behind the lights :mad2: ), which he then removed with a knife......leaving a load of sticky residue to bake into the plastic lense over the years. Remind me to kick him in the nuts if I ever see him !
I started with 1200 wet and dry to see if that would suffice in removing everything......plus it was the lowest number grit I had left.
Not good enough, so a second going over. Again, with 1200 grit wet and dry.
Again, not good enough, so off to Halfords for some 600 and 800 grit wet and dry. This is the light after a good going over with 600 grit
This is it after 800 grit.
This is it after 1200 grit.
TBH, in the photos it doesn't look very different through the stages, but in real life you can see a subtle difference. Like the wheels above, I then had to stop as I need my higher grit wet and dry before I continue.
Like I said, doesn't seem a lot, but I spent over 2 hours on the headlight so far (would be so much quicker and easier if the headlights were flat), and another 3 hours on the wheels.
Hope to get the sandpaper tomorrow.......no movement on the touch up paint as the weather looked like it was going to rain at any moment all day today so didn't want to risk it.
Last edited:
Is anything above 1200 grit a special order then? i.e one can't just pop down to Homebase and get some? I'm watching something on eBay, if I win it I'm going to attempt to paint in which will involve some rubbing down. I'm quite prepared to spend as many evenings as necessary to rub it down with progressively finer and finer papers to get the best finish I can. As I've never painted anything or rubbed anything down before in my life, the results will probably be 'interesting'!
Probably a daft question, but when you paint something (using a spray can), are you supposed to rub the actual paint down, then laquer it, then rub the laquer? Or just paint it, laquer it, rub it?
Probably a daft question, but when you paint something (using a spray can), are you supposed to rub the actual paint down, then laquer it, then rub the laquer? Or just paint it, laquer it, rub it?
this is going to look better than new when you have finished.
credit it to you. the new owner will be a very lucky so and so
credit it to you. the new owner will be a very lucky so and so
I didnt go far enough with my NS light and need to have another go at it.
As for painting / rubbing...Personaly if im painting with metalic i dont rub the paint down before laquer as I have found it dulls it.
As for painting / rubbing...Personaly if im painting with metalic i dont rub the paint down before laquer as I have found it dulls it.
What an awesome job, particularly bearing in mind you intend to sell after all that hard work. :yikes:
I can see how this will deffo make the car more attractive & saleable at the end, but all the hours & expensive materials being used will probably not have a huge impact on the selling price.......this seems to be partly a labour of love & partly the passion of a perfectionist, I only hope the new owner looks after it, after such an amazing restoration.:yesnod:
I'm watching this well documented & illustrated thread with great interest, keep it up shagmonkey & good luck with the sale mate.
B
Barry Harker
WOW Your Interior looks FANTASTIC !
How diffacult was it to take all that out ?
I want to respray tha Plastic Interior in My car but in a Dark Mettalic Graphite,
good job so far,
All the best,
Barry.
How diffacult was it to take all that out ?
I want to respray tha Plastic Interior in My car but in a Dark Mettalic Graphite,
good job so far,
All the best,
Barry.
I think so thats not an un-reasonable price Paul for some quality detailing work. I can see it now, drop your cat off at Pauls go on Holiday for a week or use the busIf only I lived a bit closer :sad:
Think you might have a big queue soon Paul

shocked then come back and its :yikes: new car almost Drop the car off at Paul's, get Joanne to drive me the 10 miles home, ride my bike to work for a week....
I don't care where you live. the wife says I can have this as a birthday present. book me in for a sunny week in july !!!
what is the list of equipment you need to do all this?
I know another member (matthewjones?) from welsh wales has a detailing business.
Would quite like to try this
I know another member (matthewjones?) from welsh wales has a detailing business.
Would quite like to try this
Relliott6879 - For smooth plastics, like the ones on the dash, you would rub down the plastic to provide a good "KEY". Then build up a number of layers of primer. Then rub down with 1200 or 1500 wet and dry paper so it feels glass smooth. Then you would paint. Again you would build up a number of layers before rubbing down again with 1200 or 1500 wet and dry. If it's a mettalic paint, it will make the paint go very dull and almost matt. This is correct and needs to look like this for the lacquer to do it's work. The finish should again be glass smooth. Then build up a couple of layers of laquer. I then go over the laquer with some very micro fine polish which smooths the laquer down to give it it's extra shiny finish.
If you are painting other more textured pieces like the A, B and C pillar covers, once painted with lacquer, I don't do any final polish as there is no point. You also wont get each layer glass smooth for obvious reasons.
Scunnycougar - The items I have used for this are listed below:
DAS-6 Dual Action polisher
Menzerna Power Gloss Cut 5
Menzerna Intesive polish cut 3.5
Menzerna Super Finish cut 2.5
Menzerna Final Finish cut 1.5
Menzerna coumpounding pads
Menzerna polishing pads
Menzerna finishing pads
PoorBoys Black Hole Glaze
DoDo Juice Purple Haze wax
Chemical Guys Maxi Suds II
Chemical Guys Strong Wash
Meguiars clay bar
Meguiars quick detailer
Premium Blue Rim and wheel cleaner
Poorboys natural look dressing
Meguirs PlastX
303 Aerospace protectant
Gliptone Liquid leather cleaner
Gliptone Liquid leather conditioner
Carlack glass sealer kit
Meguiars Gold class trim detailer
Various sponges, a number of microfibre towels, wet and dry papers, detailing brushes (for all the hard to reach places), Dyson cleaner, Karcher power washer and a Hometek steam blaster.
I "think" that is everything :eek6:
Sabre Tooth - I get where you are coming from but must disagree about the difference on re-sale value. If i had just washed it with normal car shampoo and polish, not only would I be hard pressed to find anyone that would buy a Cougar with such bad paint (when there are so many out there to choose from), but there is no way in hell I would be able to ask £2k for it. I mean, look at the "before" pictures. Would you spend £2k on a Cougar that looked like that, even if mechanically it was 100% sound and with less than 50k miles on the clock?
Ace Melon - Sounds good to me. Just confirm a date nearer the time and I'll make sure I book the time off work. If the weather turns out to be poor, I have just secured use of my sisters father in laws double birth car garage. He lives 1.2 miles from me, and it has power, lights and even a great big 80's hifi Heck, he even has a snooker table and a small pool for the end of a hard day cleaning
No progress on the car so far. Postman doesn't get to me till just before 1pm :incazzato:
If you are painting other more textured pieces like the A, B and C pillar covers, once painted with lacquer, I don't do any final polish as there is no point. You also wont get each layer glass smooth for obvious reasons.
Scunnycougar - The items I have used for this are listed below:
DAS-6 Dual Action polisher
Menzerna Power Gloss Cut 5
Menzerna Intesive polish cut 3.5
Menzerna Super Finish cut 2.5
Menzerna Final Finish cut 1.5
Menzerna coumpounding pads
Menzerna polishing pads
Menzerna finishing pads
PoorBoys Black Hole Glaze
DoDo Juice Purple Haze wax
Chemical Guys Maxi Suds II
Chemical Guys Strong Wash
Meguiars clay bar
Meguiars quick detailer
Premium Blue Rim and wheel cleaner
Poorboys natural look dressing
Meguirs PlastX
303 Aerospace protectant
Gliptone Liquid leather cleaner
Gliptone Liquid leather conditioner
Carlack glass sealer kit
Meguiars Gold class trim detailer
Various sponges, a number of microfibre towels, wet and dry papers, detailing brushes (for all the hard to reach places), Dyson cleaner, Karcher power washer and a Hometek steam blaster.
I "think" that is everything :eek6:
Sabre Tooth - I get where you are coming from but must disagree about the difference on re-sale value. If i had just washed it with normal car shampoo and polish, not only would I be hard pressed to find anyone that would buy a Cougar with such bad paint (when there are so many out there to choose from), but there is no way in hell I would be able to ask £2k for it. I mean, look at the "before" pictures. Would you spend £2k on a Cougar that looked like that, even if mechanically it was 100% sound and with less than 50k miles on the clock?
Ace Melon - Sounds good to me. Just confirm a date nearer the time and I'll make sure I book the time off work. If the weather turns out to be poor, I have just secured use of my sisters father in laws double birth car garage. He lives 1.2 miles from me, and it has power, lights and even a great big 80's hifi
Heck, he even has a snooker table and a small pool for the end of a hard day cleaning No progress on the car so far. Postman doesn't get to me till just before 1pm :incazzato:
Sabre Tooth - I get where you are coming from but must disagree about the difference on re-sale value. If i had just washed it with normal car shampoo and polish, not only would I be hard pressed to find anyone that would buy a Cougar with such bad paint (when there are so many out there to choose from), but there is no way in hell I would be able to ask £2k for it. I mean, look at the "before" pictures. Would you spend £2k on a Cougar that looked like that, even if mechanically it was 100% sound and with less than 50k miles on the clock?
.........No, I wouldn't pay 2k in the original condition, I'd factor in all the work that needs doing & make an offer, if everything else was mechanically sound & under 50K on the clock.......you are quite right.")
Being a buyer's market with 2nd hand cars at the moment, it is rare to get what you are asking without getting knocked down, but if this cat is as you say, has good history & after your marvelous restoration mate, I hope you find an enthusiastic buyer from this club, as it would deffo be worth it IMO, again, I wish you all the best with the sale matey.
M
myk
now that is a transformation , i'd love to have the patience to do that to my car
really interesting thread and it's amazing to see it through the stages ,nice job
really interesting thread and it's amazing to see it through the stages ,nice job
Relliott6879 - For smooth plastics, like the ones on the dash, you would rub down the plastic to provide a good "KEY". Then build up a number of layers of primer. Then rub down with 1200 or 1500 wet and dry paper so it feels glass smooth. Then you would paint. Again you would build up a number of layers before rubbing down again with 1200 or 1500 wet and dry. If it's a mettalic paint, it will make the paint go very dull and almost matt. This is correct and needs to look like this for the lacquer to do it's work. The finish should again be glass smooth. Then build up a couple of layers of laquer. I then go over the laquer with some very micro fine polish which smooths the laquer down to give it it's extra shiny finish.
If you are painting other more textured pieces like the A, B and C pillar covers, once painted with lacquer, I don't do any final polish as there is no point. You also wont get each layer glass smooth for obvious reasons.
It's an IMRC cover, which I'll be painting (or attempting to!) in a solid, non metallic colour. As I said, I'm prepared to take my time with it, as I want as near to the finish you'd want to see on an exterior panel as possible. I'm doing the experiment with a second hand one so if it all goes wrong I can just bin it. The only problem I can see is that it's already been painted by someone before, so I'm guessing I need rub all this off before I start.
Potentially daft question number 2: Is Hammerite smooth from a spray can a suitable paint for this, and will it respond well to rubbing down and laquer?
Hammerite might not be suitable for Plastic mate, I painted my IMRC cover there is a thread somwhere on here about it, used ordinary primer and aerosol paint from Halfords.
OK. No postman at all today :mad2:
This meant all I could do was crack on with the engine bay and door jams etc.
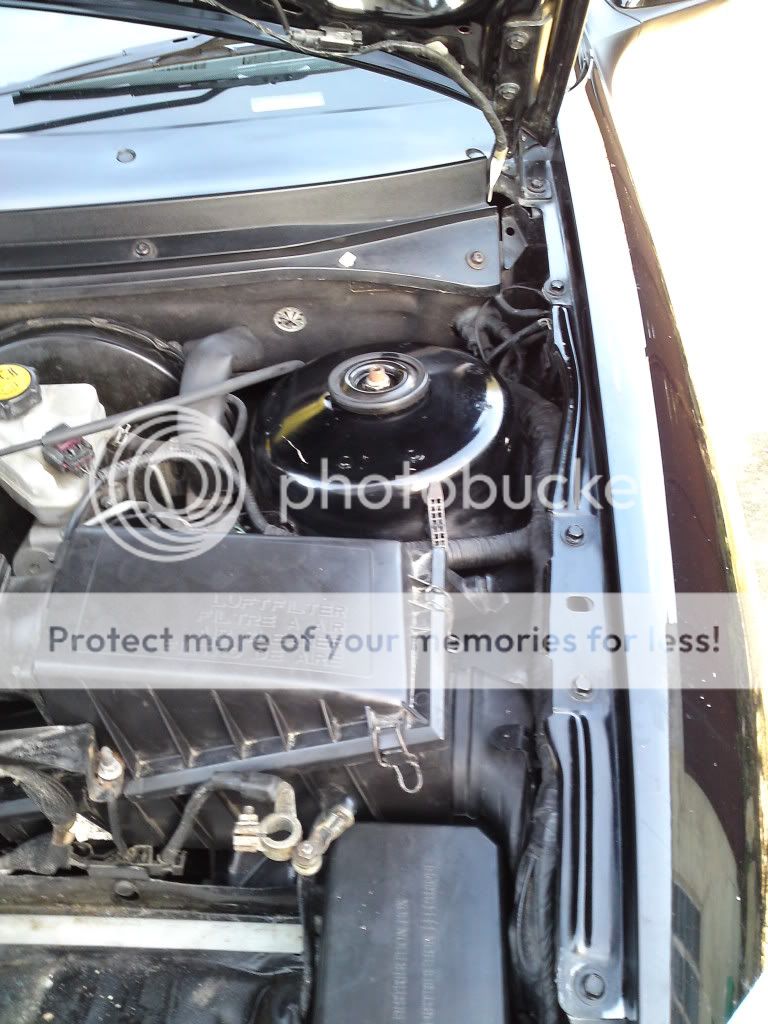
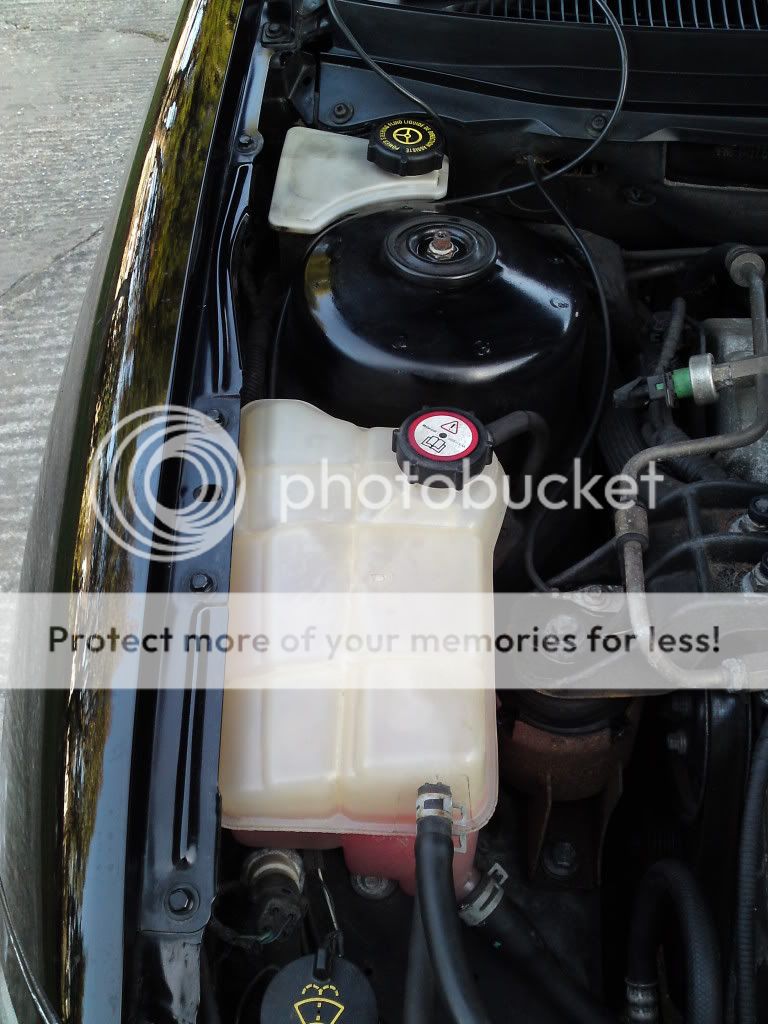
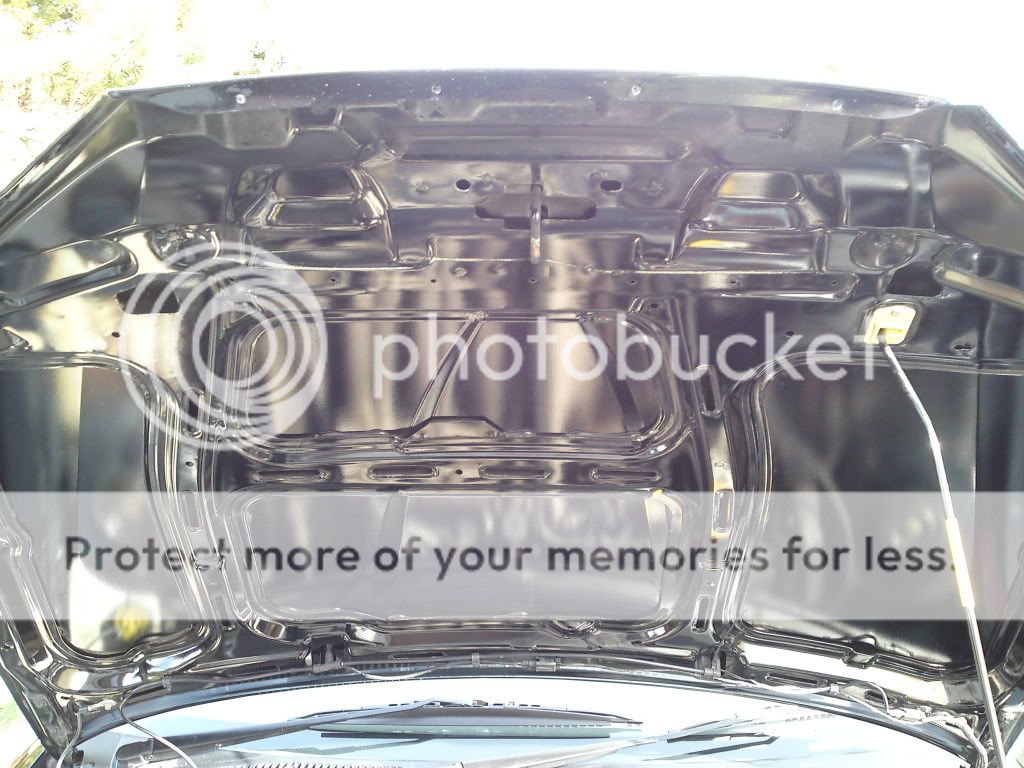
Engine bay and bonnet before:
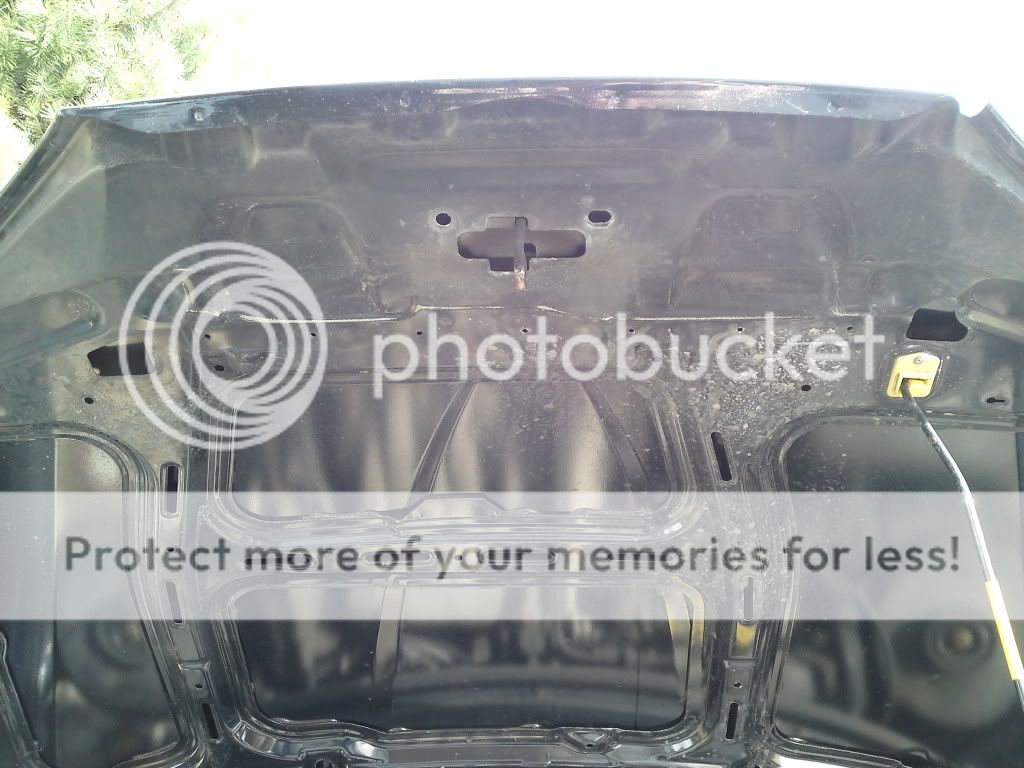
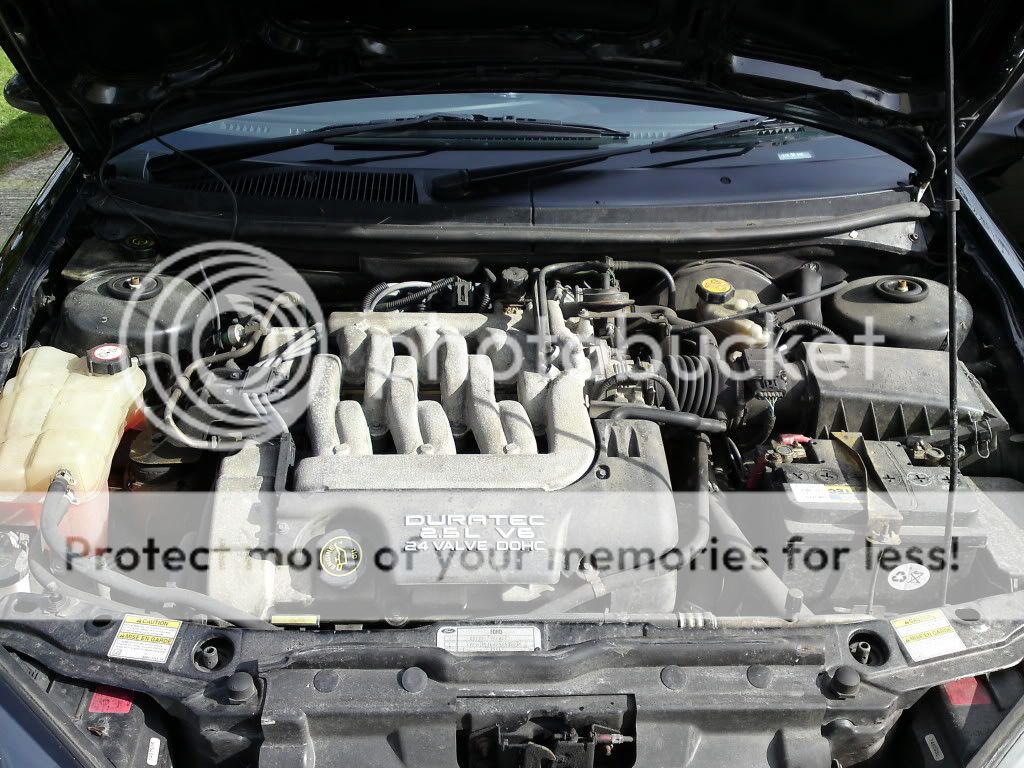
It looks like someone at some point covered the whole of the engine bay in some form of waxy sealant type stuff. This has baked on over the years and I couldn't shift it for love nor money. I tried engine degreaser, steam, T cut, white spirit.....you name it, yet it all made hardly any difference !
Battery is out being charged in the house.

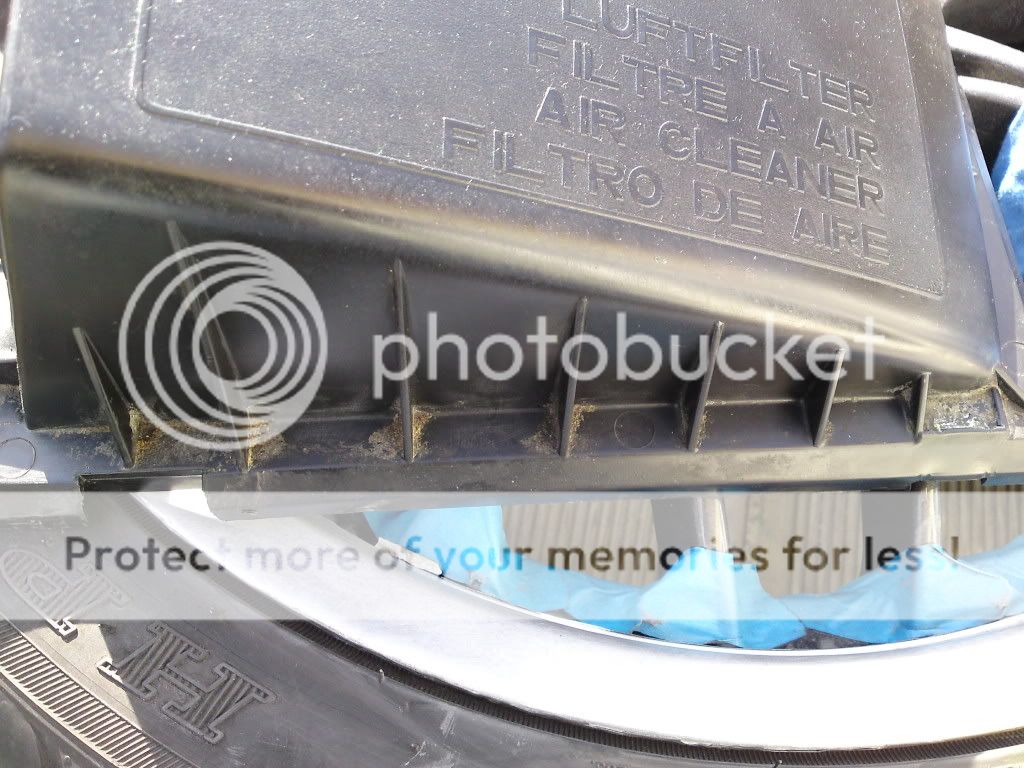
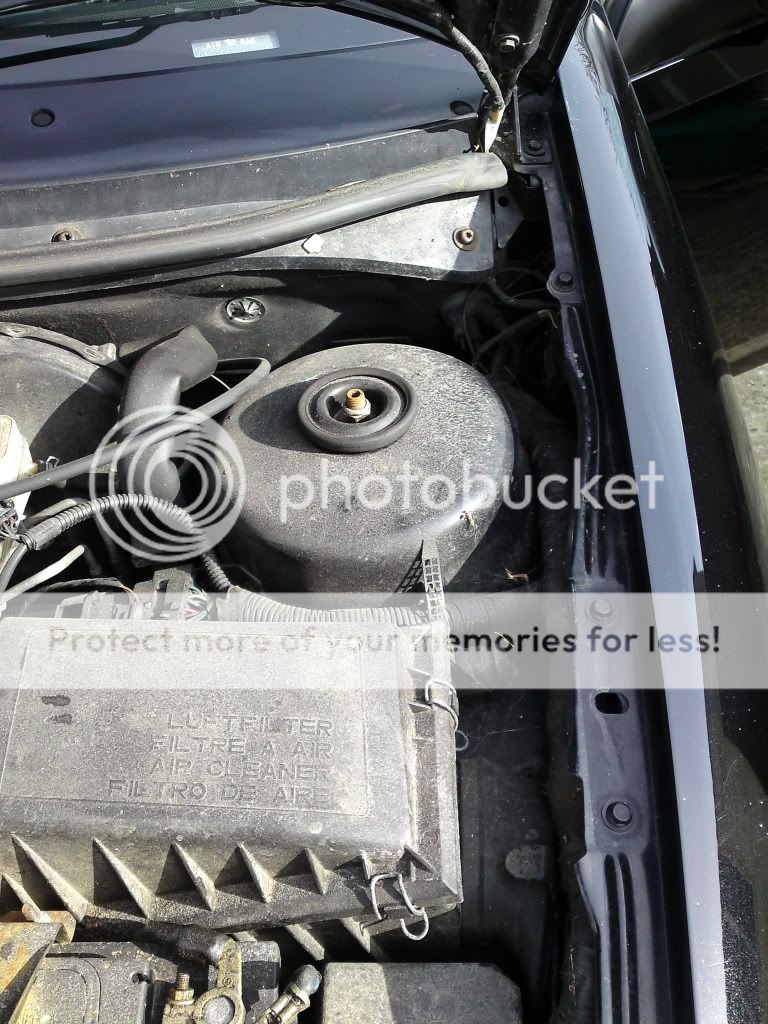
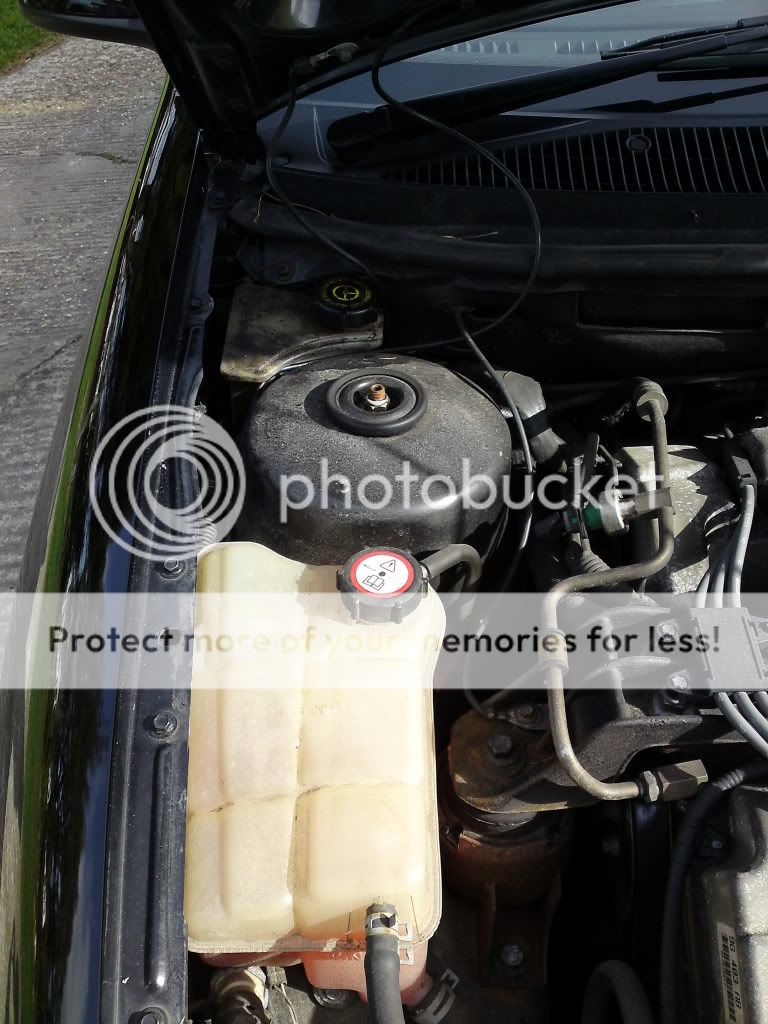
Anyhow, I did the best I could, but forgot to take a picture of the whole engine bay once I had finished. Will do that tomorrow. I did remove the airbox and fuse lid and gave them a good scrub in the kitchen sink, but yet again, I couldn't shift all the waxy substance. While the air filter was out, and despite it being changed only 5k miles ago, I took a stiff paint brush and gave each crevice a good clean out.
This is the front bumper and the damage the plastic "Brick" has done over the years :eek6:
I will tackle the front bumper after I have finished the headlights and my new cutting pads have arrived.
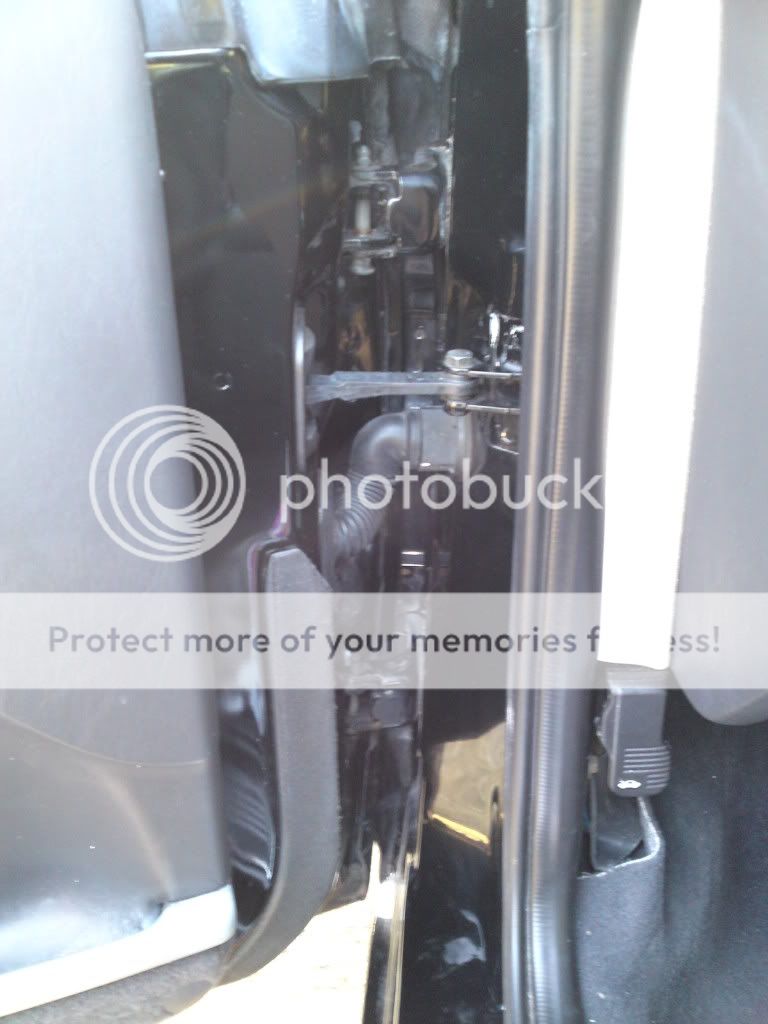
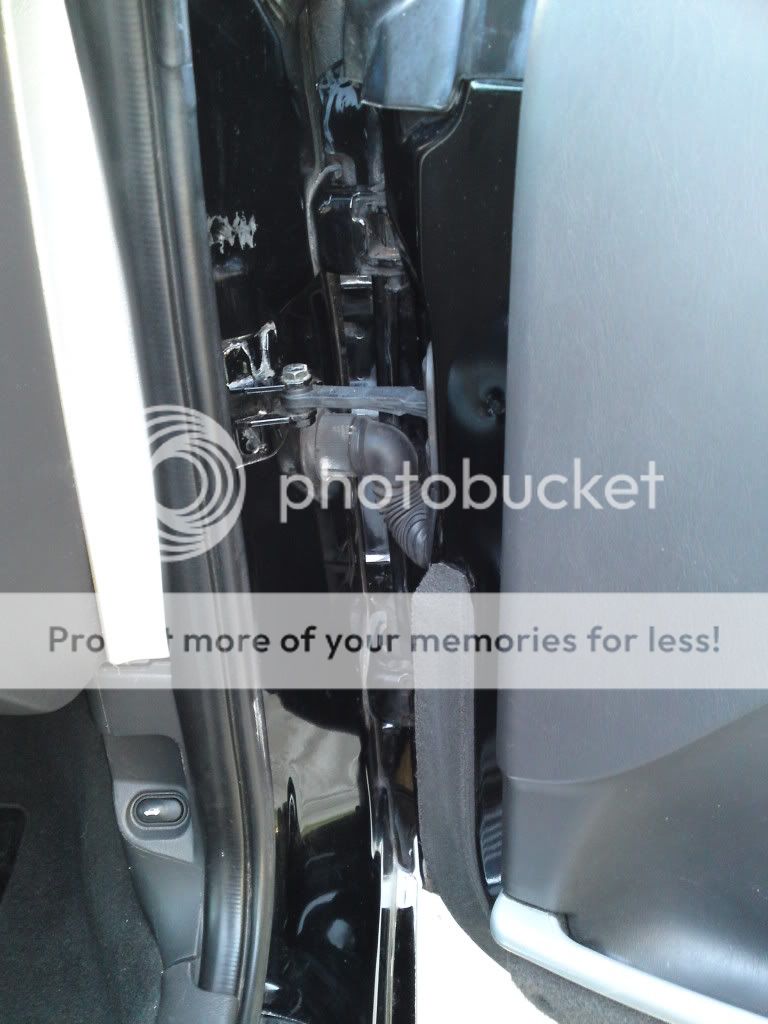
I then moved onto the door jams. Before:
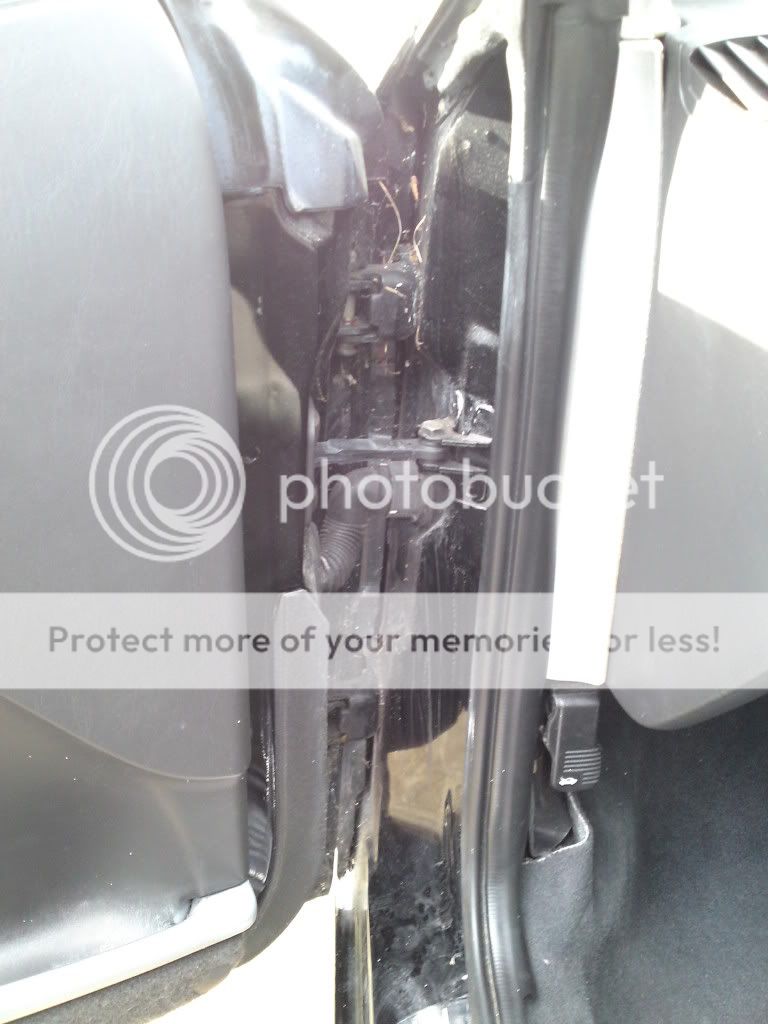
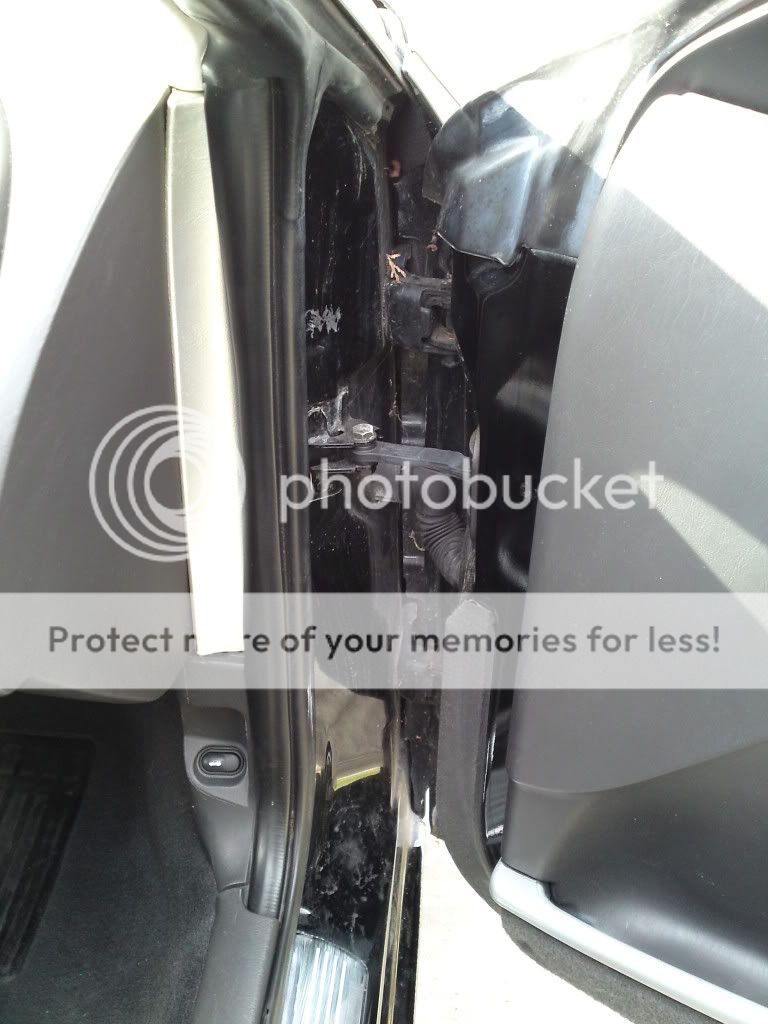
After:
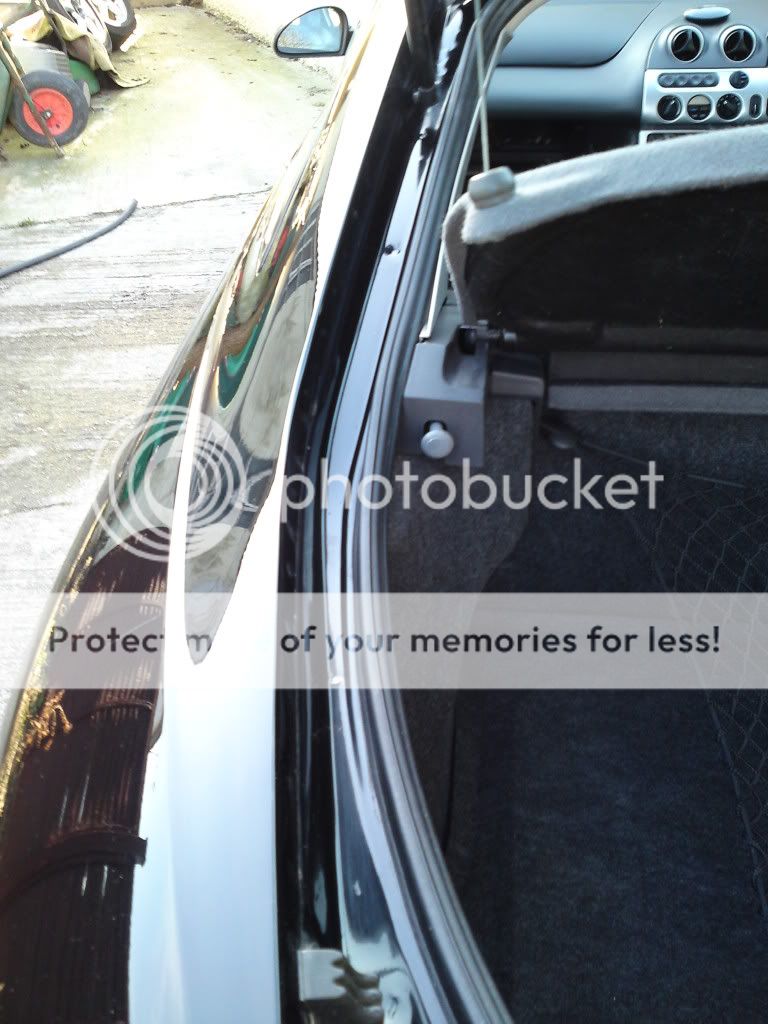
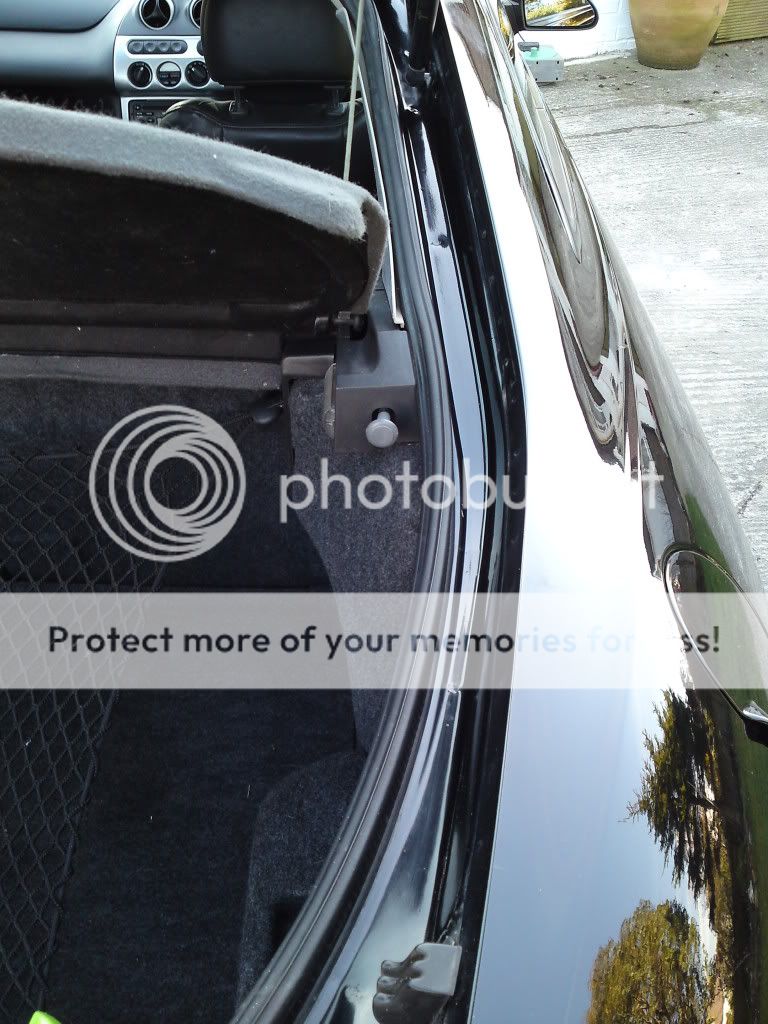
Then the rear rain gullys. Before:
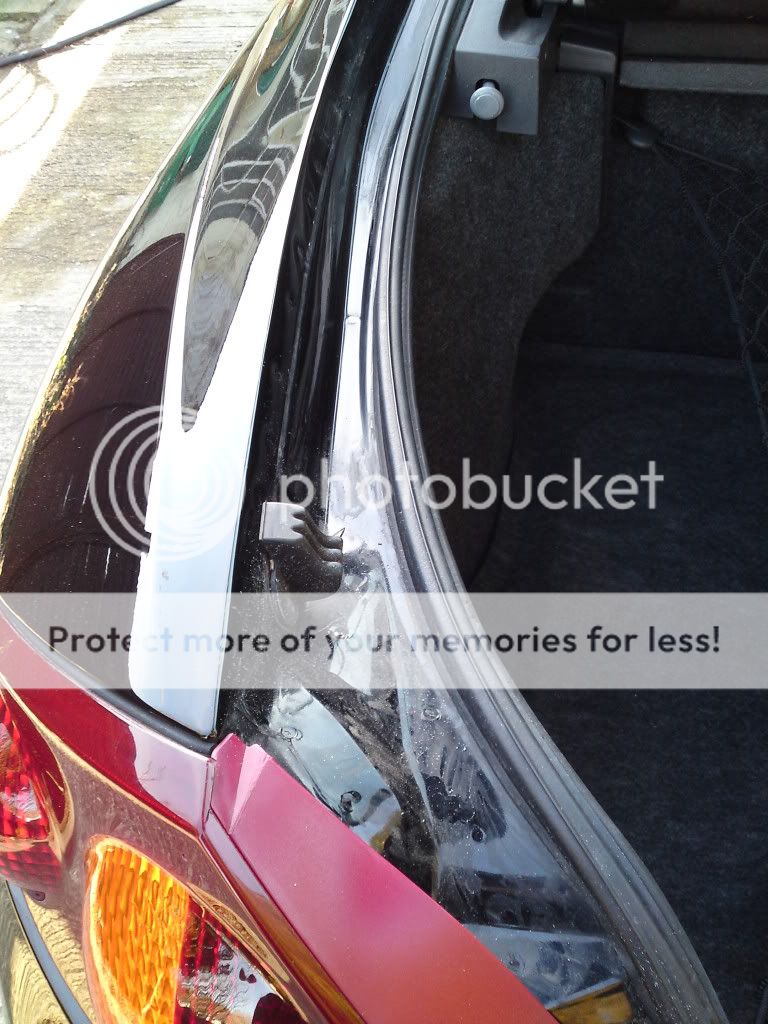
I don't seem to have a "before" of the drivers side ut:
ut:
After:
The rest of the day was spent sorting out my shed so I could move all the car cleaning stuff out of the kitchen, as SWMBO clearly got out of bed the wrong side today :incazzato:
Fingers and toes crossed that the sandpaper comes tomorrow.
This meant all I could do was crack on with the engine bay and door jams etc.
Engine bay and bonnet before:
It looks like someone at some point covered the whole of the engine bay in some form of waxy sealant type stuff. This has baked on over the years and I couldn't shift it for love nor money. I tried engine degreaser, steam, T cut, white spirit.....you name it, yet it all made hardly any difference !
Battery is out being charged in the house.
Anyhow, I did the best I could, but forgot to take a picture of the whole engine bay once I had finished. Will do that tomorrow. I did remove the airbox and fuse lid and gave them a good scrub in the kitchen sink, but yet again, I couldn't shift all the waxy substance. While the air filter was out, and despite it being changed only 5k miles ago, I took a stiff paint brush and gave each crevice a good clean out.
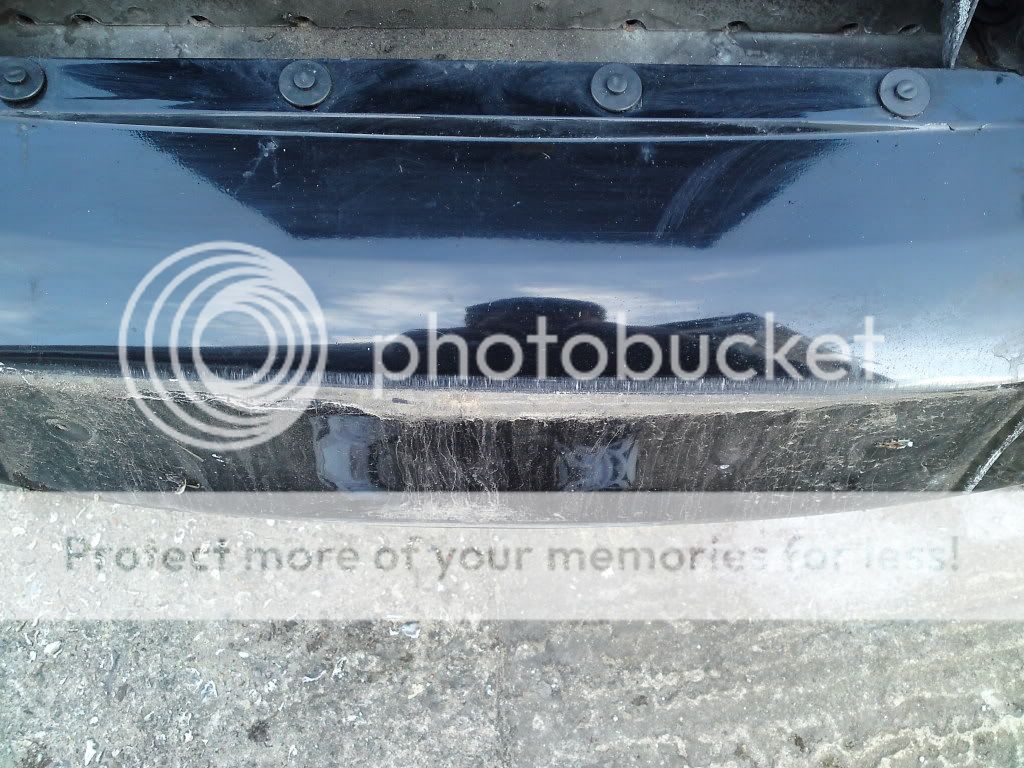
This is the front bumper and the damage the plastic "Brick" has done over the years :eek6:
I will tackle the front bumper after I have finished the headlights and my new cutting pads have arrived.
I then moved onto the door jams. Before:
After:
Then the rear rain gullys. Before:
I don't seem to have a "before" of the drivers side
ut:After:
The rest of the day was spent sorting out my shed so I could move all the car cleaning stuff out of the kitchen, as SWMBO clearly got out of bed the wrong side today :incazzato:
Fingers and toes crossed that the sandpaper comes tomorrow.