What Have You Done to Your Cougar Today?

Sam, if you're going to do what I think you're going to do, start the car and let it get up to temperature (and therefore a natural idle in closed loop). Just in case.

As for the TB gasket, I highly recommend one of these - though check the compatibility/aperature first. I've only used them on ST220s, and I'm not sure if the slots/vents on the ST220 are the same.
Ordered the gasket you both linked to as I need it regardless.

My plan for the cable tie was to remove both broken ends and loop around, and then squeeze together with another one in the middle, to make a figure 8. However if I can get away with Dan's plan that's where I'll be going anyway.

To the loft!
 
Avanti, signor. Good luck, and keep updating!

::edit:: Also, I meant to say ST200 in my post above.I think that the ST220 is the same, but please check before spending any of your hard-earned.
 
Cheers Dan, I should've been clearer in thinking it wouldn't mate up without a gap, but clearly not!

Anyway my boxes in the loft have yielded a fruitful harvest. Ready for some photos of the bounty?

IMG_0484.jpg

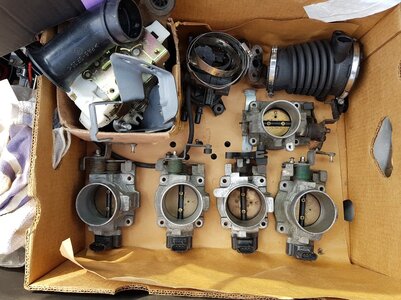
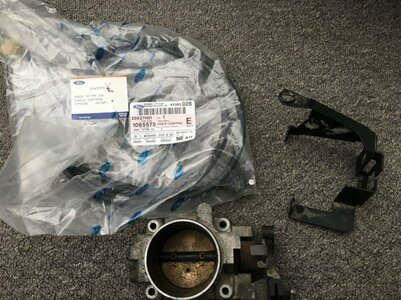
ST200 TB and I assume appropriate cable? Came with the scrapper never looked at and chucked in a box.

IMG_0487.jpg

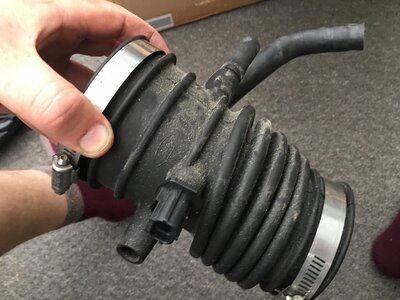
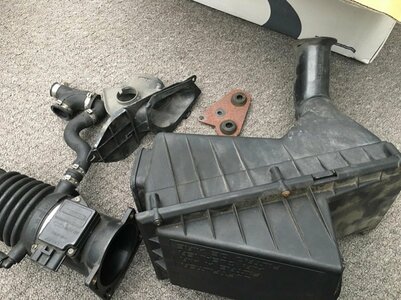
Airbox #1. I believe this is the ST200 one, although the bellows look different (or is that just me?). Also has one of those mesh filters inside.

IMG_0488.jpg

Random bellows.

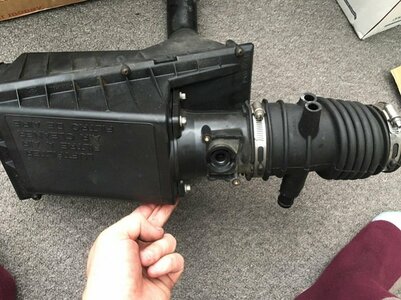
IMG_0491.jpg

Airbox #2. I didn't know I had these, I think they must be ST200 too? Something missing from the top, MAF? Paper filter installed.

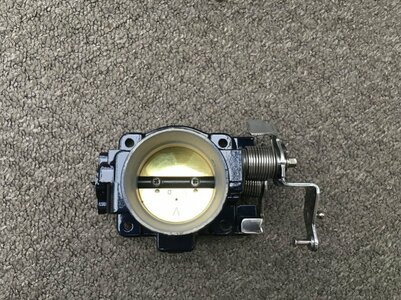
IMG_0492.jpg

The bit that matters, a nice shiny ST220 TB. Oh what's that on the side...

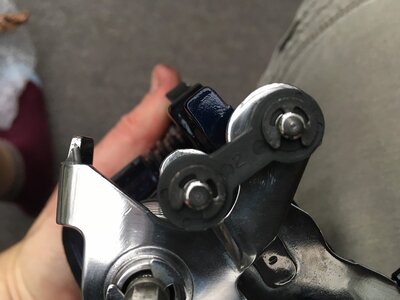
IMG_0493.jpg

Boom! Looks the same so if it easy to remove, this may be the temporary fix, seeing as the gasket won't be here until later in the week it means I'm not stuck blocking the drive. This is important for the domestic relations.

And lastly, just because I was taking snaps

IMG_0494.jpg

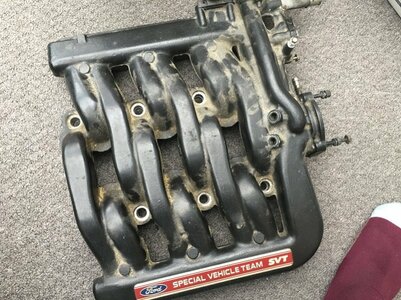
The ST200 UIM, bought at the same time as the scrapper. Have gaskets etc in the Box Of Doom along with other odds and sods, but that'll be for later.

So hopefully I can patch up the TB to make it mobile and then switch back when the gasket lands. (y)
 
Sam, the air temp sensor is on the bellows on the 200 version rather than on the airbox itself. Unfortunately the original connector won't reach it in it's new position so you have to either lengthen the wiring or cut a hole in the airbox in the same position as the original and bung the hole in the bellows.
You may also find the 200 bellows are slightly shorter than the original which makes refitting a bit of a trial. I found by connecting the bellows to the TB and the airbox lid with the lid removed I could get more purchase on the lid to pull it back into position rather than trying to fit the bellows with both ends loose.
 
There's a dilemma. I hate hacking things from the original when working but needs must.

What's the common preference, is there one?
 
As Andy said cut a hole with two tabs on the side of it to accept the air temp sensor.

Easy way to make sure you get it right is to look at your standard box and make a hole of similar shape ;)

Also if your just trying to move from the drive if everything is pretty flat you'll be able to do that just on the clutch with no throttle

Have you got the bracket to go with the st220 TB?
 
I did exactly that myself. Drill a hole in the box of the appropriate diameter, and then Dremel/file/saw the notches for the locating pegs.

The only difference is that I didn't need to bung anything - I used the standard ST24 bellows. I...um, don't recommend doing this unless you have a masochistic streak.

One last thing - and Tony will like this - please ensure that the mating surfaces of your UIM and LIM are scrupulously clean because otherwise you will have an air leak and a car that will not idle. Use a Stanley blade to scrape off the carbon, but for pity's sake make sure you don't scratch the aluminium. Use some sort of straight-edge - a steel ruler is what I used - to ensure you've got no gaps.

Good luck! I know you've got this but never be afraid to ask for help. We're here for you.
 
Last edited:
Cheers chaps, the UIM will hopefully be some time away as I need to sort the LIM etc out too. If I can get away with just the TB / airbox, that'll do for now.

It sounds daft but I want to spend any extra time sorting the sills out, the LIM and UIM will be a luxury I'll reward myself when the essentials are done.

Plus I may as well do the cam covers then too.
 
Just had a quick look thru my own collection to see if I have something. Several of these have the 'dumbell' shaped bit of plastic intact, but they are all 'lefthanded' versions off autos or other related vehicles I think. I don't think that part will have changed though. If you'd like me to post you one, I could do that in the morning - please PM me.

However, rather than waiting for a replacement, could you not just draw around it and fashion something out of a random piece of plastic after drilling a couple of holes ?
20190726_152555.jpg
 
You just need to acquire one more TB and then you can have one per cylinder and pretend you've got some sort of Jag engine with individual inlets.

I look forward to seeing the cable setup and the way you set up the inlet plenum(s).
 
Just had a quick look thru my own collection to see if I have something. Several of these have the 'dumbell' shaped bit of plastic intact, but they are all 'lefthanded' versions off autos or other related vehicles I think. I don't think that part will have changed though. If you'd like me to post you one, I could do that in the morning - please PM me.

However, rather than waiting for a replacement, could you not just draw around it and fashion something out of a random piece of plastic after drilling a couple of holes ?

Another great idea, I'll have a think in the morning. The weather looks like it'll kill any plans to get under the bonnet anyway.
 
Boom! Call me Ed China.... :LOL:

After breakfast I thought I'd see how easy it is to remove the dumbell from the 220 TB. As it tuns out it wasn't too tricky bar some radial retaining ring type things. Once removed, I replaced the retaining rings to keep those safe. I felt comftable enough to try it with the TB in place in the engine.

So far so good...

Under the bonnet, and with memories of dropping the throttle retaining clip fresh in my mind, a white cloth was positioned beneath and the retaining rings removed along with two halves of the broken dumbbell. Replacing it for the 220 spare was fiddly. There's no slack so it has to be slid over both posts at the same time which required a bit of accuracy in aligning the two. The retaining rings were awkward to install (I was glad that white cloth was there...) but careful perseverance paid off. Quickly fire it up and all is good! :)

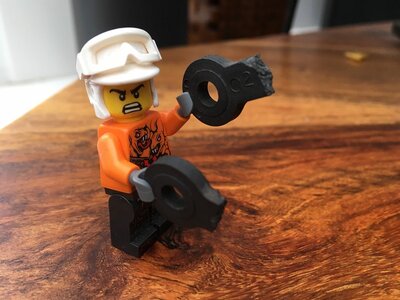
I even timed it to the fifteen minutes between downpours. The offending article is pictured below

Busted!.JPG

As you can see, Lego man is less than impressed with Ford for this.

Al, I was wondering thought if it'd be worth posting these bits to you, to see if a spare could be sorted with your 3D thingy-me-jig? I appreciate it does not seem to be a common problem (has anyone else's ever gone?), but having the capacity to create a spare anything shouldn't be overlooked?

Thanks for all the advice and suggestions, much appreciated. (y)