What Have You Done to Your Cougar Today?
- Thread starter Axximilli
- Start date
You are using an out of date browser. It may not display this or other websites correctly.
You should upgrade or use an alternative browser.
You should upgrade or use an alternative browser.
Ooh, I like the sound of those lights, maybe a project for next week.
I was also playing around with the spray painting gear where the C1 is parked up, several different size guns connected to a large compressor. Had a practice on some scrap panels and was really getting the hang of it. The C1 is going to need quite a bit of paint once the sills are done and I'm even thinking of respraying the whole car (not necessarily done by me) , it's probably just the lockdown fever talking but you never know, it's stripped down so much at the moment that it would make sense to do it now.
My current favourite is Cadbury purple metallic. :beer:
David, is that a jack and an axle stand located on the sill ? Wow your a braver man than me ! Even when my new sills are finished I wont be doing that.
Haha yeah it is! I was in two minds about jacking from the sills but the manual seems to recommend it...!
That was 20 years ago. The sills rot at both ends first, then in the middle under the B post. I recommend lifting on the sub frames or main chassis box section.
Sorry if that sounds critical David, just trying to help.
Sorry if that sounds critical David, just trying to help.
I'm not subjected to near the rust you guys are, and I have a dent in multiple of my cars from using that box section on the floor.
Unless it a car with an actual frame to lift from I wouldn't use anything under the car to lift anything.
Unless it a car with an actual frame to lift from I wouldn't use anything under the car to lift anything.
Id never lift from the box section but I would place a Jack stand on it.
Lifting by the front subframe(I know some will disagree!) And the rear subframe is the safest way IMO then Jack stands on the box section or at the rear where the 'triangle' near the handbrake cables run
Lifting by the front subframe(I know some will disagree!) And the rear subframe is the safest way IMO then Jack stands on the box section or at the rear where the 'triangle' near the handbrake cables run
I don't like lifting from the front of the front subframe in case the car walks, jack slips, and pounds the cup through the bottom of the radiator. Seen it happen too many times and I've seen a Rover Tomcat's upper slam panel thoroughly destroyed because of it.
But lifting on the front or rear subframes in general, then putting axle stands under the "frame rails" (in quotes because they're not really - box-section is probably the best description, thanks Dan) is my preferred method.
To put it another way... it's your car, your informed risk to take, and you should lift it however you're comfortable with. I won't criticise and as long as we're happy that it's safely supported, we're good to go.
Also, I want to see this car in Cadbury Purple Metallic. A very bold and unique choice and I think it'll suit her lines well!
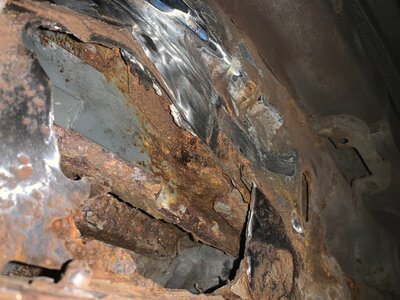
Finally got round to taking my frosty C2 for an MOT today..... Failed, but nothing I can't manage, 3 bits of welding on the sills, underneath, not on the side bit, which I am happy about, front discs and pads need replacing, so going to do the brake upgrade, Mondeo Mk3 calipers and pads and ST170 disc's, pads and disc's ordered already, and have the Mondeo calipers here too, also needs rear disc's and pads, and the normal handbrake insufficient malarki... oh and a number plate light out and headlights need cleaning up...start work on it tomorrow ....
That’ll keep you busy for a little while franspeed. Good luck with the work.
Back on lifting. I often use the trolley jack on the front subframe but on one of the main bolts to the rear of the front wheel. No danger to the rad, the jack cup would sit nicely around the bolt head but I never use the jack direct onto the vehicle. No matter where I lift there is ALWAYS a wood block in between jack and car to spread the load. I also lift on the front subframe, close to the wishbone bolts.
At the rear I lift on the subframe. I’ve placed 12 inch long wood blocks on the rear box sections with an axle stand underneath, the wood block spreads the load along the full length of the box section, I have no dents.
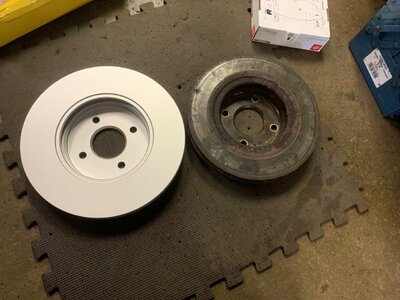
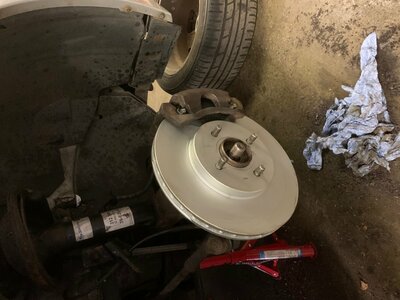
Started on the repairs for the MOT today, did the front and rear brakes, up rated brake set up on the front and new disc's and pads on the rear, along with some handbrake adjustments..... .. a few pics.. the wrong way round for some reason....
 .. so if anyone can put them the right way up, that would be greatly appreciated..
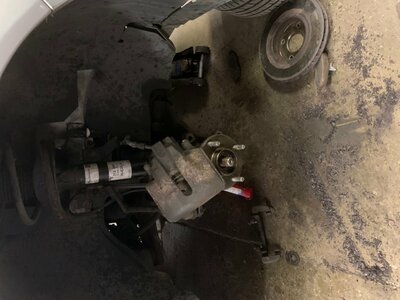
New bigger disc compared to the old one.
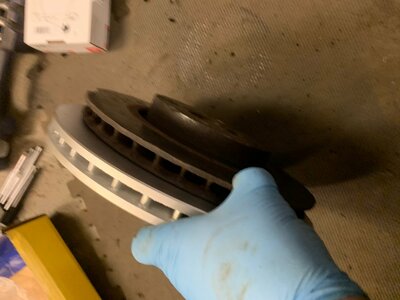
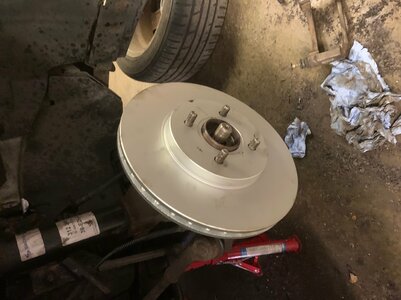
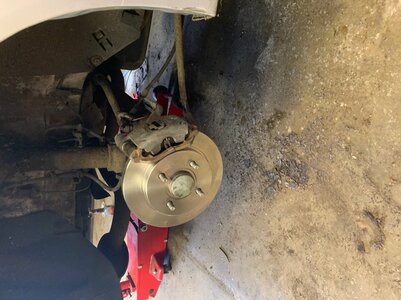
One of the holes to be welded.

New bigger disc compared to the old one.


One of the holes to be welded.

Refurbing ST200 wheels. Rather than take Matt’s half ar$ed approach, I thought I’d do it properly [emoji16]
Half way through the second day and I have just got the first one ready for painting. Starting to think half ar$ed is the way forward. [emoji1787]
Happy with my diy turntable though, makes life easier.

Sent from my iPhone using Tapatalk
Half way through the second day and I have just got the first one ready for painting. Starting to think half ar$ed is the way forward. [emoji1787]
Happy with my diy turntable though, makes life easier.

Sent from my iPhone using Tapatalk
Yeah I got to the point where the compressor wouldn't keep up, the rechargeable drill batteries were depleted quicker than they were charging and the mains drill was going through wire brushes faster than I could buy them....Starting to think half ar$ed is the way forward. [emoji1787]...
Handed the four wheels over to a professional without even getting one close to prepared.
(up thread a bit)
Starting to think half ar$ed is the way forward.
It's served me well for many years Jon
I’ve given up for now.
Too much like hard work, they only have very light corrosion but as you know unless you flatten it all every little spec shows up.
2nd set of wheels I’ve started and been beaten by both of them. [emoji481]
Sent from my iPhone using Tapatalk
Too much like hard work, they only have very light corrosion but as you know unless you flatten it all every little spec shows up.
2nd set of wheels I’ve started and been beaten by both of them. [emoji481]
Sent from my iPhone using Tapatalk
The trouble is that it's a huge amount of work with no guarantee that the end result you're capable of is what you want.
This is now one of those situations where I'm happy to earn money doing what I know how to do, and then using that money to pay someone else to do something I need because... they know how to do what I want.
Don't blame you, Jon.
This is now one of those situations where I'm happy to earn money doing what I know how to do, and then using that money to pay someone else to do something I need because... they know how to do what I want.
Don't blame you, Jon.
